Alignment & Adjustments 30 17730-241
AR2
™
1. Use a work bay with a level floor.
2. Relax the suspension by slowly moving the vehicle back and forth several times in a straight
line without using the brakes. This will slacken or loosen the suspension as the vehicle is posi-
tioned. End with all wheels positioned straight ahead. Roll to a stop without the brakes being
applied. set the parking brake.
3. Chock the front wheels of the vehicle.
4. Verify vehicle is at the proper ride height (see Ride Height in this section).
5. Place a digital protractor on the axle housing as shown in Figure 7-4.
6. Check to see if the pinion angle is correct per the vehicle manufacturer’s specified range.
7. If necessary, add / remove shims at the longitudinal torque rod connections as required to
achieve the proper pinion angle.
8. When the pinion angle is correct tighten all fasteners to the proper torque specifications per
the vehicle manufacturer and recheck the pinion angles.
9. Remove wheel chocks.
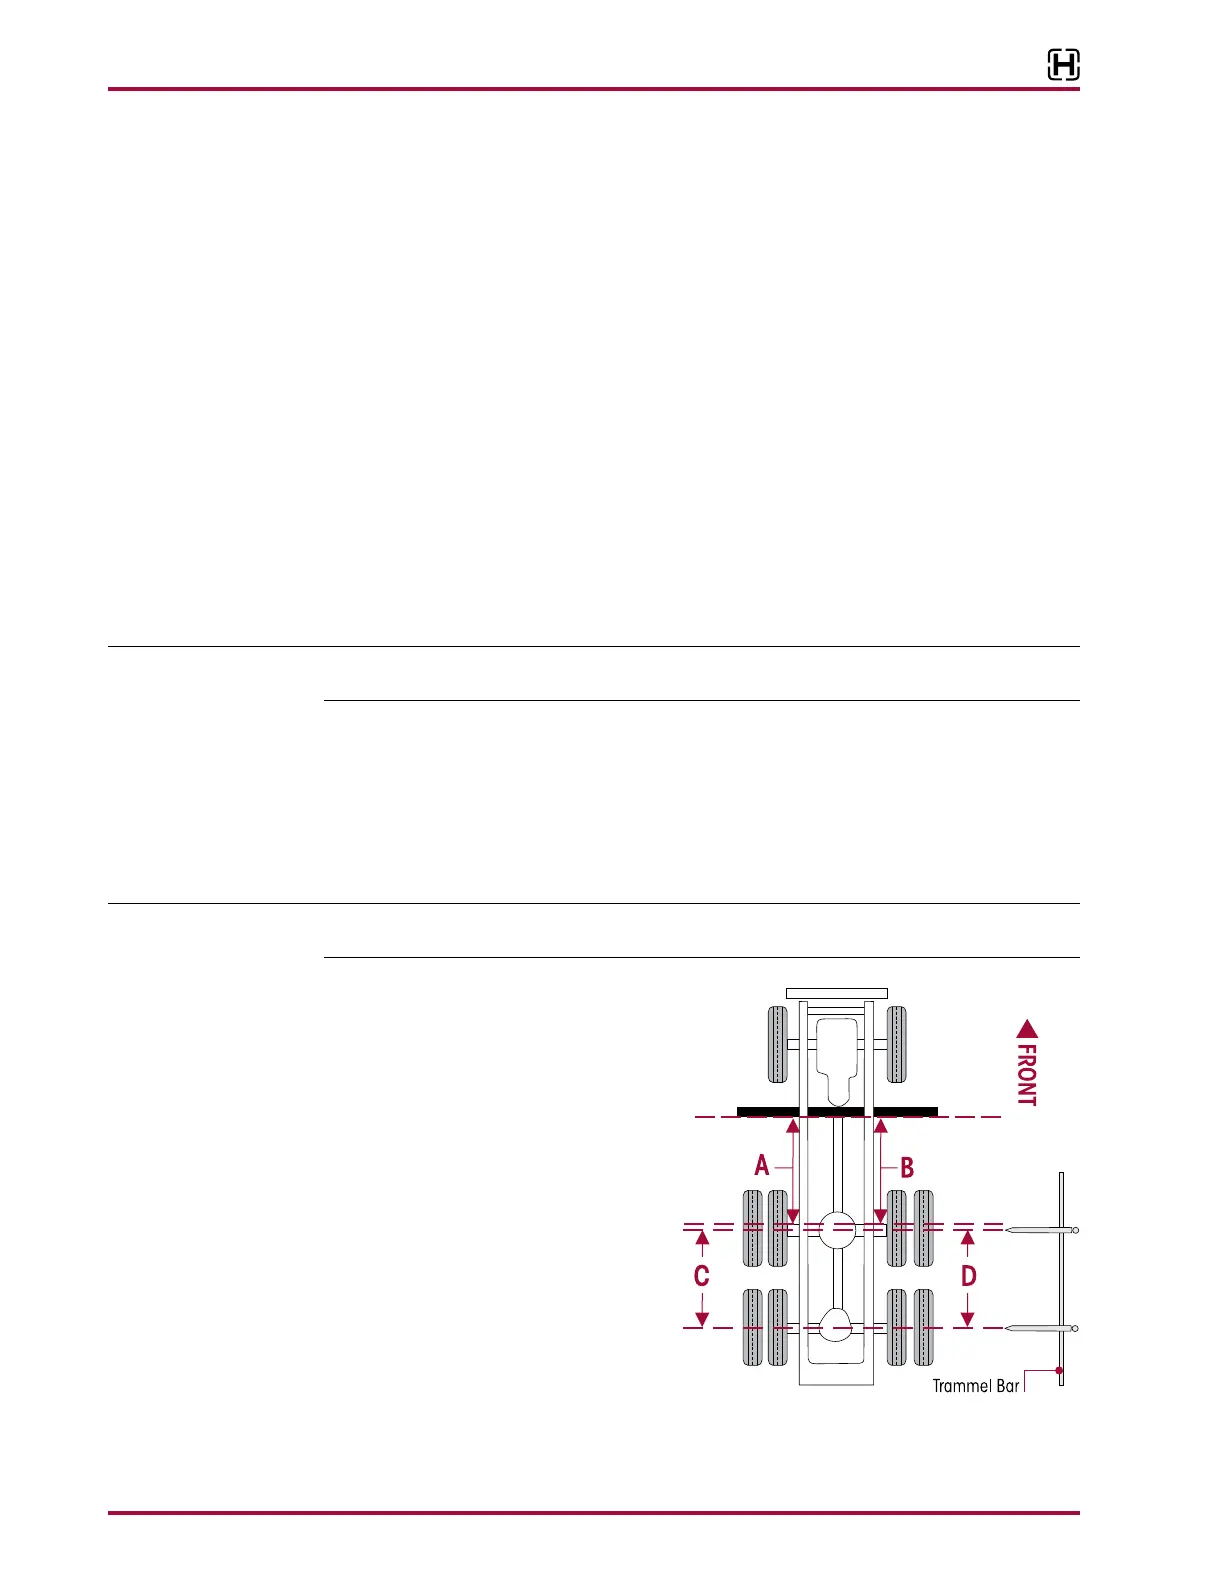
Drive axle alignment with suspensions equipped with adapter style beam or non-shim style end
connections adjustable.
Computerized alignment equipment is the preferred method of measuring alignment. To calculate
the shim thickness required, the target offset must be converted to thrust angle, see alignment
equipment manufacturer for procedures. If, however, computerized axle alignment equipment is
not available refer to the following Inspection in this section.
Proper alignment is essential for maximum ride quality, performance, and tire service life. The fol-
lowing recommended alignment procedure as described below, should be performed if excessive
or irregular tire wear is observed.
Proper vehicle alignment can only be achieved when all axles are aligned to the vehicle’s center-
line and the steering axle’s caster, camber and toe-in settings are within specifications.
1. Use a work bay with a level, flat surface.
2. Relax the suspension by slowly mov-
ing the vehicle back and forth several
times in a straight line. This will slacken
or loosen the suspension as the vehicle
is positioned. End with all wheels posi-
tioned straight ahead.
3. set the parking brake. Chock
the front wheels of the vehicle.
4. Verify and maintain the air system at
full operating pressure.
5. Verify all suspension components are
in good condition. Repair or replace
any worn or damaged suspension
components before proceeding with
the alignment process.