17730-241 37 Component Replacement
AR2
™
THE WEIGHT OF THE TRAILING ARM ASSEMBLY IS APPROXIMATELY 225 POUNDS (102 KILOGRAMS).
CARE SHOULD BE TAKEN AT REMOVAL AND INSTALLATION TO PREVENT PERSONAL INJURY OR DAMAGE
TO COMPONENTS.
11. Remove air springs.
12. Remove trailing arm fasteners and adapters from the frame hangers.
13. Lift trailing arm off center bushing and remove from vehicle.
THE WEIGHT OF THE TRAILING ARM ASSEMBLY IS APPROXIMATELY 225 POUNDS (102 KILOGRAMS).
CARE SHOULD BE TAKEN AT REMOVAL AND INSTALLATION TO PREVENT PERSONAL INJURY OR DAMAGE
TO COMPONENTS.
1. Raise frame high enough to allow adequate clearance of trailing arm between the frame and
the center bushing.
2. Position the trailing arm between the frame and the equalizing beam center bushing.
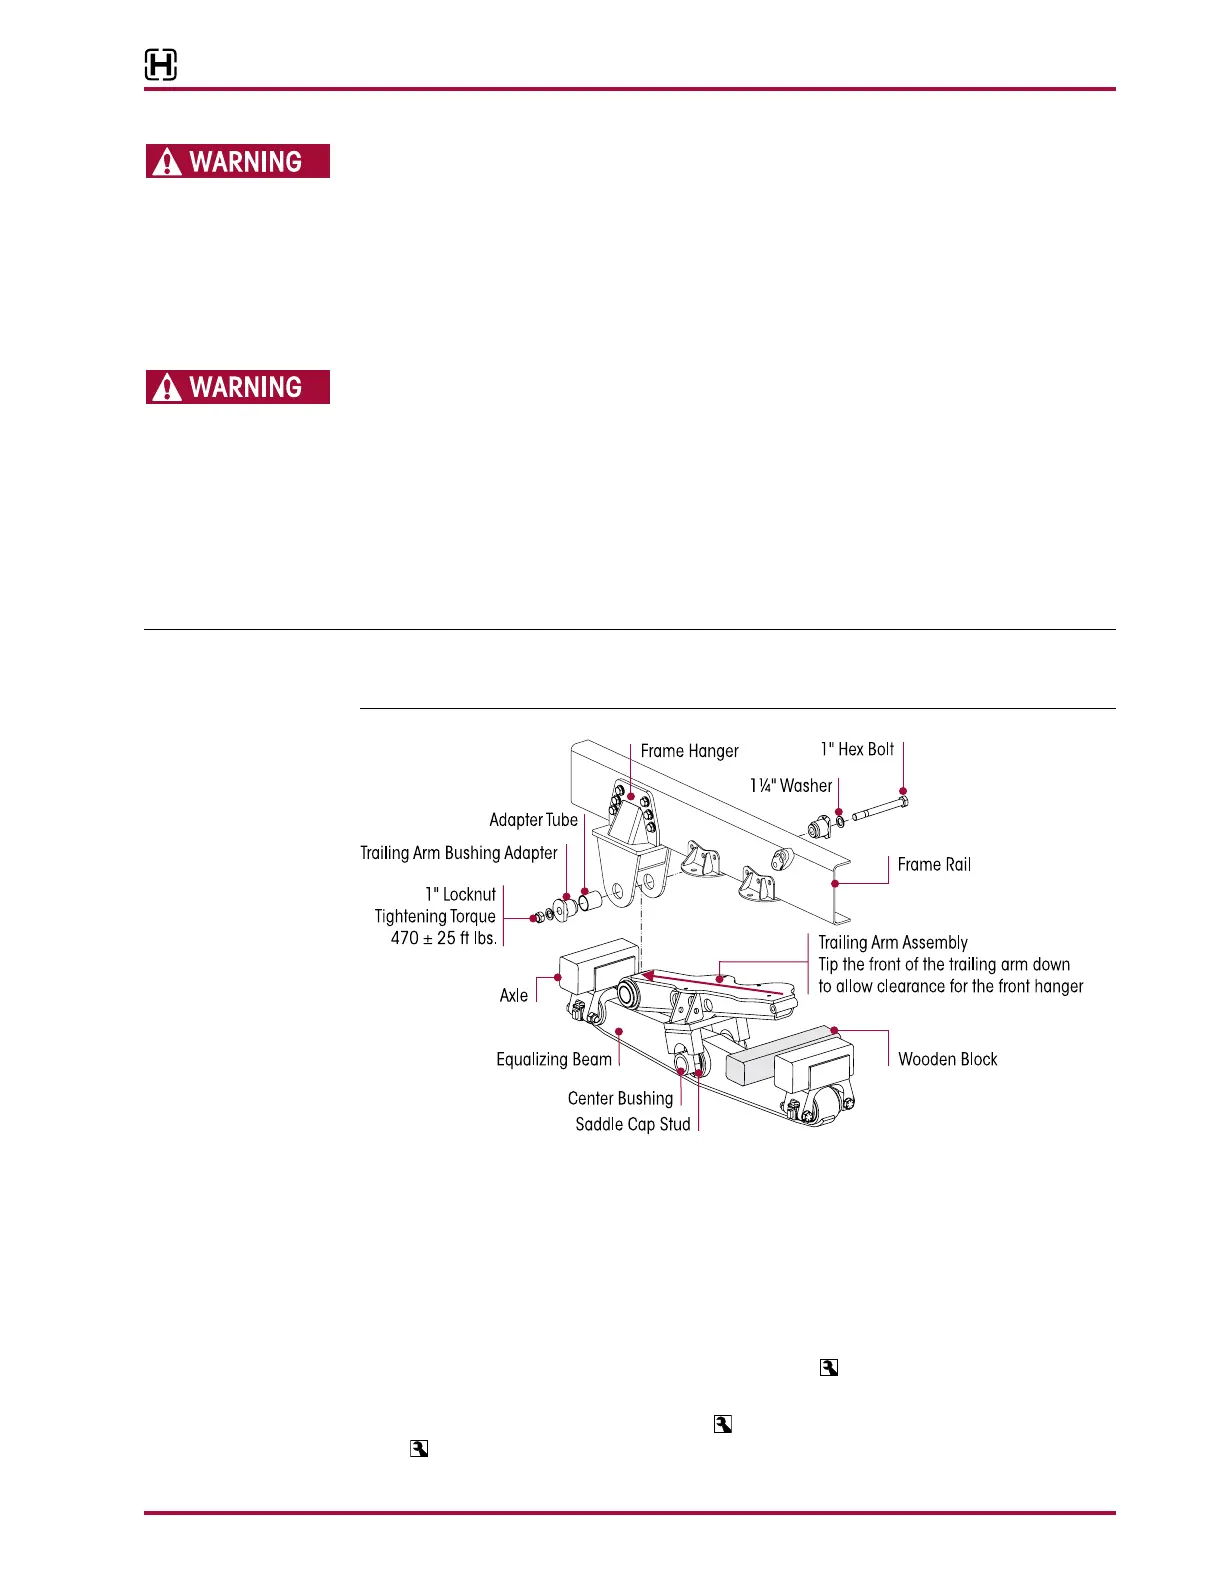
3. Carefully lower the trailing arm until it is seated on the equalizing beam center bushing, see
Figure 8-2.
4. Install the trailing arm saddle caps, see Figure 8-2. tighten at this time.
If needed, tip the front of the trailing arm down to allow clearance for the front hanger. It may be
necessary to install a block of wood behind the trailing arm to keep it from tipping backwards, see
Figure 8-2.
5. Install the trailing arm into the front hanger.
6. Install the trailing arm bushing adapter and fasteners. tighten at this time.
7. Rotate the adapter so that the cutoff flats are vertical.
8. Install the air springs. Air spring stud is on the outboard side of the frame rail.
9. Lower frame to proper ride height.
10. Install ¾" x 7¼" lower shock mounting bolt and washer from the inboard side into the trailing
arm and the shock absorber. Install outboard washer and locknut, see Figure8-3.
11. Tighten the upper and lower shock eye locknuts to
60 ± 10 foot pounds torque, see
Figure 8-3.
12. Tighten the air spring upper ¾" locknut to
60±10 foot pounds torque and lower ½" locknut
to 25±5 foot pounds torque.