17730-241 41 Component Replacement
AR2
™
1. Inspect the mounting surfaces on the trailing arm and the upper air spring mounting bracket
for cracks or damage. Replace as necessary.
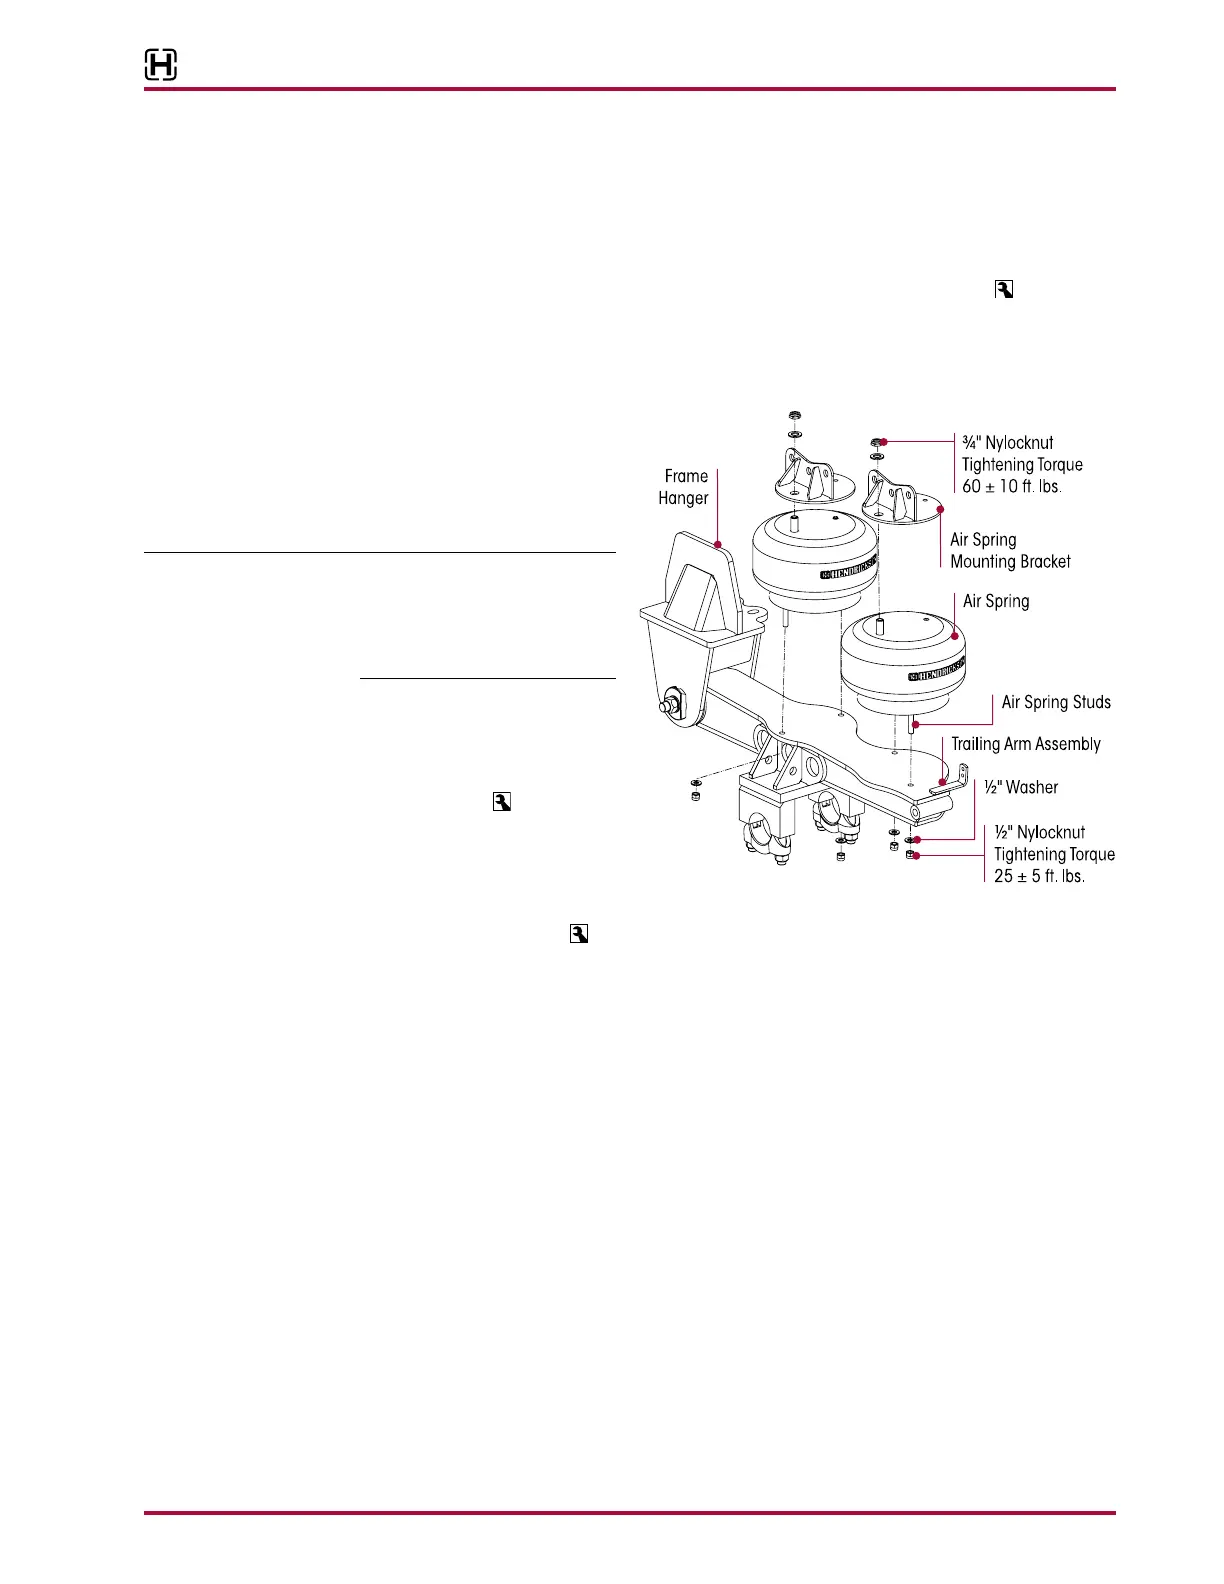
1. Install the ½" studs in the bottom of the new air spring and tighten to
25 ± 5 foot
pounds torque.
2. Assemble the air spring to air spring frame hanger by inserting studs into appropriate holes.
The ¾" combo stud faces outboard of the vehicle.
3. Install the air spring into the
trailing arm assembly by
inserting the studs into the
trailing arm mounting holes,
see Figure 8-6.
Depending on the frame height
of the vehicle it may be neces-
sary to compress the air spring
to facilitate installation into the
frame bracket and trailing arm.
4. Assemble the washers and
locknuts which connect the
air spring to the trailing arm
assembly and tighten the
locknuts to
25 ± 5 foot
pounds torque as shown in
Figure 8-6.
5. Assemble the washers and
locknuts on the combo stud which connect air spring to the frame hanger bracket. Tighten the
combo stud locknut to
60 ± 10 foot pounds torque as shown in Figure 8-6.
6. Install the air fitting to the air spring using Teflon thread seal.
7. Install the air lines to the air springs.
8. Lower the frame of vehicle.
9. See Air Spring Cautions and Warnings in the Important Safety Notice section of this publica-
tion prior to deflating or inflating the suspension system.
10. Inflate the suspension by connecting the height control valve linkage(s) to the leveling
valve arm(s).
11. Verify the air springs inflate uniformly without binding and that the vehicle air system is at the
correct operating air pressure.
12. Remove the frame supports.
13. Verify proper ride height, refer to Ride Height in the Alignment & Adjustments section of this
publication.
14. Remove the wheel chocks.