Component Replacement 52 17730-241
AR2
™
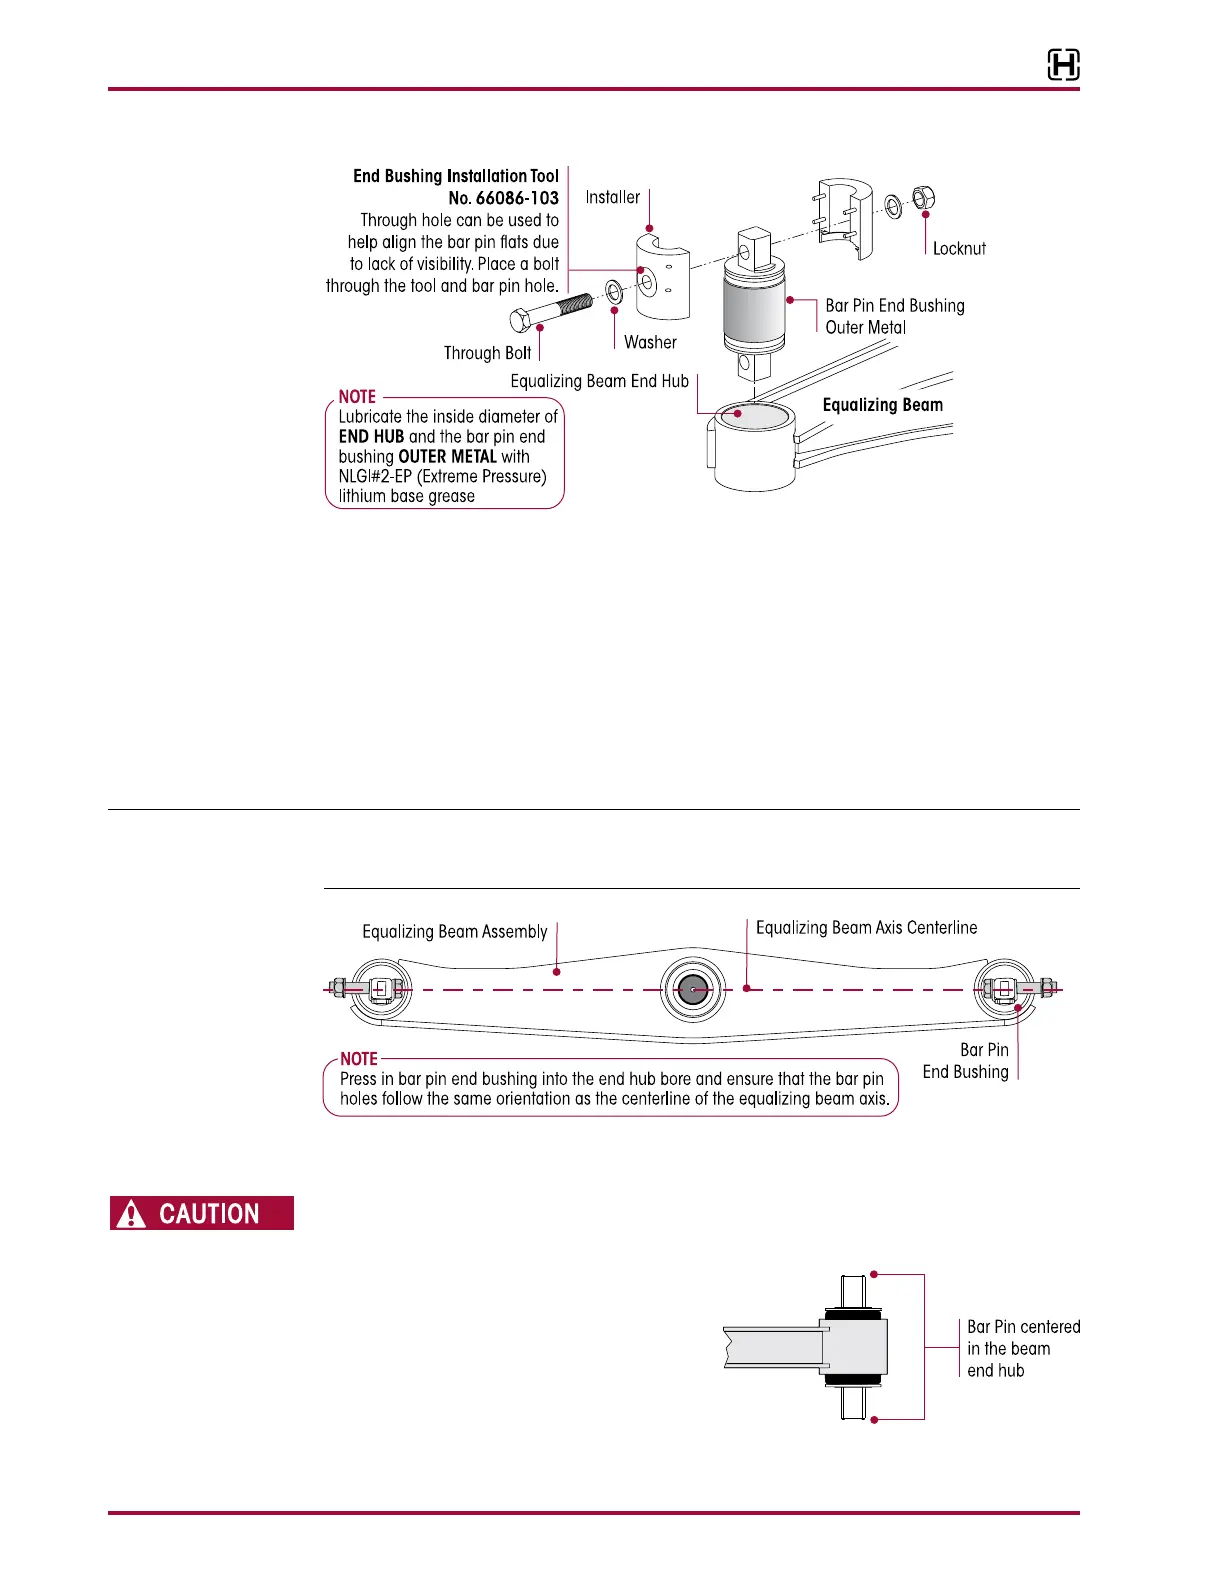
2. Install Hendrickson Part No. 66086-103 (OTC 1757) end bushing installation tool (refer to
Special Tools section of this publication) on the new end bushing as shown in Figure 8-22.
Tighten the through bolt until the two (2) halves of the tool touch. The installation tool com-
presses the rubber between the inner and outer metal of the bushing to allow press force to
be transmitted only to the outer metal of the bushing.
3. Lubricate the equalizing beam end hub inside diameter AND the bar pin end bushing’s
outer metal with a heavy layer of NLGI #2 – EP (Extreme Pressure) lithium base grease, see
Figure 8-22.
4. Position the equalizing beam end bushing and installation tool on the end hub. Verify the bolt
holes in the end bushing are in line with the beam axis, see Figure 8-23.
The end bushing must be square with the equalizing beam end hub before pressing the end bush-
ing into the equalizing beam. End bushings pressed in at an angle will damage the end bushing
and the equalizing beam.
5. Verify the end bushing’s outer metal is square with the end hub. Damage to the equalizing
beam and the end bushing will result if the bushings are pressed in at an angle.
CARE MUST BE TAKEN DURING THE INSTALLATION OF THE BUSHING. DO NOT PUSH ON THE INNER
METAL OF THE BUSHING, DOING SO WILL CAUSE DAMAGE TO THE BUSHING AND VOID WARRANTY.
6. Install the end bushing into the end hub by
pressing on the installation tool until the
installation tool contacts the end hub. This
will center the bushing in the end hub, see
Figure 8-24.
7. Install the equalizing beam onto vehicle,
refer to the Equalizing Beam Assembly procedure in this section.