17730-241 69 AR2 Conversion from RT•RTE
AR2
™
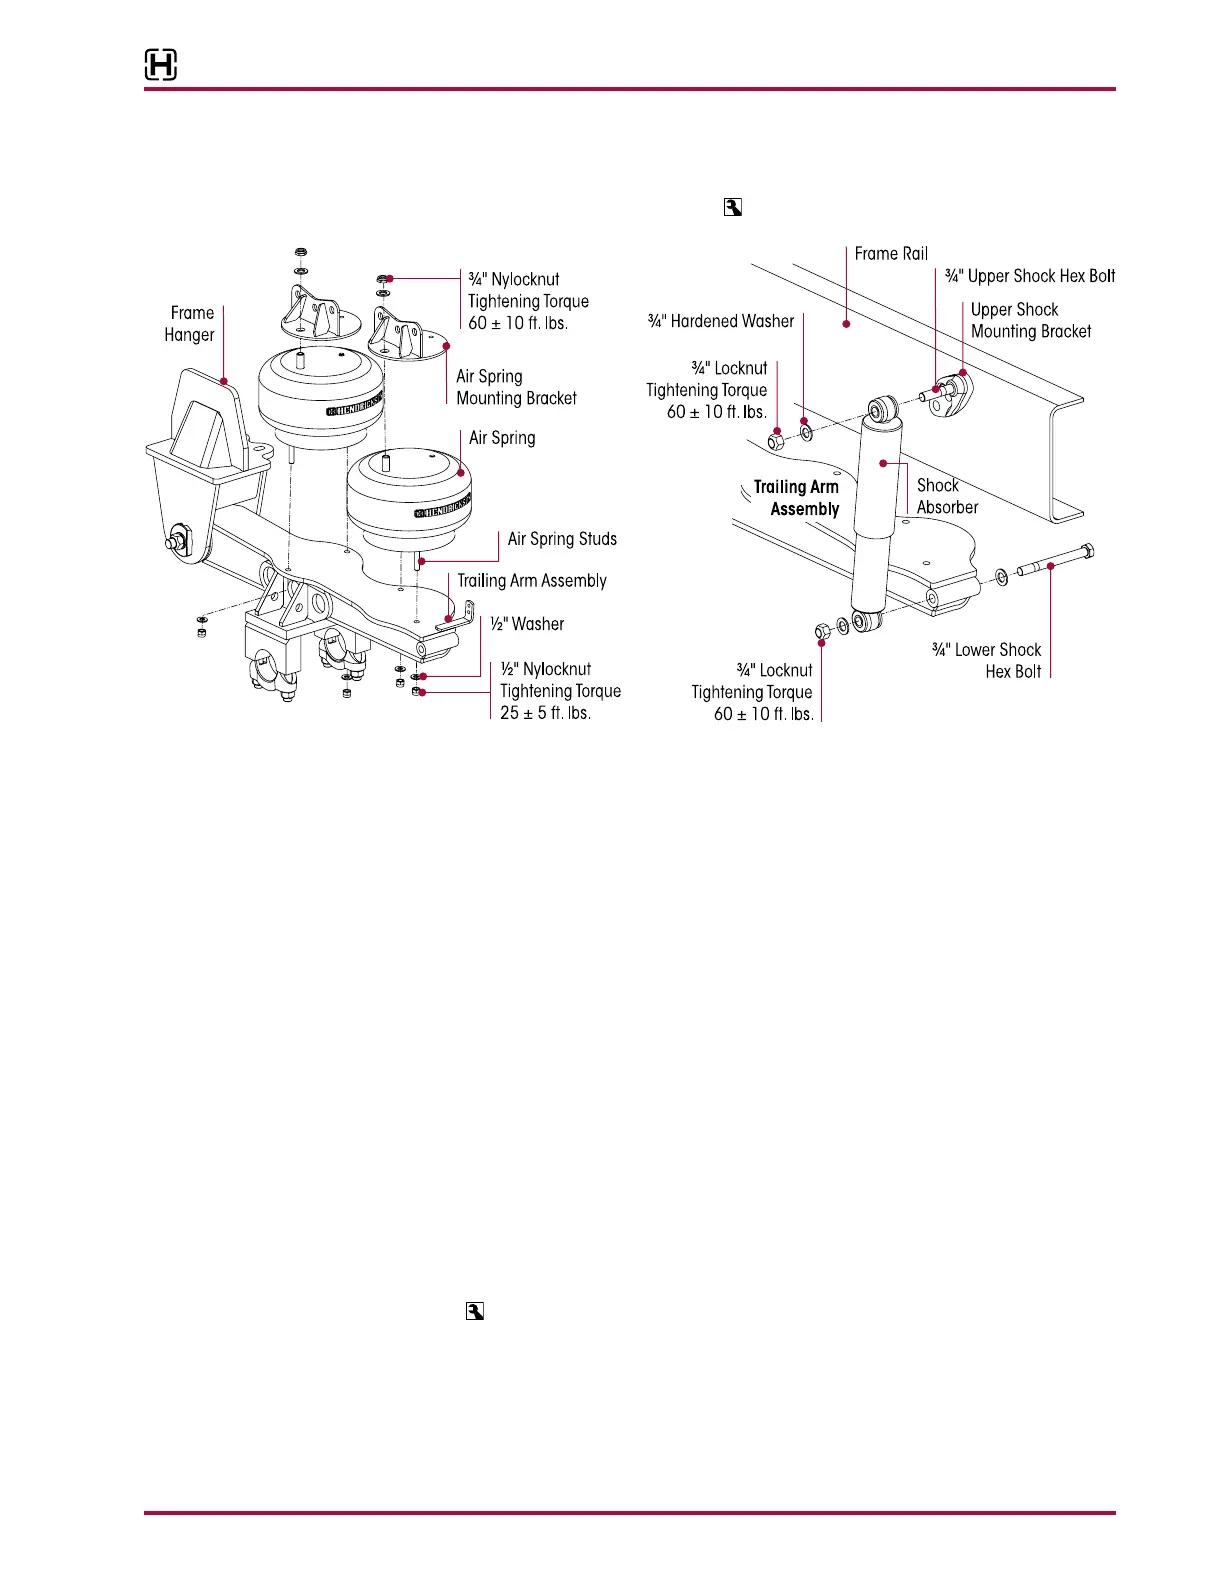
5. Install ¾" x 7¼" lower shock mounting bolt and washer from the inboard side into the trailing
arm and the shock absorber. Install outboard washer and locknut, see Figure 9-9.
6. Tighten both of the shock eye locknuts to
60±10 foot pounds torque.
1. Install the frame hangers.
2. Install the upper air spring brackets.
3. Install the upper shock brackets.
4. Install the trailing arm into the front hanger.
5. Install the trailing arm bushing adapter and fasteners. tighten at this time.
6. Install the air springs into the upper air spring brackets.
7. Install the shock absorber on the upper mounting bracket.
8. Raise the trailing arm up indexing the air spring studs into the trailing arm, see Figure 9-6.
9. Install the lower shock mounting hardware into the trailing arm.
10. Final torque on the trailing arm mounting collars will need to be done after the beams are
installed.
1. Lower the frame to the proper vehicle ride height and index the saddles on the walking beam
center bushings.
2. Verify that the saddles are centered on the center bushings.
3. Install the saddle caps and tighten in 50 pound increments of torque before achieving a final
torque of
250 ± 25 foot pounds.