EasyManua.ls Logo

HermanMiller Envelop User Manual

HermanMiller Envelop
2 pages
To Next Page IconTo Next Page
Page #1 background imageLoading...
Page #1 background image
1
Z
© 2011 Herman Miller, Inc. Zeeland, Michigan. Printed in the U.S.A.
® Y, and Z are among the registered trademarks of Herman MIller, Inc.
TM
Envelop is among the trademarks of Herman Miller, Inc.
Illustrations and specifications are based on the latest product information available at the time of publication.
The right is reserved to make changes in design and specifications at any time, without notice, and also to discontinue products.
Part no. 1b5j77 rev B.
Y
Envelop
Assembly Instructions
PARTS INCLUDED:
TOOLS REQUIRED:
1
Work Surface
2
Pin
Place the work surface on a clean flat surface.
For each tube, place a pin into the pin hole.
Make sure the flat side is pointing up as
shown in the figures above.
Ratchet
Left Support Right Support Tube (2)
Pin (2) Cap Screw (4) Button Head
Cap Screw (4)
3/16 Hex Socket
Shaft
Completed Views of Envelop
Assembly
Question and Answer IconNeed help?

Do you have a question about the HermanMiller Envelop and is the answer not in the manual?

HermanMiller Envelop Specifications

General IconGeneral
CategoryIndoor Furnishing
ManufacturerHerman Miller
Weight CapacityUp to 300 lbs
AdjustabilityHeight, Tilt
Warranty12 years
Color OptionsMultiple options available

Summary

Parts and Tools

Parts Included

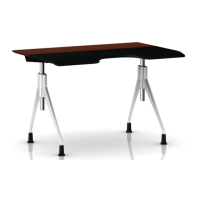
Lists all components provided for assembly, such as work surface, supports, pins, and screws.

Tools Required

Lists the necessary tools for assembly, including a hex socket and a ratchet.

Assembly Instructions

Step 1: Prepare Work Surface

Place the work surface on a clean, flat surface to start the assembly process.

Step 2: Insert Pins into Tubes

Insert pins into the pin holes of each tube, ensuring the flat side points up.

Step 3: Attach Tubes to Work Surface

Attach tubes to the work surface, ensuring holes face inward, and secure with cap screws.

Step 4: Attach Supports to Tubes

Secure supports to tubes with button head cap screws, orienting the long leg forward.

Related product manuals