EasyManua.ls Logo

HermanMiller Motia Sit-to-Stand Table User Manual

HermanMiller Motia Sit-to-Stand Table
8 pages
To Next Page IconTo Next Page
Page #1 background imageLoading...
Page #1 background image
Power Driver Phillips Bit Torque Wrench  mm Hex bit  mm Hex bit
Parts Included
Tools Required
HermanMiller
Motia
TM
Sit-to-Stand Table
Installation
How to assemble your table.
Worksurface Corner Worksurface
Stiener
Glide
Rectangle
Control Box
Corner
Control Box
Top Mounting
Plate
Corner
Mounting
Plate
Corner Foot Corner Adapter Leg
Switch
Tapping Screw Cable Holder Power CordCap Screw Socket Screw
IMPORTANT SAFETY INSTRUCTIONS
When using an electrical furnishing, basic precautions should always be followed,
including the following:
Read all instructions before using this furnishing.
DANGER - To reduce the risk of electric shock always unplug this furnishing from
the electrical outlet before cleaning.
WARNING - To reduce the risk of burns, re, electric shock, or injury to persons:
Close supervision is necessary when this furnishing is used by, or near children,
invalids, or disabled persons.
Sitting or standing on product may cause risk of personal injury (use for chairs,
tables consider obvious misuse of product).
Use this furnishing only for its intended use as described in these instructions.
Do not use attachments not recommended by the manufacturer.
Never operate this furnishing if it has a damaged cord or plug, if it is not working
properly, if it has been dropped or damaged, or dropped into water. Return the
furnishing to a service center for examination and repair.
Failure to fully tighten screws (bolts) may cause injury by causing Motia tables to
collapse. Tighten screws (bolts) until they stop plus a quarter turn.
Periodically check to make sure legs are properly aligned. Failure to do so may
cause risk of personal injury.
If using power drive set on low torque.
Keep the cord away from heated surfaces.
Never drop or insert any object into any opening.
Do not use outdoors.
Do not operate where aerosol (spray) products are being used or where
oxygen is being administered.
This furnishing is intended for commercial use
control box rating: .A, V
Duty cycle:  min on,  min o
WARNING - Risk of Electric Shock – Connect this furnishing to a properly
grounded outlet only. See Grounding Instructions.
For loading always put heavier items in the center and distribute the load.
Risk of Injury - Maximum Load  lbs ( kg).
GROUNDING INSTRUCTIONS
This product must be grounded. If it should malfunction or breakdown,
grounding provides a path of least resistance for electric current to reduce
the risk of electric shock. This product is equipped with a cord having an
equipment-grounding conductor and a grounding plug. The plug must be
plugged into an appropriate outlet that is properly installed and grounded in
accordance with all local codes and ordinances.
T FootC Foot
Assembly Instructions1HermanMiller for Motia
TM
Table 1BGGNR rev K

Other manuals for HermanMiller Motia Sit-to-Stand Table

Question and Answer IconNeed help?

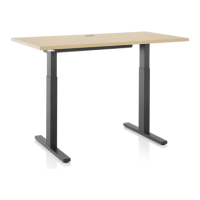
Do you have a question about the HermanMiller Motia Sit-to-Stand Table and is the answer not in the manual?
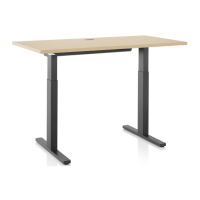
HermanMiller Motia Sit-to-Stand Table Specifications

General IconGeneral
TypeSit-to-Stand Table
BrandHermanMiller
CategoryIndoor Furnishing
Adjustment MechanismElectric
Tabletop MaterialLaminate or veneer
Frame MaterialSteel
Warranty12 Years

Summary

Important Safety Instructions

Electrical Safety and Grounding

Basic precautions for electrical furnishings, including unplugging for cleaning and using grounded outlets.

Product Usage and Injury Prevention

Guidelines on proper usage, avoiding misuse, securing components, and checking leg alignment.

Specific Hazard Warnings

Additional warnings regarding electrical shock and product injury risks, including warnings for combined use.

Table Assembly - Initial Steps

Top Mounting Plate and Leg Installation

Attaching mounting plates to legs and installing legs onto the worksurface using screws.

Foot and Stiffener Installation

Installing table feet and stiffeners to the worksurface and legs.

Table Assembly - Control System

Control Box and Switch Installation

Mounting the control box and installing the switch in predrilled holes.

Component Verification and Connection

Verifying control box and leg column labels match and plugging cables into control box.

Table Assembly - Final Connections

Power Cord and Cable Management

Connecting the power cord and securing cables using provided holders.

Final Operation Verification

Turning table upright and cycling motion to ensure synchronized legs.

Corner Table Specifics

Instructions for assembling tables in a corner configuration.

Table Assembly - Alternative Configurations

Leg and Foot Installation (Alternative)

Installing legs and C/Corner feet, including adapter and glide components.

Stiffener and Control Box Installation (Alternative)

Attaching stiffeners and installing the Corner Control Box.

Table Assembly - Verification and Power

Component Label Verification

Confirming that control box and leg column labels match for compatibility.

Switch and Power Cord Connection

Installing the switch and connecting the power cord to the control box.

Disassembly Procedures

Disassembly for Recycling

Guidance on material identification and segregation for recycling purposes.

Disassembly for Reconfiguration

Steps for safely taking apart the table, including lowering legs and avoiding component mixing.

Related product manuals