August 2005 Page 9 of 23
2005 © HID Corporation. All rights reserved.
VertX V2000 (CS) Quick Installation Guide
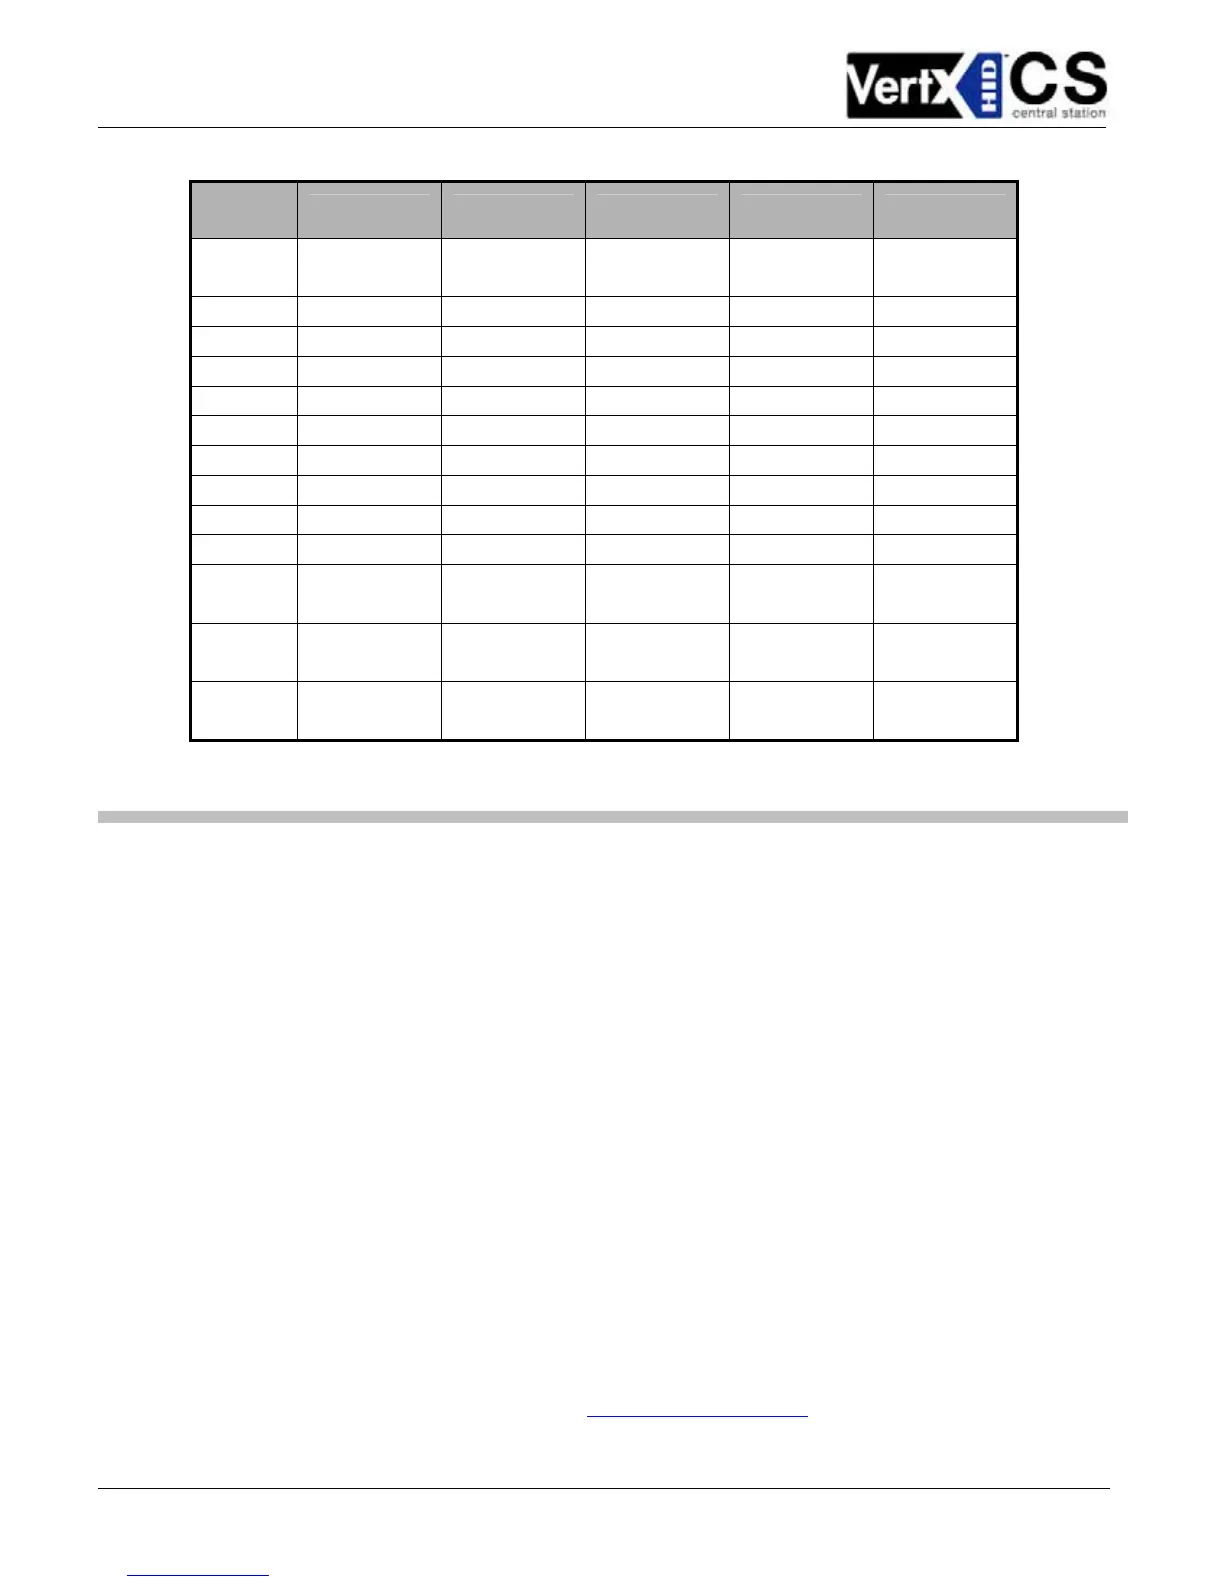
Input
number
V2000 V1000 V100 V200 V300
7
P7 Pins 4/3
Batt Fail
P7 Pins 4/3
Batt Fail
P2 Pins 3/4
8 P2 Pins 5/6
9 P4 Pins 10/9
10 P4 Pins 8/7
11 P4 Pins 6/5
12 P4 Pins 4/3
13 P4 Pins 2/1
14 P5 Pins 6/5
15 P5 Pins 4/3
16 P5 Pins 2/1
17
P7 Pins 8/7
Tamper
18
P7 Pins 6/5
AC Fail
19
P7 Pins 4/3
Batt Fail
Step 3 Communications Configuration
This section describes the communications configuration.
There are two methods of communication possible on a V2000:
• Error! Reference source not found.
• Static TCP/IP Addressing
Follow only the communication instructions that relates to your sites specific installation.
3.1 Firewall Configuration
If the VertX controller is being installed were it communicates through a firewall, then the firewall must be
configured to allow TCP data transfer on the specified port(s).
The port(s) that must be opened on the firewall for the VertX controller are the “
connection_port” and
“
listen_port” specified in the CommCfg configuration file (The Setup Host Communication screen will
take you to the Edit Configuration Files screen. The configuration files described in this section will enable
DHCP TCP/IP host communications. See sections 3.2, 3.3, and 3.4 for instructions on how to start.
Select a file from the list the appropriate configuration file and click Edit File. If you need to clear the
selection, click Clear Selection.
While following these instructions edit the circled areas shown.
Note: In addition to these configuration file edits, you may be interested in changing the “hostname”. See
/mnt/flash/etc/conf.d/hostname for instructions on changing the host name.
/mnt/flash/TaskConfig/CommCfg) as well as the Pre-Installation Checklist
.
If you are not familiar with configuring a firewall for the network, contact the Network/IT administrator or
manager.