SC3000 Series Vision Sensor Quick Start Guide
6
Chapter 4 Installation
4.1 Installation Preparation
You need to prepare following accessories before installation.
Table 4-1 Accessories
It refers to the supplied 17-pin cable that is included
in the package.
Power Adapter or Switch
Power Supply
You should select suitable power adapter or switch
power supply according to the device power supply
and consumption. You need to purchase separately.
It refers to the category 5 cable (Cat 5) or above. You
need to purchase separately.
It refers to the supplied lens cap. You can also use
polarization or infrared filter lens cap that needs to be
purchased separately.
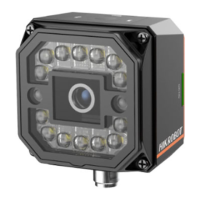
It refers to the supplied white light source. You can
also use red/blue/near-infrared light source that
needs to be purchased separately.
It refers to the supplied M4 screw that is used to fix
the device to the installation position.
It is used to install the device to the installation
position.
4.2 Install Device
Before You Start
● Make sure the device in the package is in good condition and all the assembly parts are included.
● Make sure that all the related devices are powered off during the installation.
Steps
1. Use M4 screws to fix the device to the installation position.
2. Connect the device to a power adapter or switch power supply via 17-pin cable.
3. Connect the device to a switch or NIC via network cable.
 Loading...