1 3 S E T U P R E C O R D I N G ( c o n t i n u e d )
Motion Detection Areas
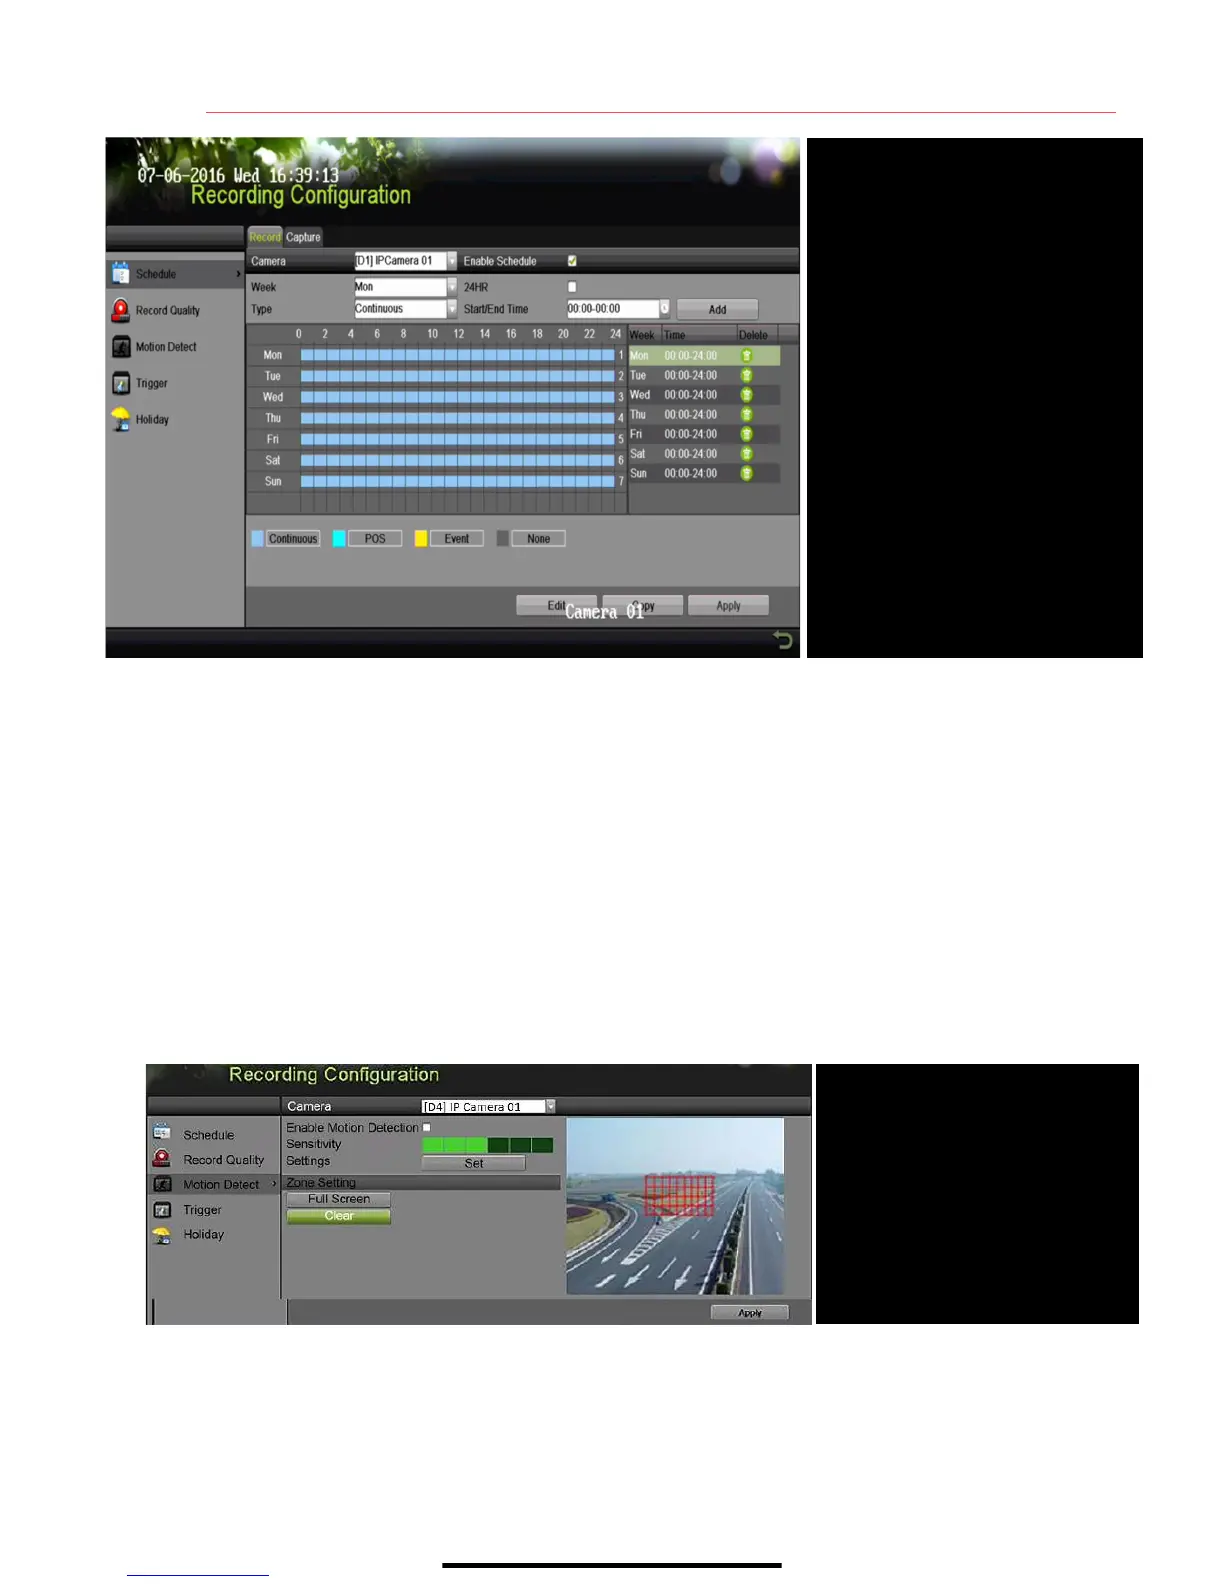
To define the image areas that Motion Detection will monitor for each camera, do the following:
1. Go to MENU > RECORDING CONFIGURATION > MOTION DETECT.
2. Use Camera pull-down menu to select camera to configure.
3. Check the Enable Motion Detection checkbox to enable motion detection.
4. Use the Sensitivity boxes to select how responsive the detection should be (the more green
boxes lit, the greater the sensitivity).
5. Drag a grid(s) over the area(s) on the image that will be sensitive to motion.
6. Click Settings Set to configure Arming Schedule (when detection is enabled) and Linkage
Actions (what action(s) to take when motion is detected).
ENABLE MOTION DETECTION
Click to enable/disable
MOTION GRID (Draw motion area)
SENSITIVITY
Set green squares for sensitivity
SETTINGS/SET
Arming schedule & linkage actions
APPLY
Motion or Continuous (default)
COLOR
Shows Recording Schedule days:
• Blue=Continuous
• Yellow=Event (motion/alarm)
• Grey=None
TIMES
Customize schedule times (ignore for
“motion only” recording)
ADD
Press to add time settings to
schedule
ENABLE SCHEDULE
Camera will not record unless
checked
 Loading...