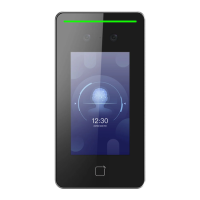
Figure 3-14 Secure Mounng Template
3.
Route the cables through the cable hole on the turnsle and x the device into the mounng
plate with 1 SC-KM3×6-T10-SUS screw.
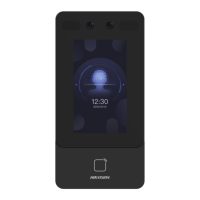
Figure 3-15 Fix the Device
4.
Aer installaon, for the proper use of the device (outdoor use), sck the protecon lm (parts
of models supplied) on the screen.
3.5 Mount With Cylinder Bracket
3.5.1 Preparaon before Mounng with Bracket
Make sure you have drilled holes on the turnsle. If not, follow the steps below to drill holes.
Steps
1.
Use 4 screws (M3 or M4), secured by ange nuts, to install the reinforcing board on the inner
surface of the turnsle.
Note
The distance between the turnsle and the edge should be no longer than 10 mm.
2.
Drill holes on the turnsle's inner surface according to the gure displayed below. And install
water-proof nut.
DS-K1T342 Series Face Recognion Terminal User Manual
16
 Loading...