Do you have a question about the HIKVISION HD Series and is the answer not in the manual?
Equipment tested and found to comply with Class A digital device limits.
Product and accessories marked with CE, comply with harmonized European standards.
Device meets CAN ICES-3 (A)/NMB-3(A) standards requirements.
Serious injury or death may occur if warnings are neglected.
Injury or equipment damage may occur if cautions are neglected.
Steps for installing a hard disk drive (HDD) into the DVR.
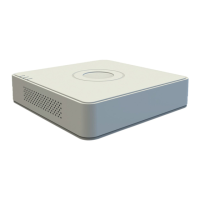
Details of indicators and ports on the front panel of the DVR.
Explanation of the functions of buttons on the DVR's control panel.
Detailed functions of composite keys for various operational modes.
Navigation and control functions of direction buttons.
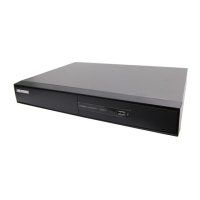
Itemized list and descriptions of rear panel connectors and ports.
Diagram for connecting the alarm input to the device using an open/closed relay.
Diagrams for connecting alarm output to AC or DC loads.
Steps to connect alarm devices to the DVR terminal block.
Diagrams for connecting PTZ and controllers via RS-485 interface.
Purpose and steps for operating termination switches for RS-485 serial interface.
Visual representation of the DVR's hierarchical menu system.
Procedures for proper startup and shutdown to ensure device longevity.
Steps to set an admin password for initial activation of the device.
Steps to log in to the device using user name and password.
Steps to log out from the device and return to live view mode.
Guide to configuring initial system settings using the setup wizard.
Steps to enter the Network Settings interface for configuration.
Steps for adding IP cameras using the 'Add IP Camera' option.
Steps for adding IP cameras using the 'Custom Adding' option.
Explanation of icons used in the IP camera management interface.
Accessing the PTZ control panel via the PTZ settings interface.
Accessing the PTZ control panel via live view mode or remote control.
Steps to enable instant recording using the live view toolbar.
Steps to configure and start all-day recording for the DVR.
Methods for playing back recorded video files.
Steps to play back recorded files using the right-click menu.
Procedures for backing up recorded files to external devices.
Note on network security risks and user protection for internet access.
Steps to access the device and perform initial login via a web browser.
Steps to set the admin password for activating web access.
Steps to log in to the device using user name and password via web browser.
Instructions to install the necessary browser plug-in for live view and management.
| Operating System | Embedded Linux |
|---|---|
| Video Input | 4/8/16 channels |
| Video Output | 1 channel VGA, 1 channel HDMI |
| Recording Resolution | 1080p |
| Hard Drive Support | SATA |
| Audio Input/Output | 1 channel input, 1 channel output |
| Network Interface | RJ45 10/100 Mbps self-adaptive Ethernet interface |
| USB Interface | USB 2.0 |
| Channels | 4/8/16 |
| Compression | H.264+/H.264 |
| Operating Temperature | -10 °C to 55 °C (14 °F to 131 °F) |