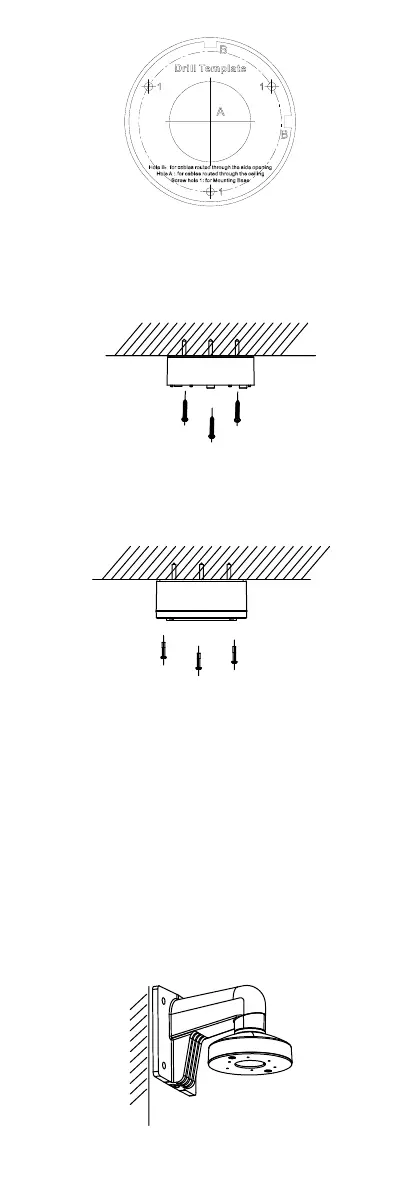
Figure 2-6 Drill Template
3. (Optional) Drill the cable hole, when the cables are
routed through the ceiling.
4. Take apart the junction box.
5. Secure the junction box body on the ceiling with PA4
× 25 screws that come with the junction box.
Figure 2-7 Secure the Junction Box Body
6. Route the cables through the bottom cable hole or
the side cable hole of the junction box.
7. Combine the junction box cover with its body and
secure it with three PM3 screws.
Figure 2-8 Combine the Junction Box Cover and Body
8. Fix the mounting base onto the junction box with
three M4 × 10 screws.
9. Connect the cables and put them back into the
junction box.
10. Refer to steps 5, 7, and 8 of 2.1.1 Ceiling Mounting
without Junction Box to finish the installation.
2.1.3 Wall Mounting
Before you start:
You need to purchase a wall mount in advance.
Steps:
1. Drill Φ 10 mm screw holes in the wall where you
want to install the wall mount.
2. Use four M6 expansion bolts to fix the wall mount
onto the wall.
Figure 2-9 Fix the Wall Mount
 Loading...