EasyManuals Logo

HIKVISION HiLook User Manual

HIKVISION HiLook
32 pages
To Next Page IconTo Next Page
To Previous Page IconTo Previous Page
Page #18 background imageLoading...
Page #18 background image
Network PTZ Camera·Quick Start Guide
8
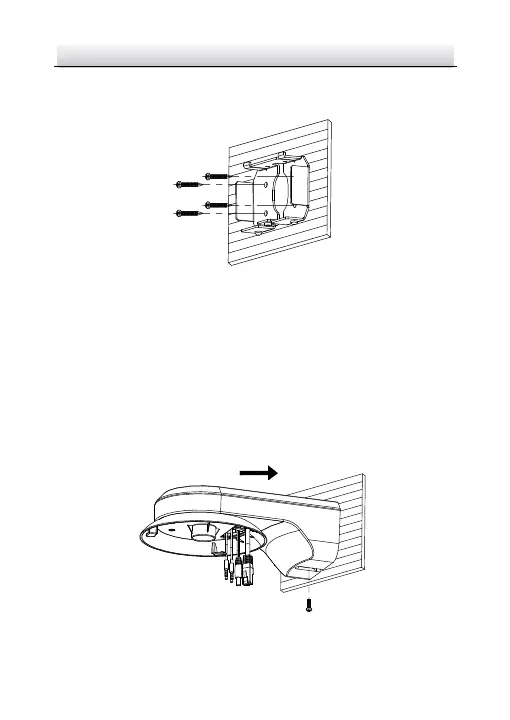
3) Fi x the bracket seat on the wall with four PA4×25 screws as
shown in Figure 2-7.
Figure 2-7 Ins tall the Bracket Seat
2. Install the wall mounting bracket.
1) Route the cables through the bracket.
2) Al i gn the bracket with the bracket seat installed on the wall,
and push the bracket according to the direction as shown in
Figure 2-8.
3) Fi x the bracket with the PM4×10 screw as shown in Figure
2-8.
Figure 2-8 Ins tall the Bracket

Questions and Answers:

Question and Answer IconNeed help?

Do you have a question about the HIKVISION HiLook and is the answer not in the manual?

HIKVISION HiLook Specifications

General IconGeneral
Image Sensor1/2.7" Progressive Scan CMOS
Ingress ProtectionIP67
Operating Temperature-30 °C to 60 °C (-22 °F to 140 °F)
Resolution1920 × 1080
IR RangeUp to 30 m
Power SupplyDC 12V ±25% / PoE (varies by model)
Weather ResistanceYes
Lens2.8mm fixed lens (varies by model)

Related product manuals