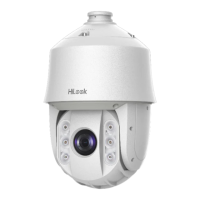
Network PTZ Camera·Quick Start Guide
1) Al i gn the camera with the installation plate, and rotate the
camera clockwise to fix the camera onto the installation
plate.
Note:
Align the FRONT label on the camera with the FRONT label
on the installation plate.
2) Remove the protective films after installation.
Note:
Do not touch the bubble directly with your hands. Otherwise,
the image may blur.
2.3 Wall Mounting
Before you start:
You need to prepare the wall mounting bracket first.
For cement wall, you need to use the expansion screw to fix the
bracket.
For wooden wall, you can just use the self-tapping s crew to fix
the bracket.
Make sure that the wall is strong enough to withstand more
than eight times the weight of the camera and its accessories.
Steps:
1. Install the bracket seat.
1) Drill four screw holes into the wall where you want to install
the camera according to the screw holes on the bracket seat.
2) Insert the four expansion screws i nto the screw holes.
 Loading...