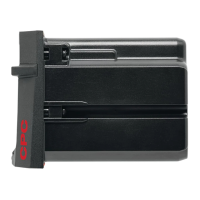
NOTE
Before inserting the battery, check that the contacts
are clean and free from grease.
Depending on the type of Hilti battery, push or slide
the battery into the interface provided.
Check that the battery and charger interfaces match
(keyed fit).
Charging begins automatically after insertion of the
battery in the charger.
NOTE
- Charging does not begin automatically when the
yellow TPS battery indicator lamp blinks (only on
C4/36‑ACS TPS charger). Check that the battery in-
terface matches the charger interface (both interfaces
are keyed to prevent insertion of incompatible types).
- The battery will suffer no damage even when left in
the charger for long periods. In this case, however, it
is necessary that the charger is operating (green LED
on the charger must be lit). After the battery has been
charged, it receives a regular trickle charge over a
period of 48 hours in order to ensure that full battery
capacity is maintained. The battery charge status LED
goes out after 48 hours, even although the battery is
fully charged. For safety reasons, it is recommended
that the battery is removed from the charger after
completion of the charging cycle.
6.2 Care of the Li-ion battery
Avoid entrance of moisture.
Charge the battery fully before using it for the first
time.
In order to achieve maximum battery life, stop dis-
charging the battery as soon as a significant drop in
performance is noticed.
NOTE
If use of the power tool continues, further battery
discharge will be stopped automatically before the
battery cells suffer damage.
Charge the battery with the Hilti charger approved for
use with Li-ion batteries.
NOTE
- A conditioning charge (as is required with NiCd or
NiMH batteries) is not necessary.
- Interruption of the charging procedure h as no neg-
ative effect on battery life.
- Charging can be started at any time with no negative
effect battery life. There is no memory effect (as with
NiCd or NiMH batteries).
- For best results, batteries should be stored fully
charged in a cool dry place. Avoid charging the battery
in places subject to high ambient temperatures (e.g.
at a window) as this has an adverse effect on battery
life and increases the rate of self-discharge.
- If the battery no longer reaches full charge, it may
have lost capacity due to aging or overstressing. It
is possible to continue working with a battery in this
condition but it should be replaced in good time.
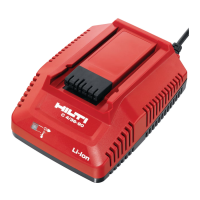
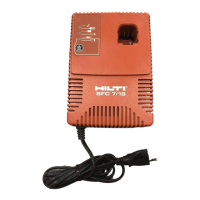
6.3 LED display on the charger 4
Green LED on the
charger lights
Lights constantly The appliance is connected to the electric supply and
is ready for use.
Blinks
The battery is too cold (<0°C) or too hot (>60°C)
and i s thus not charging. The charger switches
automaticallytochargingmodeassoonasthe
battery reaches the required temperature.
LED doesn’t light
Charger malfunction. Unplug the charger and then
plug it in again. If the LED still doesn’t light, the
appliance should be returned to Hilti Service for
repair.
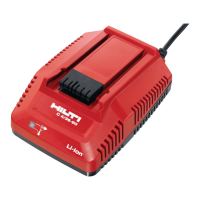
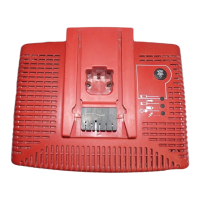
6.4 LED display on the battery 5
6.4.1 Charging status display
When the green LED on the charger lights constantly,
a blinking LED on the battery indicates that charging
is taking place.
6.4.2 Indication of too high / too low
temperature
If the battery is too hot or too cold, the green LED
onthechargerwillblinktoindicatethis.Atthesame
en
16