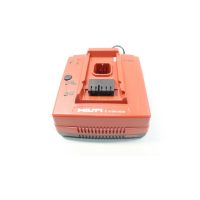
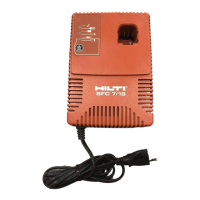
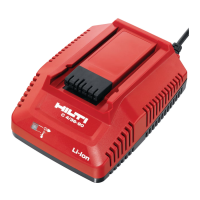
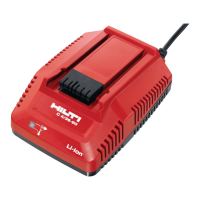
The Hilti TCU 7/36 is a battery charger designed for charging Hilti batteries with a nominal voltage of 7 to 36 volts. This manual provides essential operating instructions and safety precautions for its use.
Function Description
The TCU 7/36 charger is specifically designed to charge Hilti NiCd batteries, including the BP 6-86 (for the TE 6-A cordless rotary hammer), SBP 10 (for the SB 10 cordless screwdriver), and SBP 12 (for the SB 12 cordless screwdriver). It features electronic charging control and temperature monitoring to ensure safe and efficient charging. The charger also offers a "conditioning charge" mode to optimize battery performance and extend battery life, particularly for older batteries or those experiencing reduced capacity due to self-discharge.
Important Technical Specifications
- Frequency: 50/60 Hz
- Output Voltage: 7.2–36.0 V (max. charging voltage 54 V)
- Output Current for Charging Current: 2.5 A max.
- Trickle Charging Current: 0.15 A/0.05 A
- Voltage Range: 7.2–54.0 V
- Temperature Monitoring: NTC (for BP 6-86) and Diode (for SBP 10, SBP 12)
- Charging Time:
- BP 6-86: 60 min.
- SBP 10: 48 min.
- SBP 12: 48 min.
- Insulation Class: Electrical insulation class II (double insulated)
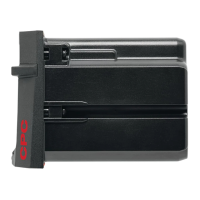
- Battery Compatibility: BP 6-86, SBP 10, SBP 12 (NiCd type)
Usage Features
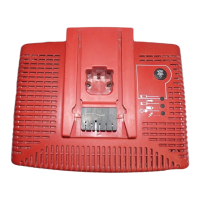
The charger is equipped with LED indicators to provide clear status updates during operation:
- Green LED:
- Lights when the charger is connected to the mains supply.
- Blinks when the self-test determines a fault in the charger or battery.
- Red LED:
- Lights when the battery is being charged (charging in progress).
- Blinks when the battery is charged (working capacity reached).
- Yellow LED:
- Blinks when the battery is too cold (approx. 0°C) or too hot (approx. 60°C). The charger will automatically begin charging once the battery reaches the required temperature.
- Lights when the charger is operating in conditioning charge mode.
Operation Steps:
- Connect to Mains Supply: Ensure the mains voltage matches the rating plate information. A brief self-test will occur, with all three indicators lighting briefly, followed by only the green LED. If the green LED blinks, the self-test was unsuccessful; unplug and reconnect the charger. If the issue persists, return the charger for repair.
- Insert Battery:
- For BP 6-86: Insert the battery into the dovetail guide and push until it clicks.
- For SBP 10/SBP 12: Push the battery into the compartment as far as it will go. Ensure the battery fits correctly.
- Conditioning Charge Mode: This mode is used to optimize battery performance, especially for older batteries. To activate, press the conditioning mode button before inserting the battery, then release it approximately 3 seconds after battery insertion. The yellow LED will light, indicating conditioning charge mode is active. This mode supplies a small current over several hours with pauses to prevent overheating, taking 7 to 10 hours to fully charge. It is recommended to use this mode no more than once a month.
- First Use of Battery: Before a new battery is used for the first time, it must be charged for 24 hours in normal mode or 10 hours in conditioning mode to "form" the battery cells.
- Battery Storage: Store batteries at room temperature when not in use. Avoid storing them in high temperatures (e.g., direct sunlight, in a car windscreen) or low temperatures, as extreme temperatures can affect performance.
- Deep Discharge Prevention: Avoid fully discharging a battery. Change the battery as soon as its performance drops to prevent damage to cells. The BP 6-86 battery for the TE 6-A is equipped with an electronic deep discharge prevention device.
Safety Precautions:
- General Safety: Always observe safety instructions to avoid injury, electric shock, and fire hazards.
- Short Circuits: Avoid short-circuiting the contacts of the charger or battery, as this presents a risk of fire.
- Environmental Conditions: Do not expose the charger to rain, damp/wet surroundings, or flammable liquids/gases.
- Pre-Use Check: Before each use, check the charger, supply cord, and plug for damage. Do not use if damaged or if controls do not operate correctly.
- Intended Use: Use the charger only for its intended purpose with specified Hilti NiCd batteries.
- Supply Cord Handling: Never carry or unplug the charger by pulling the supply cord. Protect the cord from heat, oil, or sharp edges. If the cord is damaged, unplug the mains plug immediately.
- Good Condition: Keep the charger and batteries clean and in good condition. Do not operate if dirty or wet.
- Repairs: Repairs, especially to the supply cord, must only be carried out by the manufacturer or authorized Hilti service centers using original Hilti spare parts.
Maintenance Features
- Care of the Charger:
- The outer casing is made from impact-resistant plastic.
- Clean the outside of the charger regularly with a slightly damp cloth. Do not use sprays, steam pressure cleaning equipment, running water, or cleaning agents containing silicone, as these can negatively affect electrical safety.
- Ensure ventilation slots are not blocked. Clean them carefully with a dry brush and prevent foreign objects from entering the charger's interior.
- Care of Batteries: Use a dry cloth to clean battery contacts if necessary.
- Maintenance Checks: Regularly check all external parts of the charger for damage and ensure all controls operate faultlessly. If parts are damaged or controls malfunction, have the charger repaired at a Hilti service center.
- Disposal: Hilti batteries contain nickel and cadmium. Dispose of batteries in accordance with national regulations.
Warranty
Hilti provides a 12-month warranty from the date of sale, covering defects in material and workmanship, provided the tool is operated, handled, cleaned, and serviced correctly according to the operating instructions. Only original Hilti consumables, components, and spare parts may be used. The warranty covers free-of-charge repair or replacement of defective parts, but not normal wear and tear. Hilti is not liable for direct, indirect, incidental, or consequential damages, and specifically excludes implied warranties of merchantability and fitness for a particular purpose. For repairs or replacements, send the tool and/or related parts to the local Hilti marketing organization.