Before
use
f
^
l f
^
l
Ll\l
Z\1
lt is essential that the
safety
precautions print-
ed in these
operating
instructions
are read and observed.
f l
/\
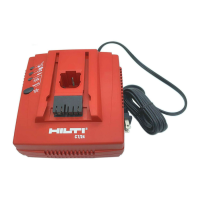
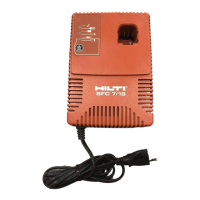
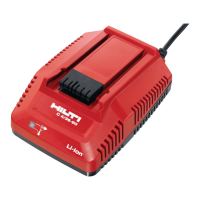
Connect the charger
to the mains supply.
-
The mains voltage
must corresp0nd to the infor-
mation
given
on the rating
plate.
-
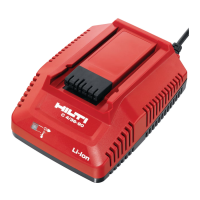
All thtee indicators
light brielly during lhe sell-
tesl,
atter
which
only lhe
green
LED
should
light.
-
The
green
LED blinks when
the self-test
was
NOT
successful.
lf,
after unplugging and reconnecting
the
charger to the mains
supply,
the
self-test
is
still
not
successful,
please
return
the charger to a Hilti
service centre for reoair.
A]
/'\
Operale
the
charger only at a suitable location.
-
The
location for operation
of
the
charger should
be dry, clean
and cool but not exposed to frost.
-
The
charger
must
be able to
give
off heat during
the charging
procedure.
Accordingly, the ventlla-
tion slots must
always be unobstructed.
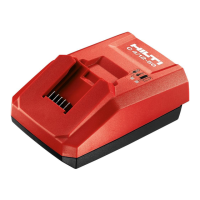
0peralion
Inserling the battery
BP 6-86 for the TE
6-4:
Insert the
battery
in
the dovetail
guide
and
push
it in
until a click is heard
(engaged).
E
SBP
'10
for the
SB
10:
SBP
1 2 for the
SB 1 2:
Push the battery into the
compartment as far as
jt
will
gOE
Take
care to ensure that the
battery
fits
correctly
in
the
charging compadment.
AThe
charger
is
designed for use with the batteries
listed
above. lt must not
be used
to
charge other
batteries.
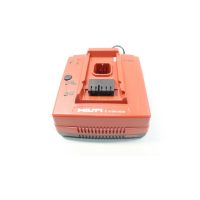
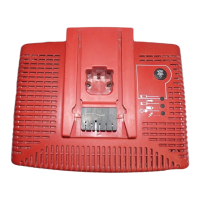
Indicators
Zl
Green LED
-
Lights when the
charger is connected
to the
mains supply
-
Blinks
when the self-test
determines a
fault in the
charger or battery
Red LED
-
Lights when the
battery is being
charged
(charging
in
progress)
-
Blinks when the
battery
is
charged
(workinq
capacitv reached)
Yellow LED
-
Blinks
when the battery is too cold
(approx.
0'C) or too hot
(approx.
60"C). The
charger begins charging automatically
as soon as the battery reaches the required
remperaru re.
-
Lights when the
charger is operating in
conditioning charge mode.
Condilioning charge mode
E
NiCd cells are subject to self-discharge. With
older bat-
teries, the rate
of self-discharge of some of the cells may
be higher than that of others. As
conventional chargers
switch
off
when the first
cells
have reached
full charge,
the
other
partly
charged cells do not receive the full
charge. The
user becomes aware of
this
effect in the
form
of
inadequate
battery capacity.
This
effect can be eliminated by applying a conditioning
charge. During this
procedure,
the
charger supplies a
small
current over several
hours,
with
pauses
made in
order
to
avoid overheating the battery. Depending
on
its
condition, the llattery will take 7 to 10
hours t0 reach
full
charge.
The
conditioning charge begins when the
conditioning
mode button is
pressed
before insertion
of
the
battery
and released
approx. 3 seconds after the battery has
been
inserted.
The
yellow
LED lights while the
battery
is being charged in conditioning mode.
The battery
should be charged
in
conditioning mode no
more than
once a month. The conditioning
charge
is,
so to
speak, a
kind
of
"training"
for the battery. Just as
excessive training can be harmful to the human
body,
t00 frequent
use of conditioning charging mode can also
weaken
the battery.
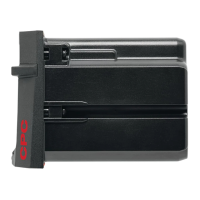
Baltery
(accessory)
f
^
l
/\
Brforr a battery is
used
for the first
time, it must
be charged
for 24
hours
in normal
mode or for 1
0
hours
in conditioning mode in order to
permit
"forming"
of the
battery
cells.
-At
iow
temperatures: Battery
performance
drops at
low temperatures.
Store
batteries
at
r00m tempera-
ture when not in
use.
-At
high
temperatures: Do n0t store
batteries
where
they may be subjected t0 high temperatures
(e.9.
exposed
to
the sun, at a window, behind
a car
wind-
screen or on a radiator).
Never fully discharge
a battery. Change the battery as
s00n
as
its
0erformance
droos. The cells that reach
a
state of total discharge first will
otherwise be damaged
by the
current still being drawn from the other cells.
An
excepti0n
to this is the
BP 6-86 battery for the
TE 6-4
(this
battery is equipped with
an electronic deep
discharge
prevention
device).
 Loading...