English 15
1.
Press the button on the rotating laser, on the PRA 30G laser receiver and on the PRA 90 automatic
tripod.
◁ The devices are ready for use.
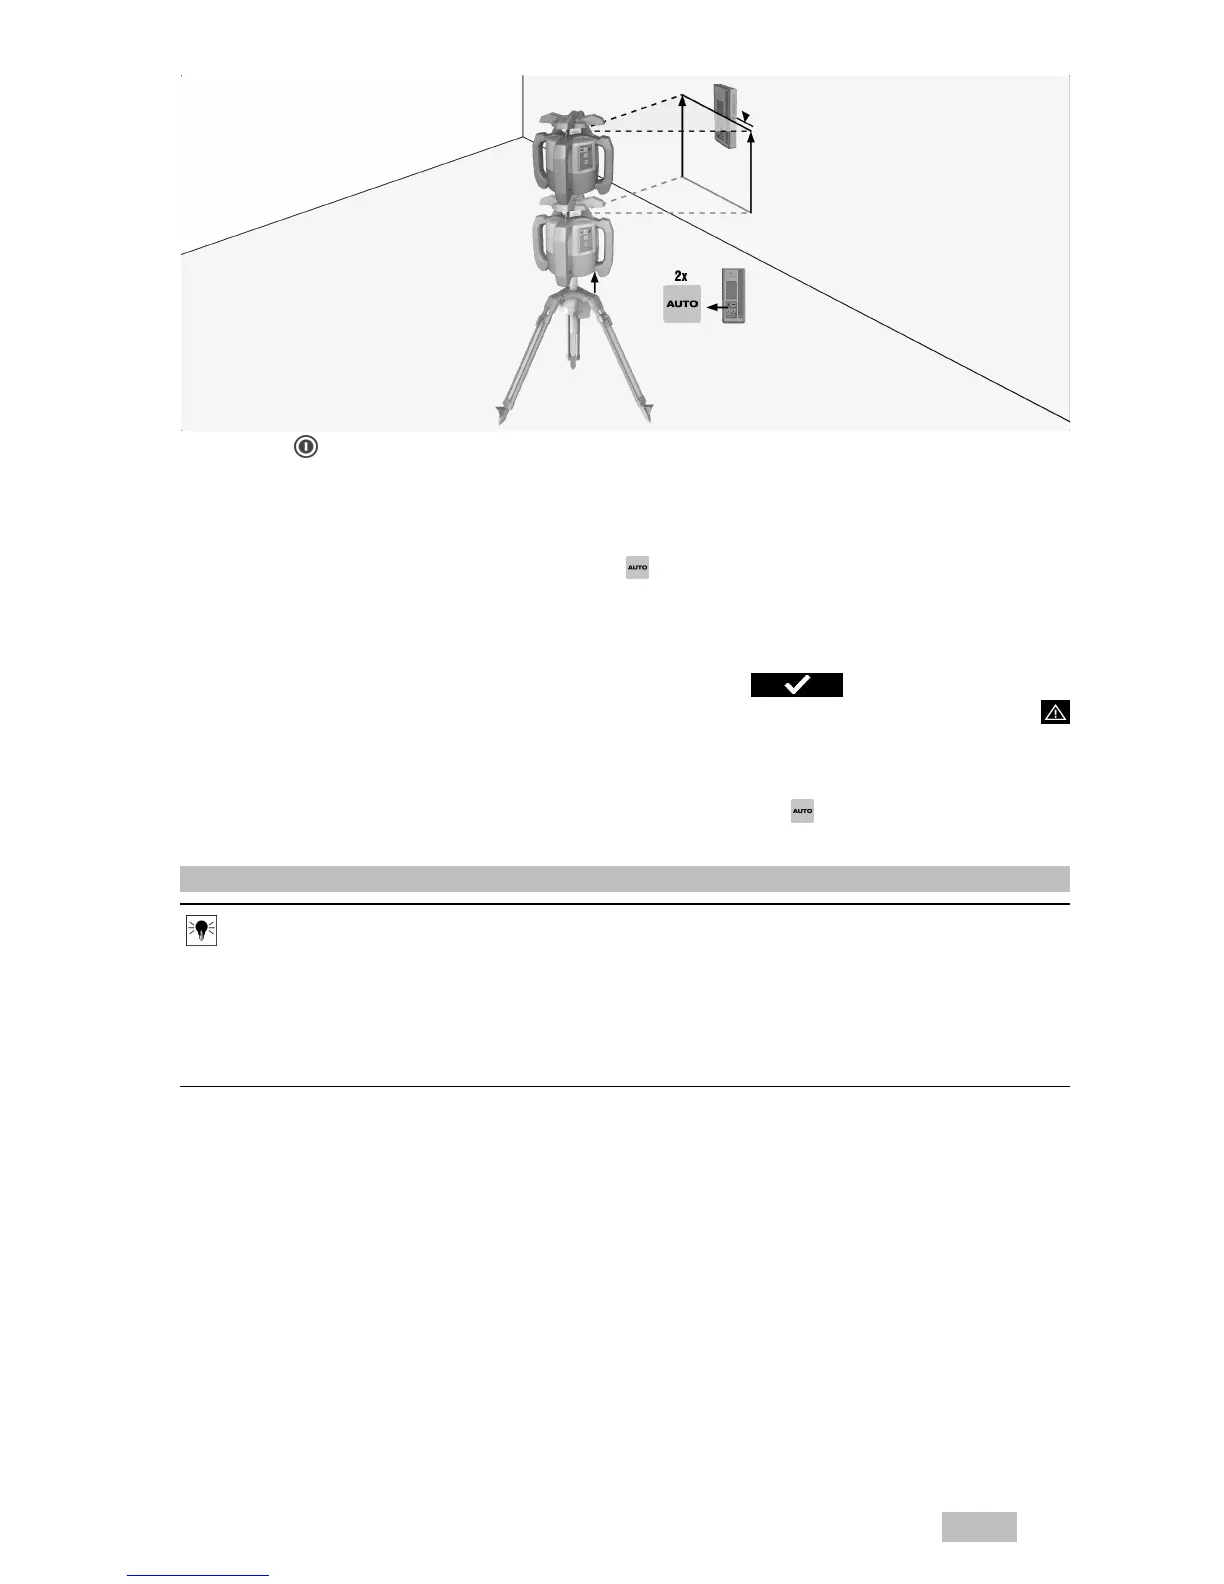
2. Keep the marking notch on the PRA 30G laser receiver at the height that is to be set. The PRA 30G laser
receiver should be held steady or secured in place.
3.
Begin automatic alignment by double-clicking the button on the PRA 30G laser receiver or select the
corresponding function in the AUTO menu.
◁ The PRA 90 automatic tripod moves up and down until the correct position is reached. An signal tone
is emitted by the laser receiver repeatedly during this procedure.
◁ The rotating laser levels itself once the position has been reached. Successful completion is indicated
by a continuous signal tone with a duration of 5 seconds. The symbol is displayed briefly.
▽
If automatic alignment cannot be completed successfully, short signal tones are emitted and the
is displayed briefly.
4. Check the height setting in the display.
5. Remove the PRA 30G laser receiver.
6.
Stop automatic alignment before completion by double-clicking the button on the PRA 30G laser
receiver.
5.7 Manual vertical alignment
Note
The rotating laser is placed or securely mounted in the vertical position (tripod, wall mount, facade or
batter board adapter, or lying on the rear grips). A reference point (A) is marked below the laser head
(e.g. a nail on a batter board or a spot of paint on the floor or ground).
The PRA 30G laser receiver and the rotating laser are paired.
The PRA 30G laser receiver and the receiving side of the rotating laser are facing each other and in
direct line of sight. The best receiving side of the rotating laser is the side at which the battery is inserted.
Printed: 29.09.2017 | Doc-Nr: PUB / 5376998 / 000 / 00
 Loading...