pack of brushes). The brush should be fitted so that the
brush shunt (pigtail) is at the bottom of the brush.
viii. Refit the brush springs by inserting into the holder with the
coil spring over the brush then push in until
the tag comes into contact with the holder, slide the tag
away from the brush and release. The brush
spring will clip into position. Check the springs and brushes
for correct alignment and free movement.
ix. Carry out electrical safety test and record results (see
Testing for Electrical Safety page 8).
x. Finally check that all leads and cables are clear of moving
parts and will not be trapped when refitting the cover
motor.
xi. Refit the cover motor and secure with the four Screws
Ref.1.
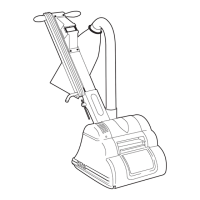
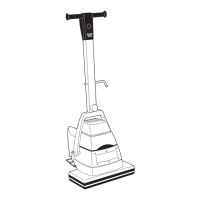
Sanding Pad
It is very important to maintain the HT7-2 Edger sanding pad in
perfect condition for score free sanding and to maximise the life of
the abrasive disc.
In normal operation the sanding pad needs little maintenance
apart from periodic trimming, however, if the pad is worn below its
minimum thickness or it is damaged it must be replaced.
Reasons for Removing/Replacing the Sanding Pad
1. The sanding pad is worn below its minimum tread thickness of
4mm (5/32”)
2. Physical damage that cannot be removed by trimming.
3. To gain access to maintain/repair the fan, gears, motor and
bearings.
4. To remove an obstruction from the dust pickup.
Removal and Replacement of the Sanding Pad
1. Disconnect the edger from the power supply.
2. Turn the edger upside down and rest it on its handles.
3. Remove the Bolt Clamp (Ref.59) and Clamp Washer (Ref.58).
4. Using a 18mm (11/16“) hardwood dowel approximately
150mm (6”) long, lock the Fan Intake (Ref.31) in position to
stop it turning by inserting the dowel through the underside of
the edger to the rear of the sanding pad.
5. Using service tool Part No.011730 Sanding Pad Wrench,
remove the sanding pad in a counter clockwise direction (right
hand thread). Take care to support the edger.
Note: The sanding pad can be tight, if needed use a soft mallet to
tap the wrench to help removal.
CAUTION: when the sanding pad becomes loose
carefully remove it by hand. Take care not to lose the Shims
(Ref.56) which may come away with the sanding pad.
These shims, which may vary in quantity with a minimum of
two, are used on the Shaft Drive (Ref.47) to pack out the
sanding pad.
6. Thoroughly clean the Guard Disc (Ref.54) and refit all the
Shims (Ref. 56) if removed.
7. Fit a new sanding pad and tighten using the service tool.
Reasons for Trimming the Sanding Pad
1. As part of routine maintenance.
2. The sanding pad has been damaged.
3. The sanding pad has been replaced.
4. The sanding pad has been removed to gain access to other
components or to remove an obstruction from the dust pick-up.
5. The castors have been replaced and/or adjusted.
Trimming the Sanding Pad
1. Disconnect the edger from the electrical supply and place
the edger on a flat, smooth surface such as a work bench.
Visually check to see that only the front of the sanding pad is
in contact with the surface it is standing on. That is, the castors
are adjusted so that the edger is ‘tipped’ forward.
2. Use a piece of paper or 0.005” feeler gauge to check under
and around the sanding pad to confirm that only the front part
of the sanding pad is in contact with the surface it is standing
on.
The correct contact area is illustrated in the diagram below.
If the contact area is wrong or can not be identified accurately
check and adjust the castors as detailed below in - Adjusting
the Castor
3. To trim the sanding pad fix a piece of fine grit floor sander
abrasive (120 grit) face up to a solid flat board that is large
enough to stand on and operate the edger. Place the board
on a flat even floor and the edger on top of the board with the
pad over the abrasive. Do not fit an abrasive disc.
CAUTION: make sure that the Clamp Bolt (Ref.59) is
secure and properly tightened
4. Connect the edger to the power supply, stand on the board
and tip the edger back and switch ‘ON’. Carefully lower the
edger so that the sanding pad comes into contact with the
abrasive. Move the edger from side to side across the abrasive
under its own weight for a few seconds. Tip the edger back
and switch ‘OFF’
5. Disconnect from the power supply and check the condition
of the sanding pad. You should witness an even surface with
no high or low spots around the whole surface of the sanding
pad in the contact area as shown in the diagram below.
Note: Do not hold the edger in place, always keep it moving
across the abrasive sheet. Do not over trim the sanding
pad or you will reduce it’s life. Do not lift or force the edger
while trimming the pad, allow the edger to move under it’s
own weight. The sanding pad minimum tread depth is 4mm (
5/32“).
Adjusting the Castors
The castors are set to achieve the correct contact area across
the sanding pad as illustrated in the diagrams above.
1. To check the castor setting place a clean sheet of glass across
the two castors and the sanding pad. Inserting a 0.005”
feeler gauge (or a sheet of paper) between the glass and the
sanding pad. Check the correct contact area is achieved (see
diagram above - Sanding Pad Static Contact Area)
An alternative method is to lightly dampen the rubber sanding
pad and then place the glass sheet across the two castors and
sanding pad. Apply light pressure to the glass sheet, which
will witness the dampened area of the sanding pad in contact
with the glass.
7
 Loading...