5
Bracket
(not included)
Screw
(not included)
Spacer
(not included)
Before you begin the third-party
manufacturer instructions, be sure to do the following
things:
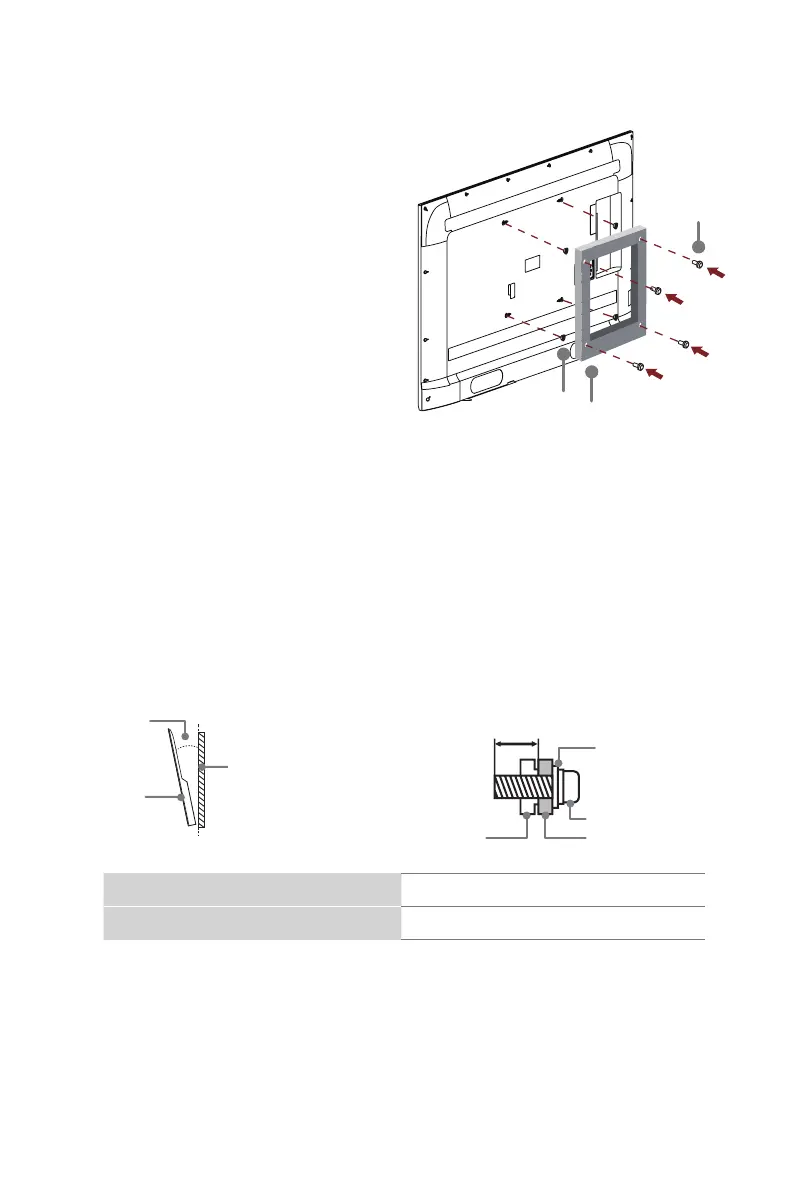
Attach the wall mount bracket (not included)
CAUTION:
• Follow instructions provided with the wall mount bracket. If it is not correctly mounted,
the TV may fall and cause property damage or personal injury.
• When you attach the mount, be sure to use spacers (provided by the third-party
manufacturer) between the TV and the bracket.
• To prevent internal damage to the TV and to ensure it is mounted securely, be sure to
use fixing screws (not included) that are 8.0 - 10.0 mm in length when measured from
the attaching surface of the rear cover.
• Make sure the tilt angle between the TV screen and the vertical surface is no more
than 15 degrees.
8.0 - 10.0
mm
Wall mount bracket
Screw
Spacer
Rear cover of the TV
≤15°
TV screen
Vertical
surface
1.
Place the TV face down on a clean, safe
and cushioned surface.
2.
Remove the TV stand if you have already
attached it.
3.
Place spacers (not included) in the
corresponding bracket holes.
Wall mount hole pattern (mm) 200 × 300
Wall mount screw size M6
NOTE:
• If you have additional questions, please contact the wall mount manufacturer or the
retailer from which you purchased the TV.
• The diameter and length of the screws differ depending on the wall mount bracket
model.