EasyManua.ls Logo

Hitachi 8000 Series User Manual

Hitachi 8000 Series
17 pages
To Next Page IconTo Next Page
Page #1 background imageLoading...
Page #1 background image
1
Introduction
Part names
Any button marked with “*” is not supported on this projector (User's
Manual (detailed)119).
• Each time you press any button (except ID buttons), the ID button of current
selected ID number will light (
User's Manual (detailed)17).
NOTE
Back of
the remote control
Remote control
(1) STANDBY button (2)
(2) ON button (
2)
(3) ID - 1 / 2 / 3 / 4 buttons (
3)
(4) INPUT PORTS button (
3)
(5)
PAGE UP / PAGE DOWN buttons
(4)
(6) F5 button (
4)
(7) ENTER button
(8) RESET button
(9) ESC button (
4)
(10) ▲/▼/◄/►cursor buttons
(11) MENU button (
5)
(12) VOL + / - buttons (
6)
(13) AV MUTE button (
6)
(14) MAGNIFY ON / OFF buttons (
7)
(15) FREEZE button (
8)
(16) PbyP button (
9)
(17) ASPECT button (
10)
(18) AUTO button (
11)
(19) POSITION button (
11)
(20) KEYSTONE button (
12)
(21) MY BUTTON - 1, 2, 3, 4 buttons (
13)
(22) FOCUS + / - buttons (
14)
(23) ZOOM + / - buttons (
14)
(24) LENS SHIFT button (
14)
(25) LENS MEMORY button (
15)
(26) Battery cover (
16)
(27) Wired remote control port (
17)
(1)
(4)
(5)
(15)
(6)
(7)
(8)
(9)
(21)
(19)
(20)
(2)
(12)
(14)
(13)
(10)
(11)
(18)
(24)
(26)
(25) (23)
(22)
(16)
(17)
(27)
Question and Answer IconNeed help?

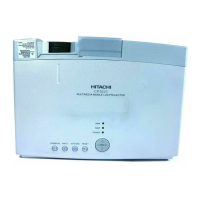
Do you have a question about the Hitachi 8000 Series and is the answer not in the manual?

Hitachi 8000 Series Specifications

General IconGeneral
BrandHitachi
Model8000 Series
CategoryProjector
LanguageEnglish

Summary

Remote Control Overview

Power and ID Functions

Controls projector power and remote ID settings.

Navigation and Menu Controls

Enables navigation through menus and options.

Picture Adjustment Buttons

Adjusts image parameters like position, keystone, focus, and zoom.

Special Function Buttons

Provides access to advanced features like input selection and picture modes.

Power On/Off Operation

Turning on the Power

Step-by-step guide to powering on the projector.

Turning off the Power

Step-by-step guide to powering off the projector.

Safety Warnings

Crucial safety precautions regarding projector operation and heat.

Remote Control Functions

Remote ID Functionality

How to use the remote ID for multiple projectors.

Input Port Selection

How to select video input sources using dedicated buttons.

PC Mouse and Keyboard Emulation

Page Navigation and Mouse Control

Using PAGE UP/DOWN and cursor buttons for PC mouse control.

Key Function Mapping for PC Use

Mapping ENTER, ESC, F5 buttons to PC mouse/keyboard functions.

Important Usage Precautions

Warnings about improper use and connection procedures.

Menu Navigation and Operation

Accessing the Menu

How to start the menu system.

Navigating EASY MENU

How to use cursor buttons in the EASY MENU.

Navigating ADVANCED MENU

How to use cursor buttons in the ADVANCED MENU.

Audio and Screen Muting

Volume Adjustment

Using VOL +/- buttons to adjust audio output levels.

AV Mute Functionality

How to temporarily turn off screen and audio.

Magnify Feature

Activating Magnification

How to turn on the magnification feature.

Magnification Levels and Signals

Different zoom levels for various signal types.

Adjusting Magnified Area

Using cursor buttons to shift the magnified view.

Exiting Magnification

How to turn off the magnification feature.

Screen Freezing and Shading

Temporarily Freezing the Screen

How to freeze the projected image.

Notes and Cautions

Important notes and safety cautions for freeze/shade functions.

Picture-by-Picture (PbyP) / Picture-in-Picture (PinP)

Activating PbyP Mode

How to enable the Picture-by-Picture mode.

Switching to PinP Mode

How to transition from PbyP to Picture-in-Picture.

Exiting PinP Mode

How to exit the Picture-in-Picture mode.

Aspect Ratio Selection

Cycling Through Aspect Ratios

How pressing ASPECT cycles through settings.

Aspect Ratio Options for Signals

Available aspect ratios for different input signals.

Automatic and Manual Adjustments

Automatic Adjustment Feature

Using the AUTO button for automatic image adjustment.

Adjusting Picture Position

Using the POSITION button for manual position adjustment.

Keystone Correction

Selecting Keystone Correction Mode

Choosing between AUTO, MANUAL, PERFECT FIT.

AUTO Keystone Correction

Performing automatic vertical keystone correction.

MANUAL Keystone Correction

Manual adjustment of vertical and horizontal keystone.

PERFECT FIT Correction

Adjusting screen corners and sides for distortion.

My Button Customization

Assigning Functions to My Buttons

How to assign functions to MY BUTTON 1-4.

List of Assignable Functions

Overview of available functions like SLIDESHOW, MY IMAGE, etc.

Lens Adjustment Controls

Adjusting Zoom and Focus

Using ZOOM and FOCUS buttons for image clarity.

Adjusting Lens Position

Using LENS SHIFT for lens position adjustment.

Lens Adjustment Safety

Safety warning about moving lens parts.

Lens Memory Functions

Saving Lens Adjustments

Storing current lens settings into memory.

Loading Lens Adjustments

Recalling previously saved lens settings.

Clearing Lens Memory

Deleting stored lens adjustments.

Remote Control Battery Installation

Installing the Batteries

Step-by-step guide to inserting batteries.

Battery Handling Precautions

Safety warnings and guidelines for battery use.

Connectivity and Ports

Wired Remote Control Port

Connecting a wired remote control.

Remote Control Relay Functionality

Using the projector as a remote control relay.

Related product manuals