35
CP-WX11000 ( P6WX )
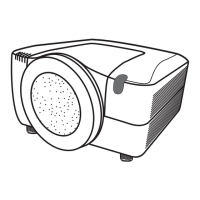
Attaching the USL-801/SL-802/SL-803 Lens When Unpacking the LCD Projector
1. Lens attachment is completed.
Follow the procedures in step 1 through
step 6 for Attaching the SD-804/LL-805/
UL-806 Lens and install the lens in the
LCD projector.
3. Attaching the optional parts (2)
(SL-802/SL-803 only)
Rotate the attached blinder to the
underside of the lens and mount the
second blinder on the lens shade in the
same way.
Engage the two catches on these
blinders.
4. Assembling the main unit parts (1)
Insert the two catches on the front cover
into the LCD projector body to attach the
front cover.
5. Assembling the main unit parts (2)
Screw on the front ring.
Caution:
ŷ Take care not to get the blind sheet
trapped when À tting the front ring
as this may lead to malfunction.
6. Attaching the optional parts (3)
(SL-802/SL-803 only)
Have the two protectors supplied with the
lens ready and insert the ¿ rst protector
between the front ring and the lens.
7. Attaching the optional parts (4)
(SL-802/SL-803 only)
Rotate the attached protector to the
underside of the lens and insert the
second protector in the same way
between the front ring and the lens.
Engage the two catches on the protector.
8. Lens attachment is completed.
2. Attaching the optional parts (1)
(SL-802/SL-803 only)
Have the two blinders supplied with the
lens ready and mount the ¿ rst blinder on
the lens shade.
Front cover
Catch
Catches
Front ring
Catch
Blinder
Protector
Front ring
Catch
Protector
Blinder
Lens shade
Caution:
ŷ When using the USL-801 lens, the
edges of the projected image may
appear dark or shadows may be visible.
If this happens, use the lens shift
function to adjust the position of the
projected image.

 Loading...