Chapter 14 Operation Examples
14-6
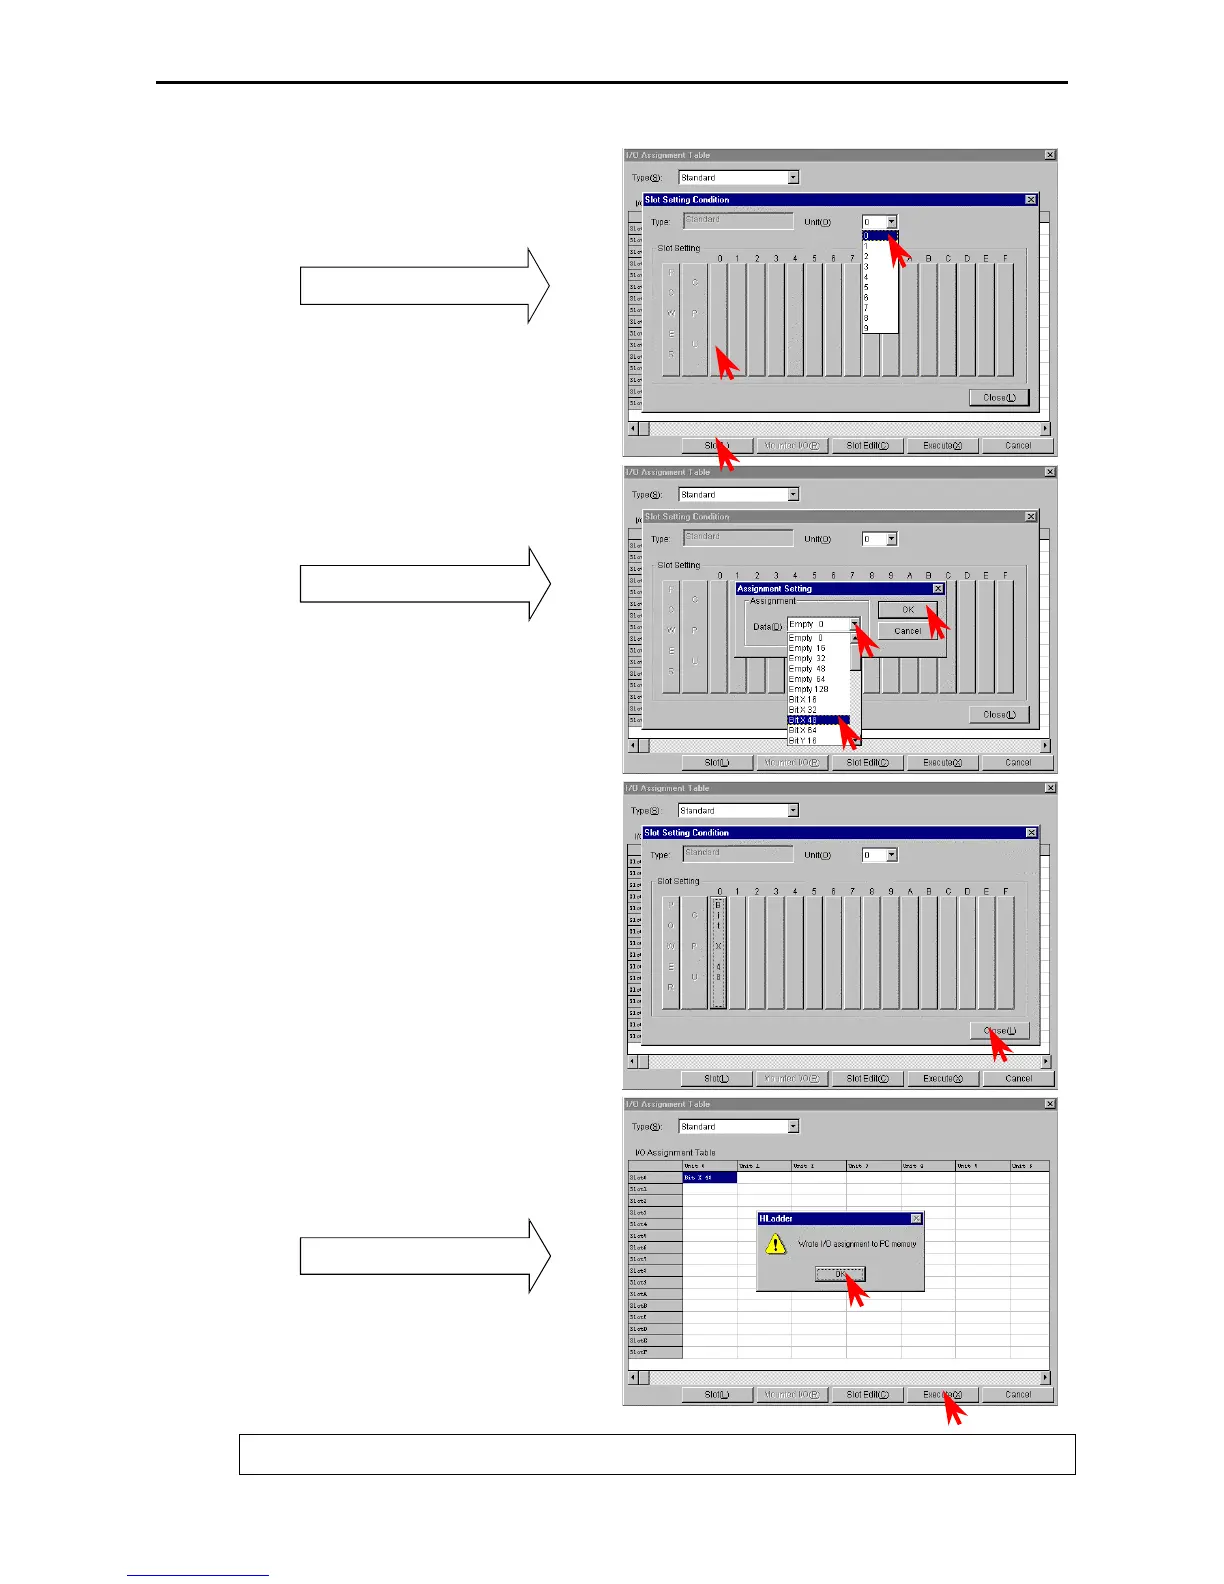
[Setting from the Slot Setting Status]
Click the [Slot] button to display the Slot Setting
Status dialogue box.
1] Click the W of the unit and select the unit
number from the pull-down display.
2] Click the button of the slot number to be set.
Slot Setting Status dialogue box
3] Click the W of the data and select the I/O type
from the pull-down display.
4] Click the [OK] button and close the
Assignment Setting dialogue box.
Specification of I/O type
In the same way, repeat the steps 1] and 2] to 4] to
set other unit and slot numbers in order to perform
I/O assignment according to the unit to be used.
In this example, X48 and 16 vacant points are
assigned to slots 1 and 2 respectively.
5] Click the [Close] button to close the Slot
Setting Status dialogue box.
Enter the I/O assignment set in the Slot Setting
Status into the I/O Assignment List.
6] Click the [Execute] button to write the
assigned information to the PC memory.
7] Click the [OK] button in the confirmation
dialogue box to close the I/O Assignment List
dialogue box.
Confirmation dialogue box
For online mode, it is possible to read the I/O mounted on the CPU by the “Mount” button. For details, refer to the
“Reading Mounted I/O” of the programming device.


 To Next Page