49
VACUUM COMPARTMENT
Pull up the
handle to unlock.
Pull out the
Vacuum Case.
Caution
The Vacuum Case is not put in the vacuum state unless the
handle is pushed down securely.
Closing the door of the Refrigerator Compartment without locking
the handle may damage parts or food or form a clearance
between the doors, which reduces cooling performance.
It takes about three to four minutes for the Vacuum Case to be
vacuumed after the vacuum pump starts to operate. The hissing sound
may not be heard when the Vacuum Case is opened within four
minutes.
The hissing sound indicates that vacuum is being released. Thus, the
Vacuum Case cannot be drawn out while the sound is heard. Draw it out
after the sound is no longer heard.
REQUESTS
If a part of the gasket is stuck together, the vacuum state cannot be maintained. If it is stuck together, please remove it. Since it is
difficult to see the left and right sides and the bottom, remove the Vacuum Chilled Case and check it.
Dew and/or frost may be formed in the sealed Vacuum Compartment due to moisture contained in food or in the air. Soak a soft cloth in
lukewarm water and wipe off the dew and/or frost with the cloth. (Attached dew, frost or ice does not reduce performance.)
If you want to avoid dew, frost or ice, stored food should be wrapped with plastic wrap.
Wipe water or soup spilled in the compartment soon, if any.
The platinum catalyst needs no replacement. Do not remove it.
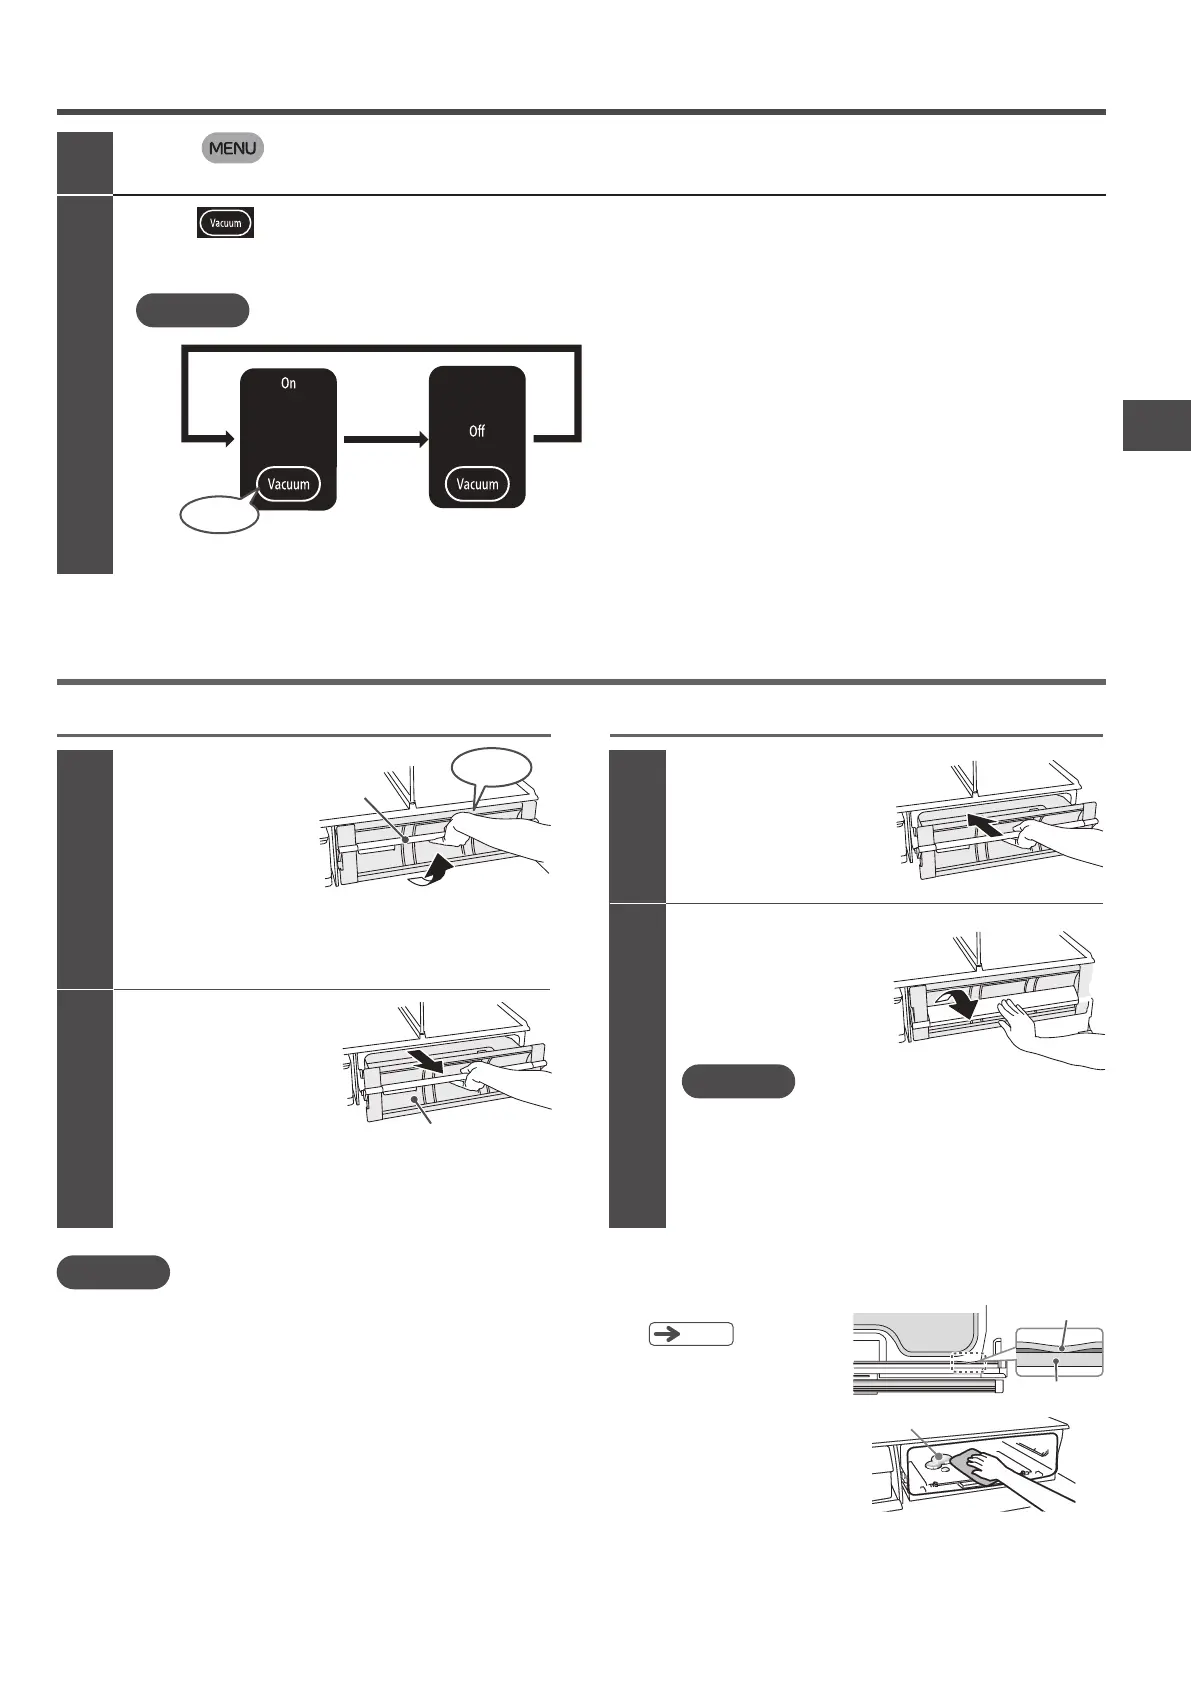
When opening the door When closing the door
When opening/closing the door of the Vacuum Case
Push the Vacuum
Case back to the
end.
Press down the
handle to lock.
1
2
1
2
Handle
HIss
Vacuum Case
Dew, frost or ice
A part stuck
together
Gasket
Changing the vacuum compartment setting
1
2
On
(At the time of purchase)
Off
(Non vacuum)
Touch it
P.67
The “Off” indicator lamp continues to be lit during the “Off”operation. The display will be turned off
after about 40 seconds for energy saving, but the function that is set once will remain effective.
CAUTION
Touch button on the Control Panel to turn on the indicator lamp.
All indicator lamps turn on, and then the current settings are displayed.
Touch button to change the settings as you like.
The display switches in sequence as shown below every time the button is touched.
The temperature is set to “On” at the time of purchase.
 Loading...