60
MAINTENANCE (continued)
Remove the vacuum compartment.
Re-installing the vacuum compartment.
Wet a sponge or dishcloth in warm water,
and wipe the following parts.
2
3
1
Vacuum compartment
For details on how to remove the vacuum compartment:
Be sure to remove any items stored in the vacuum compartment.
For details on how to install the vacuum compartment:
Note: Do not use any detergents or other cleaning agents.
Wash the gasket by using
a soft sponge.
Use a dry dishcloth to wipe off any
excess water and then allow the
gasket to dry naturally.
1
2
When the packing of the vacuum
compartment door is too dirty.
Note: Do not use any detergents or other cleaning agents.
Once a month
Gently wipe the ceiling of the vacuum compartment, especially in the
vicinity of the interior LED light. Excessive force might damage the
light.
Using any cleaning agent other than warm water on the vacuum
compartment gasket might damage, deform, or discolor the gasket and
reduce the effectiveness of the vacuum.
NOTES
If the packing of the vacuum compartment door is loose
or not close firmly, the vacuum cannot be maintained.
P.62
P.62
Once a week
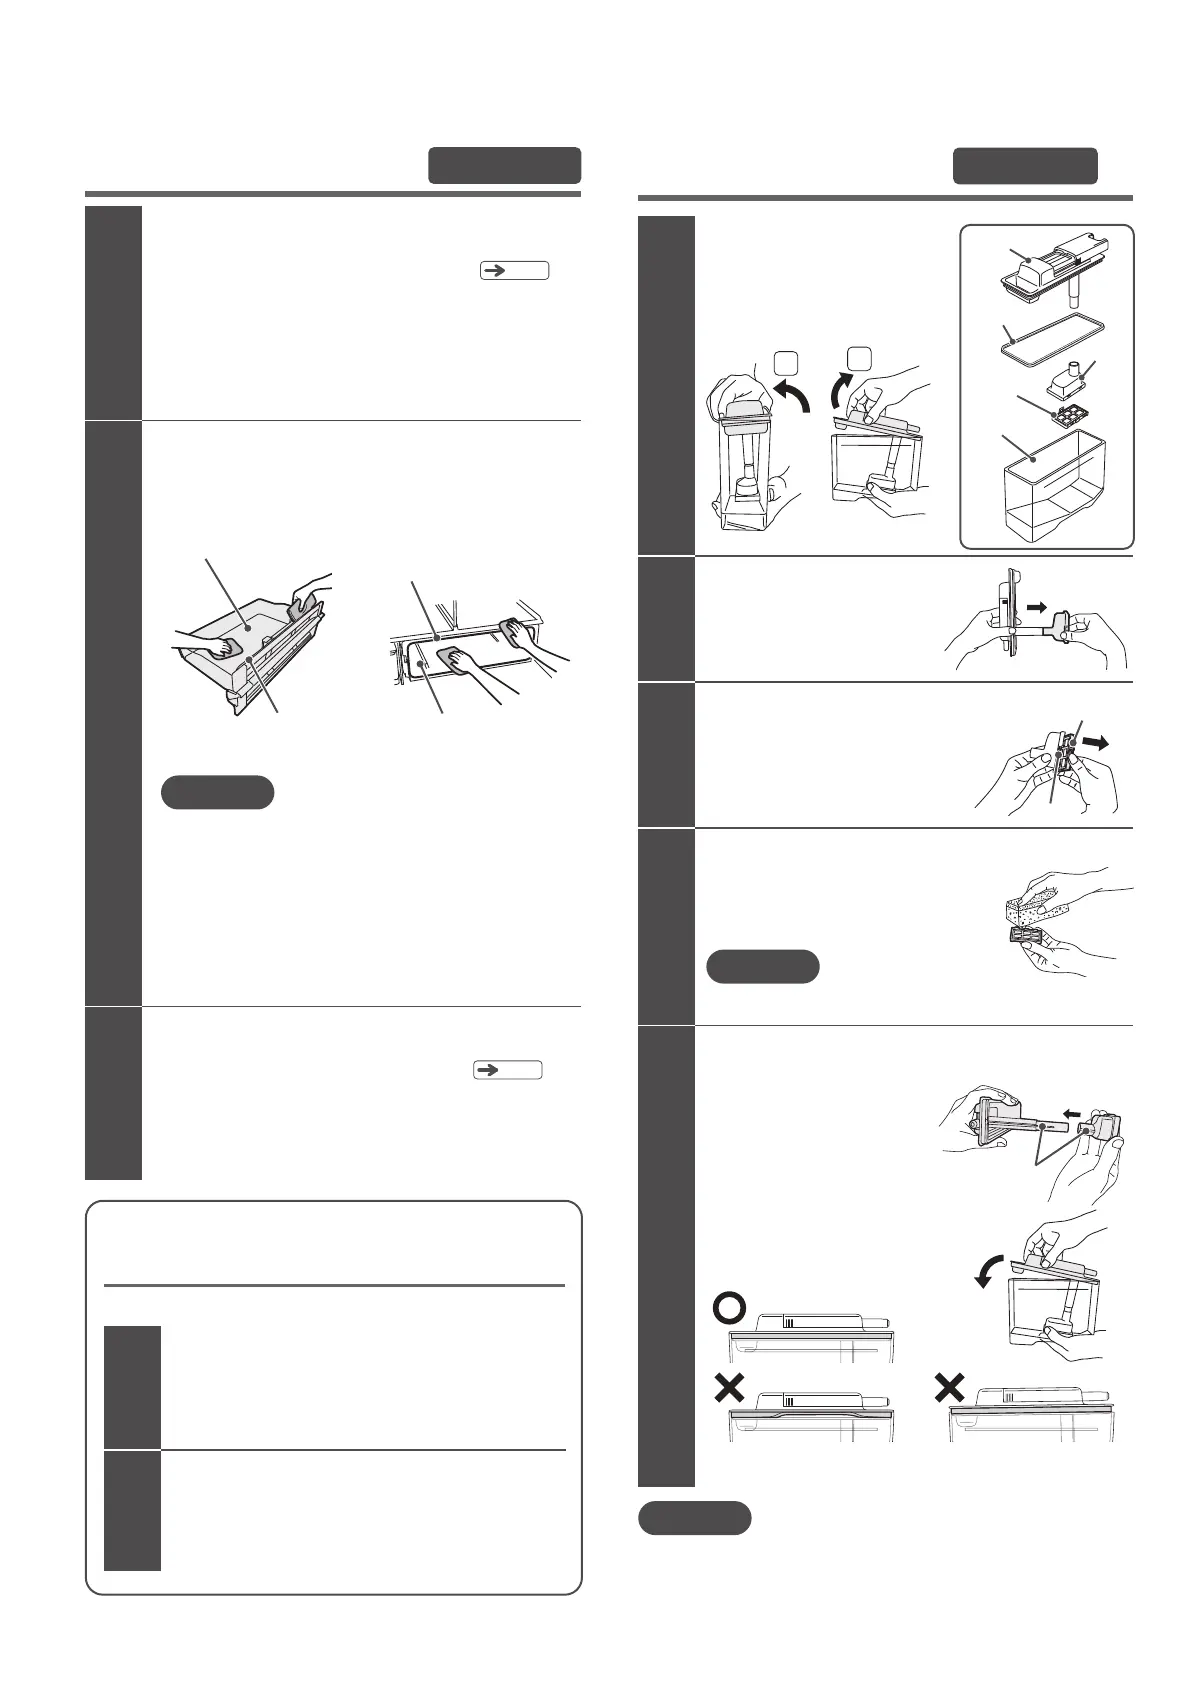
Water supply tank
Remove the water supply
tank and its cover.
1
Remove the gasket
and case from the cover.
2
Pull the case to remove it from
the cover.
Remove the water filter
from the case.
3
To remove the water filter, pull the tab of
the water filter to separate it from the catch.
Open the tank by removing the cover in
the directions indicated by the arrows.
Wash each part of the water supply tank.
4
Wash each part by using a soft sponge.
Do not use any detergents or other
cleaning agents.
Reassemble the water supply tank,
and then fill the tank.
5
Close the tank by attaching the cover in
the direction indicated by the arrow.
Reattach the case to the cover by
aligning the tubes and inserting
the tube of the cover into that of
the case.
REQUEST
If you do not plan on using the automatic ice maker for a period of time, clean the
water supply tank, wait for it to dry completely, and then re-install it in its place.
(Ensure the water filter and all other parts of the tank are completely dry.)
NOTE
Replace the water filter every 3 to 4 years or as needed.
Groove for the vacuum
compartment gasket
Receptacle for
the vacuum compartment
Vacuum compartment gasket
Aluminum tray
Catch
Tab
Case
Water filter
Tank
Cover
Gasket
The gasket is twisted. The cover is not attached
properly.
Front
Back
Front Back
Front Back
Tubes
1
2
 Loading...