Getting Started
pg. 15 - 26 -
26
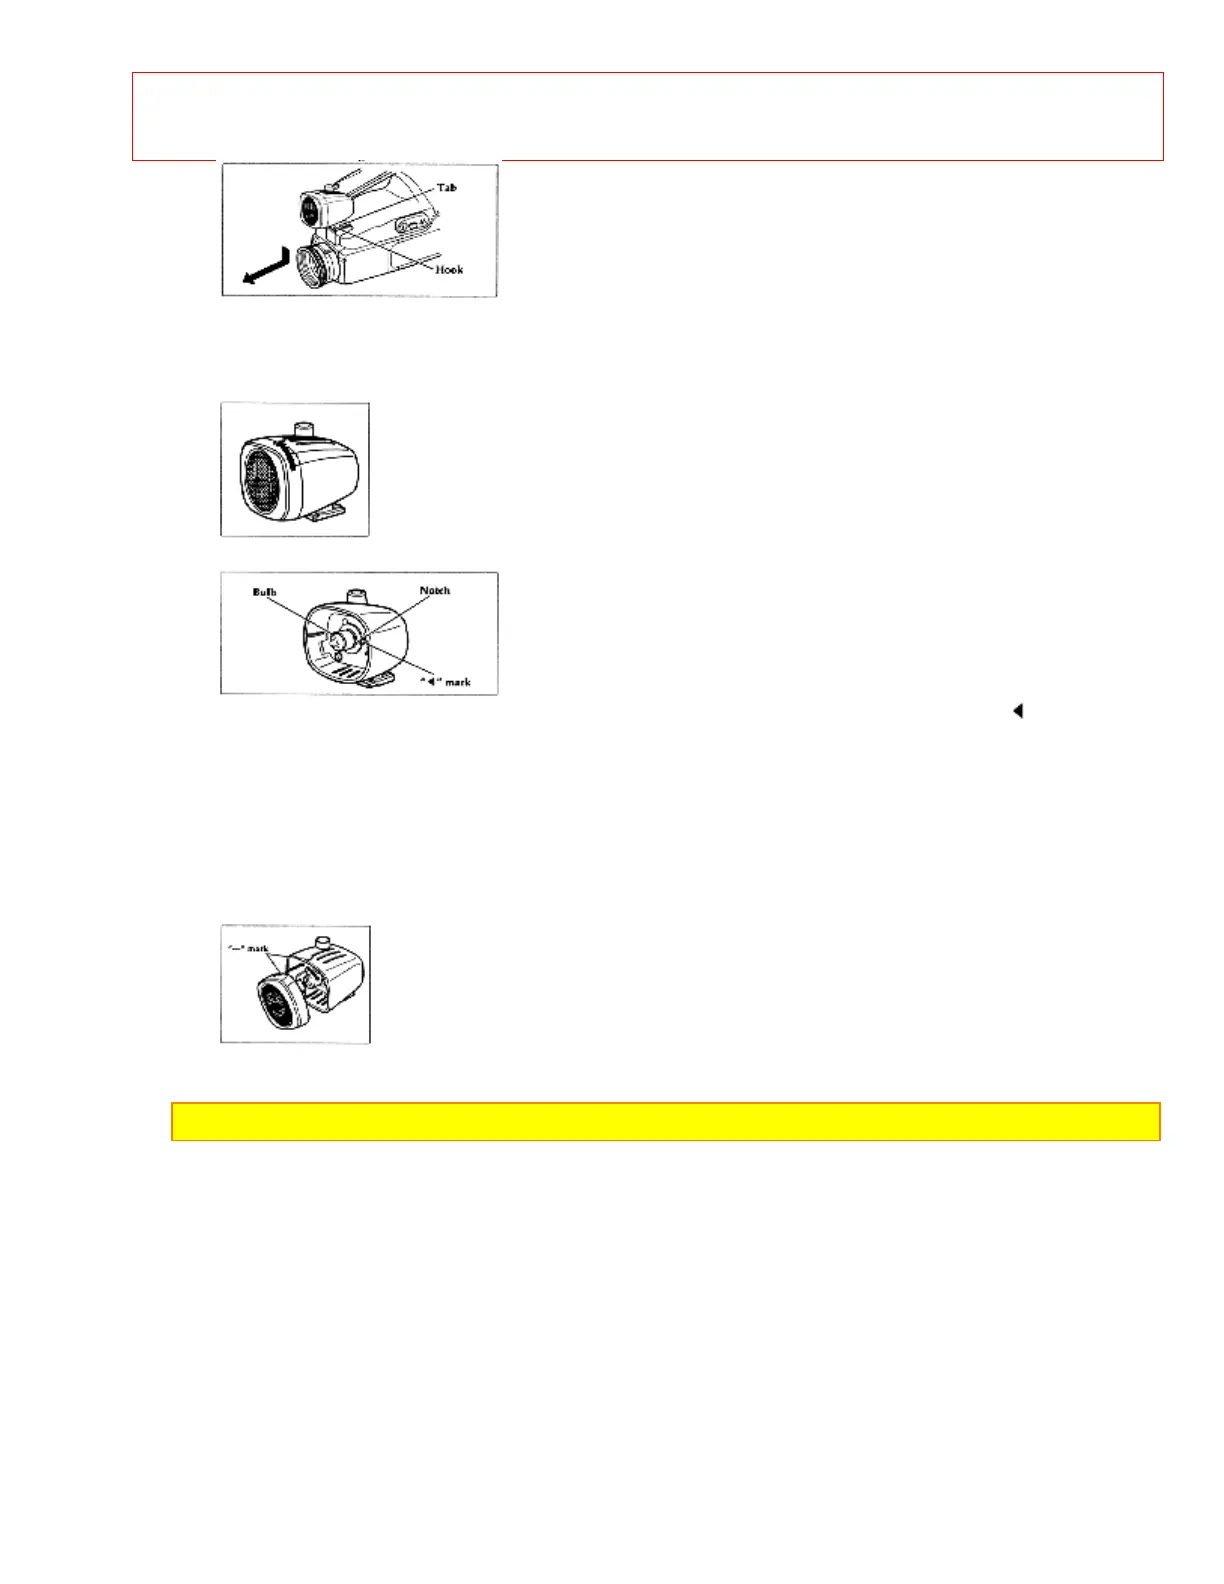
Replacing the DC Camera Light Bulb
1. Turn the front of the case counter-clockwise and remove it.
2. Remove the bulb by pulling it out through the opened case.
3. Install the new bulb by aligning the notch in the rim of the bulb's base with the " " mark
outside the socket. Avoid touching the bulb directly with your fingers. It may shorten the life of
the bulb.
4. Reattach the front of the case by placing the bulb in the hole of the reflective plate, lining up
the smaller "-" mark on the front of the cover with the "-" mark on the DC camera light, and
turning the front of the cover clockwise till the larger "-" mark on the front of the cover aligns
with the "-" mark on the DC camera light. Check that the front of the camera light is attached
properly before turning the light on.
Note: Only replace the camera light bulb with VM-CP4L (optional) to reduce the risk of fire.