Do you have a question about the Hitachi VM-E535LE and is the answer not in the manual?
Protect from water, dust, sand, and high temperatures; handle moisture carefully.
Use specified accessories; heed warnings to prevent injury or damage.
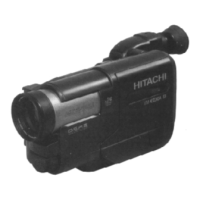
Single-unit design, direct recording, and playback features.
3-inch LCD monitor, digital zoom up to X32, smooth transitions.
Digital effects, Programme AE, EIS, Auto Focus, Remote Control.
Adjust strap for easy button access and secure grip.
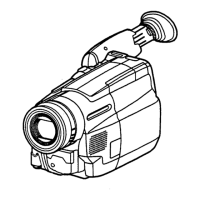
Adjust electronic viewfinder for clear viewing.
Adjust diopter control for optimal viewfinder focus.
Attach shoulder strap for carrying the camera.
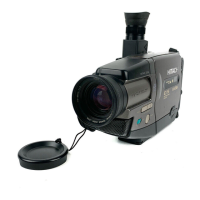
Operate the lens door to protect the lens.
Automatic shutter and aperture adjustment for brightness.
Eliminates glitches between recordings for smoother edits.
Open, adjust angle, and control brightness of the LCD screen.
Avoid touching screen, handle carefully to prevent damage.
Install the 3V lithium battery for clock and memory.
Install two IEC R6 batteries into the remote control.
Connect battery pack or AC adapter/charger for power.
Use optional car battery cord for power via cigarette lighter.
Monitor battery level indicator in viewfinder/LCD.
Plug in AC adapter, charge battery, monitor charge lamp for completion.
Avoid extreme temperatures, do not store fully charged, handle with care.
Insert 8mm cassette correctly into the holder.
Eject and remove the cassette from the holder.
Connect power, insert cassette, set switch to CAM, press Start/Stop.
Quickly review last few seconds of recorded footage.
View recorded tapes on LCD or TV, control playback with buttons.
Use F.FWD/REW buttons to quickly locate tape sections.
Pause playback to view a still frame of the image.
Change LCD monitor angle for different viewing positions.
Monitor automatically brightens for outdoor recording.
Procedure to set current date and time for recording.
Methods to correct errors during or after setting.
Options for recording date automatically or continuously.
Record date and created title superimposed on video.
Automatic focusing; conditions where manual focus is needed.
Engage manual focus mode and adjust focus manually.
Control zoom using the power zoom lever for wide/telephoto shots.
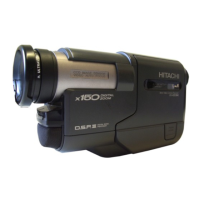
Extend magnification up to X32 beyond optical zoom range.
Momentarily magnify image by 1.5x using INST. ZOOM button.
Shoot close-up objects as near as 1 cm from the lens.
Corrects slight image shaking during recording for specific modes.
Apply effects like 16x9, negative, mosaic, half-mirror.
Switch picture format from 4:3 to 16x9 with black bars.
Apply negative or mosaic effects to the recorded image.
Use X130 zoom or create symmetric images.
Select and use four fade modes for smooth scene transitions.
Perform fade-in before recording and fade-out during recording.
Visually search and select segments for editing or copying.
Displays elapsed tape time in hours, minutes, seconds.
Shows remaining tape length using visual bars.
Switch between different on-screen displays in viewfinder/LCD.
Locate recorded segments by date and time.
Automatically stop tape at a preset point for review.
Operate camcorder functions remotely using infrared signals.
Create personalized titles with up to 16 characters per line.
Edit or correct characters in a title before or during recording.
Record titles directly or via VCR, manage display.
Screw telephoto or wide-angle converters onto the lens.
Record new audio/video onto tape using external sources.
Connect camcorder to TV using output cables for playback.
Use RF output adapter for TVs without AV inputs.
Select TV channel and RF adapter switch for optimal picture.
Connect camcorder to VCR and record tape content.
Select and copy scenes from tape using an edit remote.
Battery installation and remote control usage guidelines.
Match edit remote control code to the VCR for operation.
Step-by-step process to select and copy edited segments.
Stop the editing process and return to normal modes.
Clean viewfinder lens and tube if dusty or dirty.
Consult dealer for regular maintenance and difficult adjustments.
Power, temperature, dimensions, weight of the device.
Format, system, signal, tape speed, output details.
Scanning, illumination, camera device, lens diameter.
| Type | Camcorder |
|---|---|
| Lens | Zoom lens |
| Optical Zoom | 12x |
| Digital Zoom | 24x |
| Focus Adjustment | Auto/Manual |
| Minimum Illumination | 3 Lux |
| White Balance | Auto/Manual |
| Focus | Auto/Manual |
| LCD Screen | Yes |
| Image Sensor | CCD |
| Weight | 1.2 kg |
| Image Sensor Size | 1/3 inch |
| Shutter Speed | 1/60 - 1/4000 sec |
| Microphone | Built-in |
| Viewfinder Type | Electronic |
| Screen Size | 2.5 inches |