Number Item
2 Clip
3 Washer and bind screw
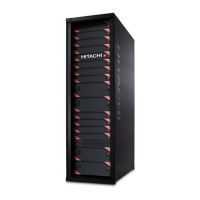
4. Position the controller so the front faces the front of the rack, and then slide the controller gently onto the rails.
Stop sliding when the mounting flanges on the front of the controller touch the vertical face of the rack.
NoteCheck the rear of the controller chassis to be sure the chassis is fit securely into the stoppers.
Number Item
1 Stopper
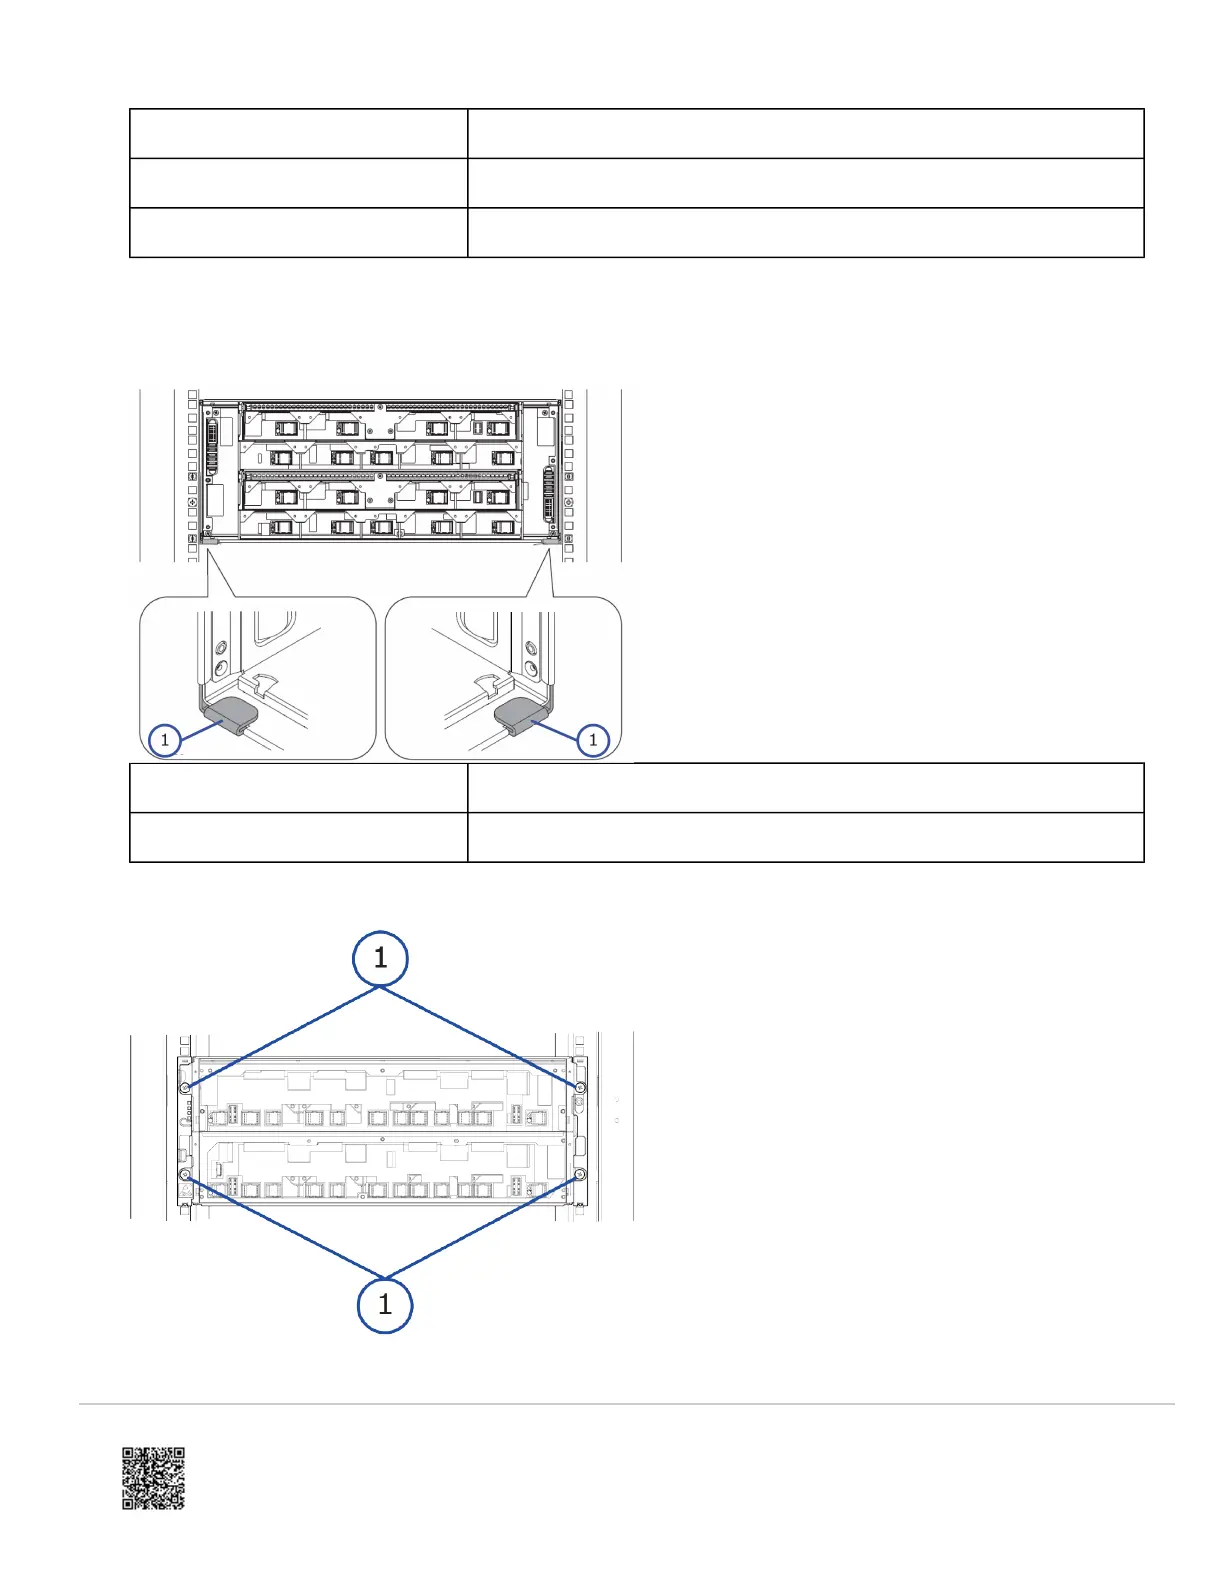
5. On the front of the controller chassis, attach the two bind screws and washers to each side of the rack.
https://knowledge.hitachivantara.com/Documents/Storage/VSP_E_Series/93-06-4x/VSP_E1090_Installation/01_Installing_yo…
Updated: Sun, 18 Jun 2023 03:59:58 GMT
Powered by
6