EasyManua.ls Logo

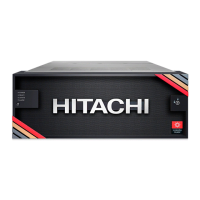
Hitachi VSP E1090

Hitachi VSP E1090
22 pages
To Next Page IconTo Next Page
Loading...
Installing your storage system
Hitachi Virtual Storage Platform E1090 (VSP E1090) storage systems are designed for self-installation, so you can
install and set up your storage system for the first time without assistance from a Hitachi Vantara representative.
Make sure your data center meets all site preparation requirements in the Hitachi Virtual Storage Platform E1090
Hardware Reference Guide before you install the storage system. If you are not using a Hitachi Universal Rack make
sure the electrical specifications of your rack meet the power requirements of the storage system.
This video shows how to mount and cable your storage system and how to perform the initial setup by using Hitachi
Storage Advisor Embedded.
Step 1: Unpack the storage system
Procedure
1. Inspect all materials for signs of damage. If you see damage, discontinue the installation and contact your Hitachi
Vantara representative.
2. Loosen the band around the cartons and open all boxes. Remove all packing materials, envelopes, and boxes
from the cartons.
3. Retain all packing materials and cartons in case you need to transport or ship the storage system in the future.
4. Check the items you received against the packing list. If any items are missing or damaged, discontinue the
installation and contact your Hitachi Vantara representative.
5. Check the labels of each controller and drive box and verify the location of each component on the rack layout
diagram.
6. Place the keys for the front bezel in a safe place. You will need them to attach the bezel to the front of the
controllers.
Step 2: Verify component location in the rack
The controller and drive boxes for the VSP E1090 are shipped fully configured and must be installed in the rack at the
specific location designated by the rack layout.
Each pre-configured component is shipped with two identification labels: one attached to the shipping box, the other
https://knowledge.hitachivantara.com/Documents/Storage/VSP_E_Series/93-06-4x/VSP_E1090_Installation/01_Installing_yo…
Updated: Sun, 18 Jun 2023 03:59:58 GMT
Powered by
1
Question and Answer IconNeed help?

Do you have a question about the Hitachi VSP E1090 and is the answer not in the manual?

Hitachi VSP E1090 Specifications

General IconGeneral
ModelVSP E1090
Maximum Capacity69PB
Availability99.9999%
Form FactorRack-mounted
Storage Controller TypeActive-active
Drive Types SupportedSAS HDD
Host InterfacesFibre Channel, iSCSI
RAID LevelsRAID-1, RAID-5, RAID-6, RAID-10
Data ReductionCompression, Deduplication
Operating System SupportWindows, Linux, VMware, IBM AIX, HP-UX
Management SoftwareHitachi Storage Advisor, Hitachi Ops Center
ScalabilityScale-up

Summary

Hitachi VSP E1090 Storage System Installation Guide

Step 1: Unpack Storage System Components

Procedure for unpacking, inspecting for damage, and verifying contents against the packing list.

Step 2: Verify Component Rack Location

Procedure for verifying component placement in the rack using identification labels and rack layout diagrams.

Step 3: Install Controller into Rack

Procedure for physically installing the controller unit into the designated rack location.

Step 4: Install Drive Boxes into Rack

Procedure for installing drive boxes into the rack using rack rails and brackets.

Step 5: Cable Drive Boxes

Procedure for cabling drive boxes to the controller according to the provided cable diagram.

Step 6: Connect Storage System to Power

Procedure for connecting the storage system to power sources, emphasizing redundancy and proper circuit connection.

Step 7: Cable Management Console

Procedure for connecting a management console to the storage system via an Ethernet cable.

Step 8: Power On Storage System

Procedure for powering on the storage system, including checking LEDs and attaching the front bezel.

VSP E1090 Initial System Setup

Prepare for System Setup

Prerequisites for initial setup, including network connectivity and browser requirements for the management console.

Change Default Password

Procedure for changing the default password for the storage system's maintenance user.

Run Initial Setup Wizard

Set Up Network Configuration

Configure IPv4/IPv6 addresses, subnet masks, gateways, and DNS servers for network connectivity.

Set Up System Information

Configure system name, contact person, and location details for the storage system.

Set Up Date and Time

Configure UTC timezone, daylight saving, and NTP server settings for accurate time synchronization.

Set Up Cloud Connection Settings

Configure organization code, proxy settings, and authentication for cloud connectivity.

Host Connectivity and Support Registration

Step 10: Connect Hosts to Storage System

Procedures for connecting hosts via Fibre Channel or iSCSI ports to the storage system.

Step 11: Register Storage System with Support

Process for registering the storage system on the Hitachi Vantara Support website.

Step 12: Install Remote Ops Monitoring System

Guide to downloading, installing, and configuring the Hitachi Remote Ops monitoring system.

Additional Information Resources

Links to user documentation, release notes, technical bulletins, and support website for further information.

Related product manuals