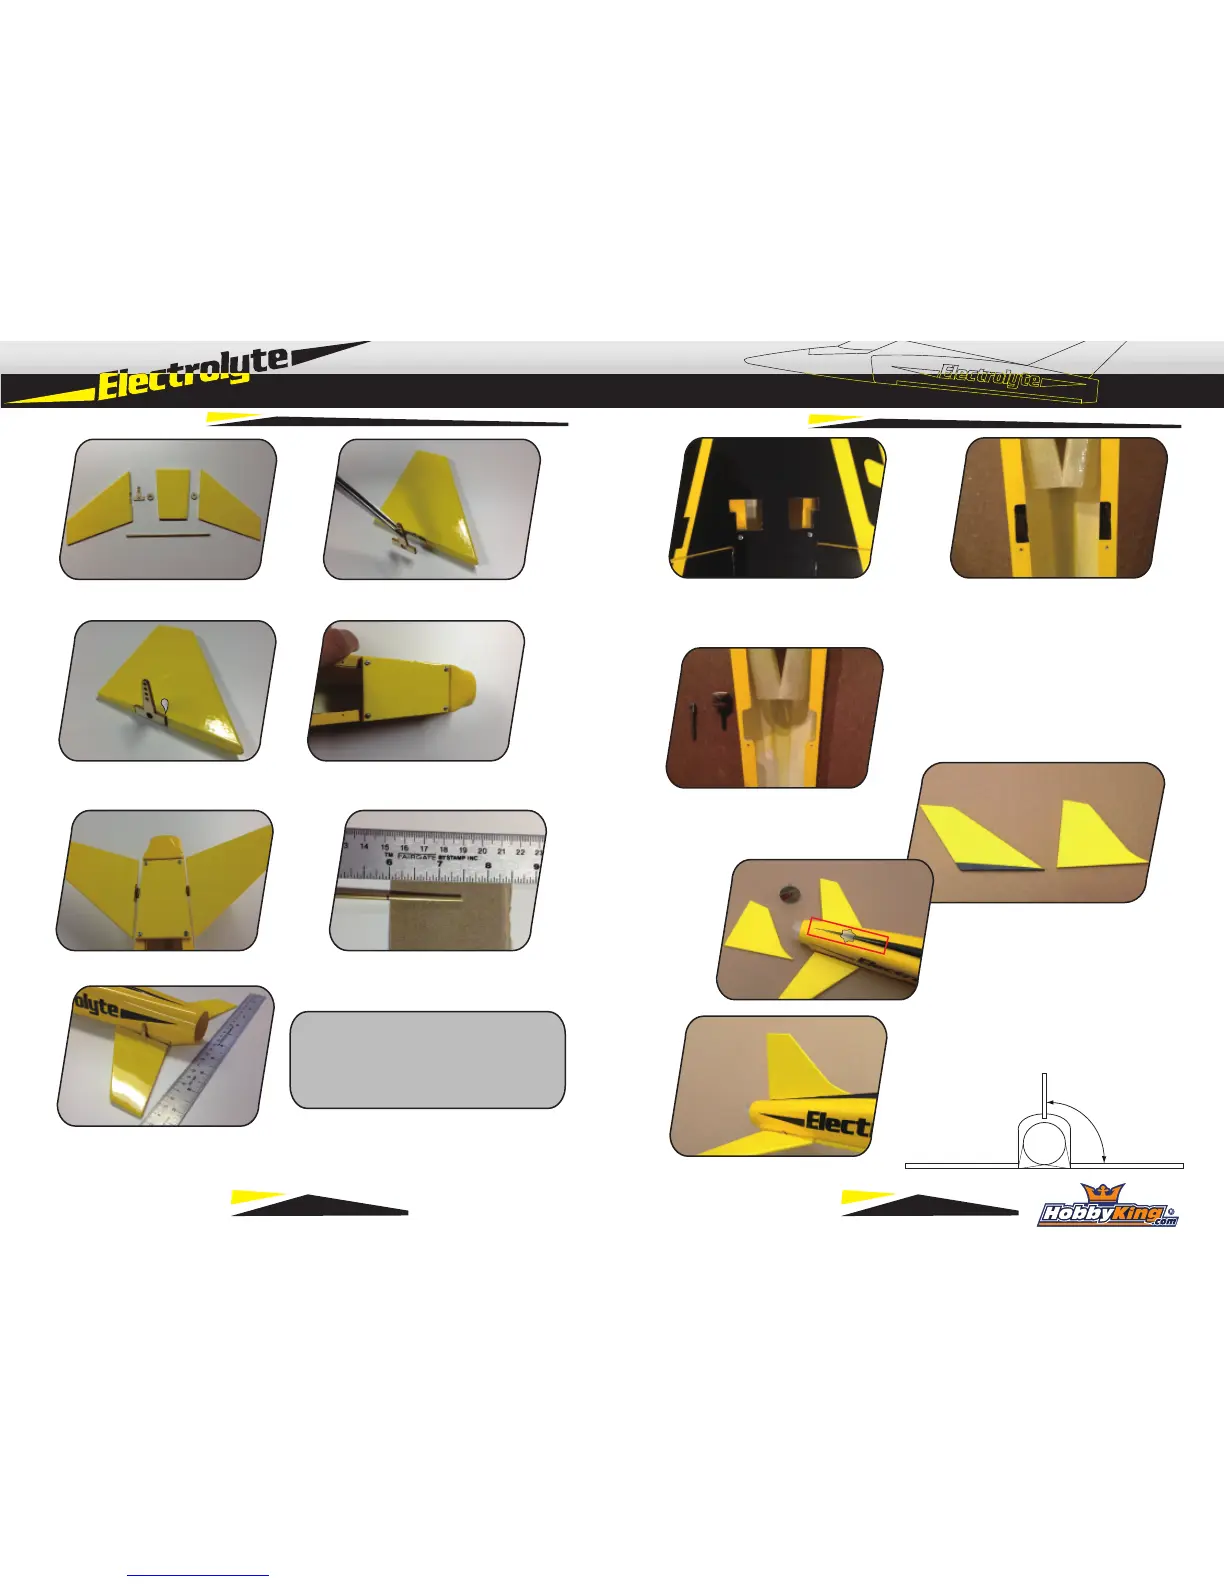
Stabilizer Assembly
1) Identfiy left stab with recess for control horn.
2) Remove covering material where control
horn is glued to stabilizer.
3) Glue horn to stab using regular CA. 4) Attach center section of flying stab to
fuselage using 4 screws.
5) Test fit flying stab with spacers.
7) Using 15 min epoxy, glue brass tube to left stab with control horn and allow to cure. Install
left stab into center section with L & R spacers in place. Finally glue other stabilizer half. Set
on flat surface with tips of both halves contacting the flat surface for alignment.
**Build Note** Apply epoxy to stabilizer
halves only. Do not glue to center section.
Spacers should touch stabilizer slightly, but
not limit movement.
1) Locate the servo cutouts in wing and cut
away covering from the top and bottom.
2) Mount the wing to the fuselage, lining up the
wing mounting holes to the fuselage. Using a
black felt pen, mark the location for the aileron
servo cutouts in the wing saddle.
4) Select which fin option you will use.
Roughen fuselage at contact location with
sandpaper or a rotary tool.
3) Using a rotary tool, cut away wing saddle
material from the marked location. This allows
the wing servos to sit flush against the bottom
of the wing.
5) Glue fin to fuselage with 15 minute epoxy,
keeping the fin 90 degrees to the horizontal
stabilizer.
6) Roughen the area on each end of the brass tube
that will be inserted into the stabilizer half.
90°
Airframe Assembly
3 4