HOLMS 300
© HOLMS INDUSTRI AB, ALL RIGHTS RESERVED 141204. 15
easiest thing is to empty the tank first and then run the
pump dry for 20-30 seconds.
The water tank has been designed so that the suction pipe
of the pump ends a little above the bottom of the tank.
This is so that rough particles remain in the container
rather than being drawn up. When emptying the tank,
therefore, a bottom plug must be removed, see figure 7.
Operating with side brush (extra equipment)
The Holms 300 can be fitted with one or two side brushes
for more efficient sweeping up against kerbs, etc. These
can be optionally fitted on the right, left or both sides.
Setting the side brush
For information on connecting side brushes, see
“Connection of side brush (extra equipment)” on
page 14.
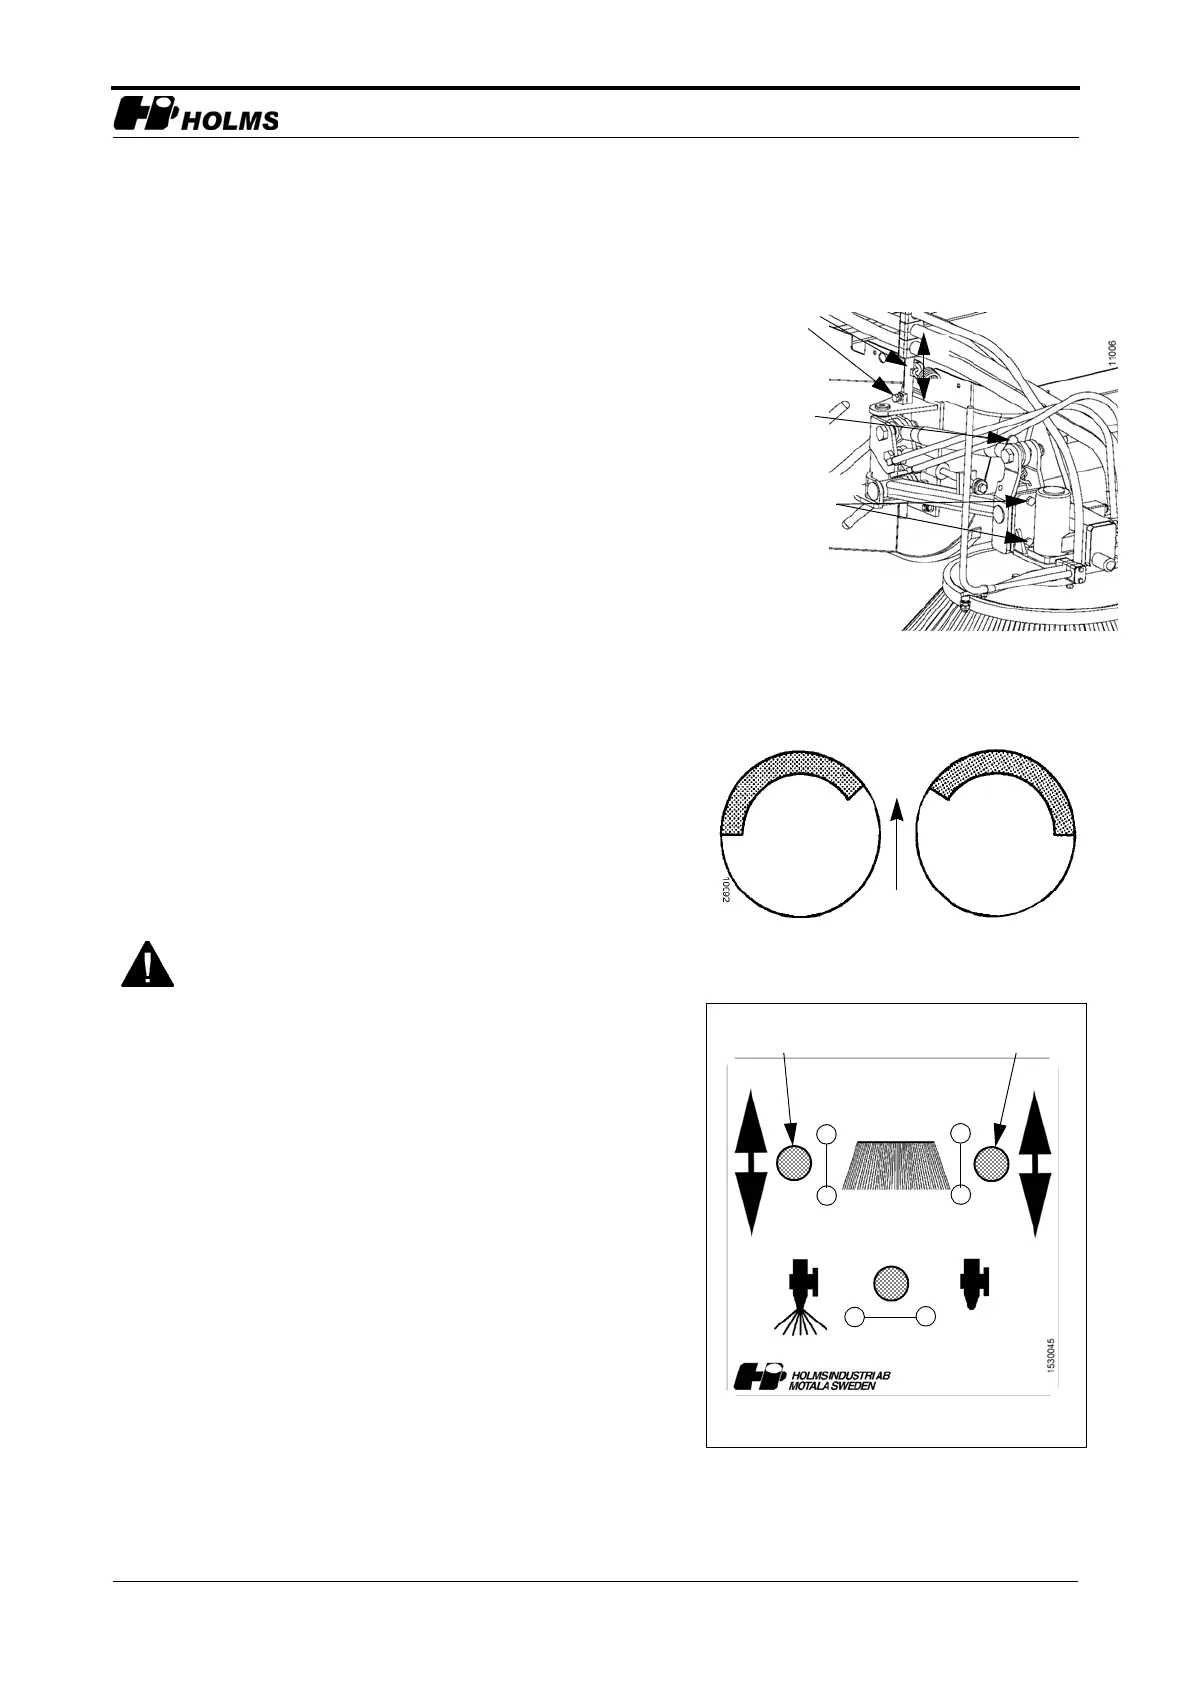
The sideways inclination of the side brush is adjusted by
loosening the two nuts (see figure 8), angling the brush
and tightening the nuts.
The forwards inclination of the brush is adjusted by
loosening the lock on the rigging screw (see figure 8) and
fixing the rigging screw so that the desired inclination is
achieved. Secure using the lock.
The pressure of the brush against the ground can be
adjusted by loosening firstly the nut and then the screw
that holds the balancing rod. Then, push down the rod for
increased ground pressure or pull it up for decreased
ground pressure, see figure 8. Then, secure the screw
and nut.
By allowing the side brush to rotate for a while against
the ground and then raising it, the brushing pattern can be
studied. Only the forward, outer part should touch the
ground, see figure 9.
Operation
All manoeuvring of the side brush requires the main
brush (roller) to be connected (rotating). The side brush
is started by moving the switch into position 2 (see figure
10). The brush then starts and moves down and out into
the operating position.
Always turn the side brush and sweeper roller off
before making any adjustments.
Rigging screw's
lock
Balancing rod
nut/screw
>
<
vertical position
Nuts for adjusting
(reverse side)
8.Setting the side brush
Right
fitting
Left
fitting
9.Brushing pattern
Switch for side brush
left-mounted.
Switch for side brush
right-mounted.
2
1
2
1
3
4
Position 1: Switched off
Position 2: Operating position
Position 3: Sprinkler on
Position 4: Sprinkler off
10.Control unit