HOLMS 300
18 © HOLMS INDUSTRI AB, ALL RIGHTS RESERVED 141204.
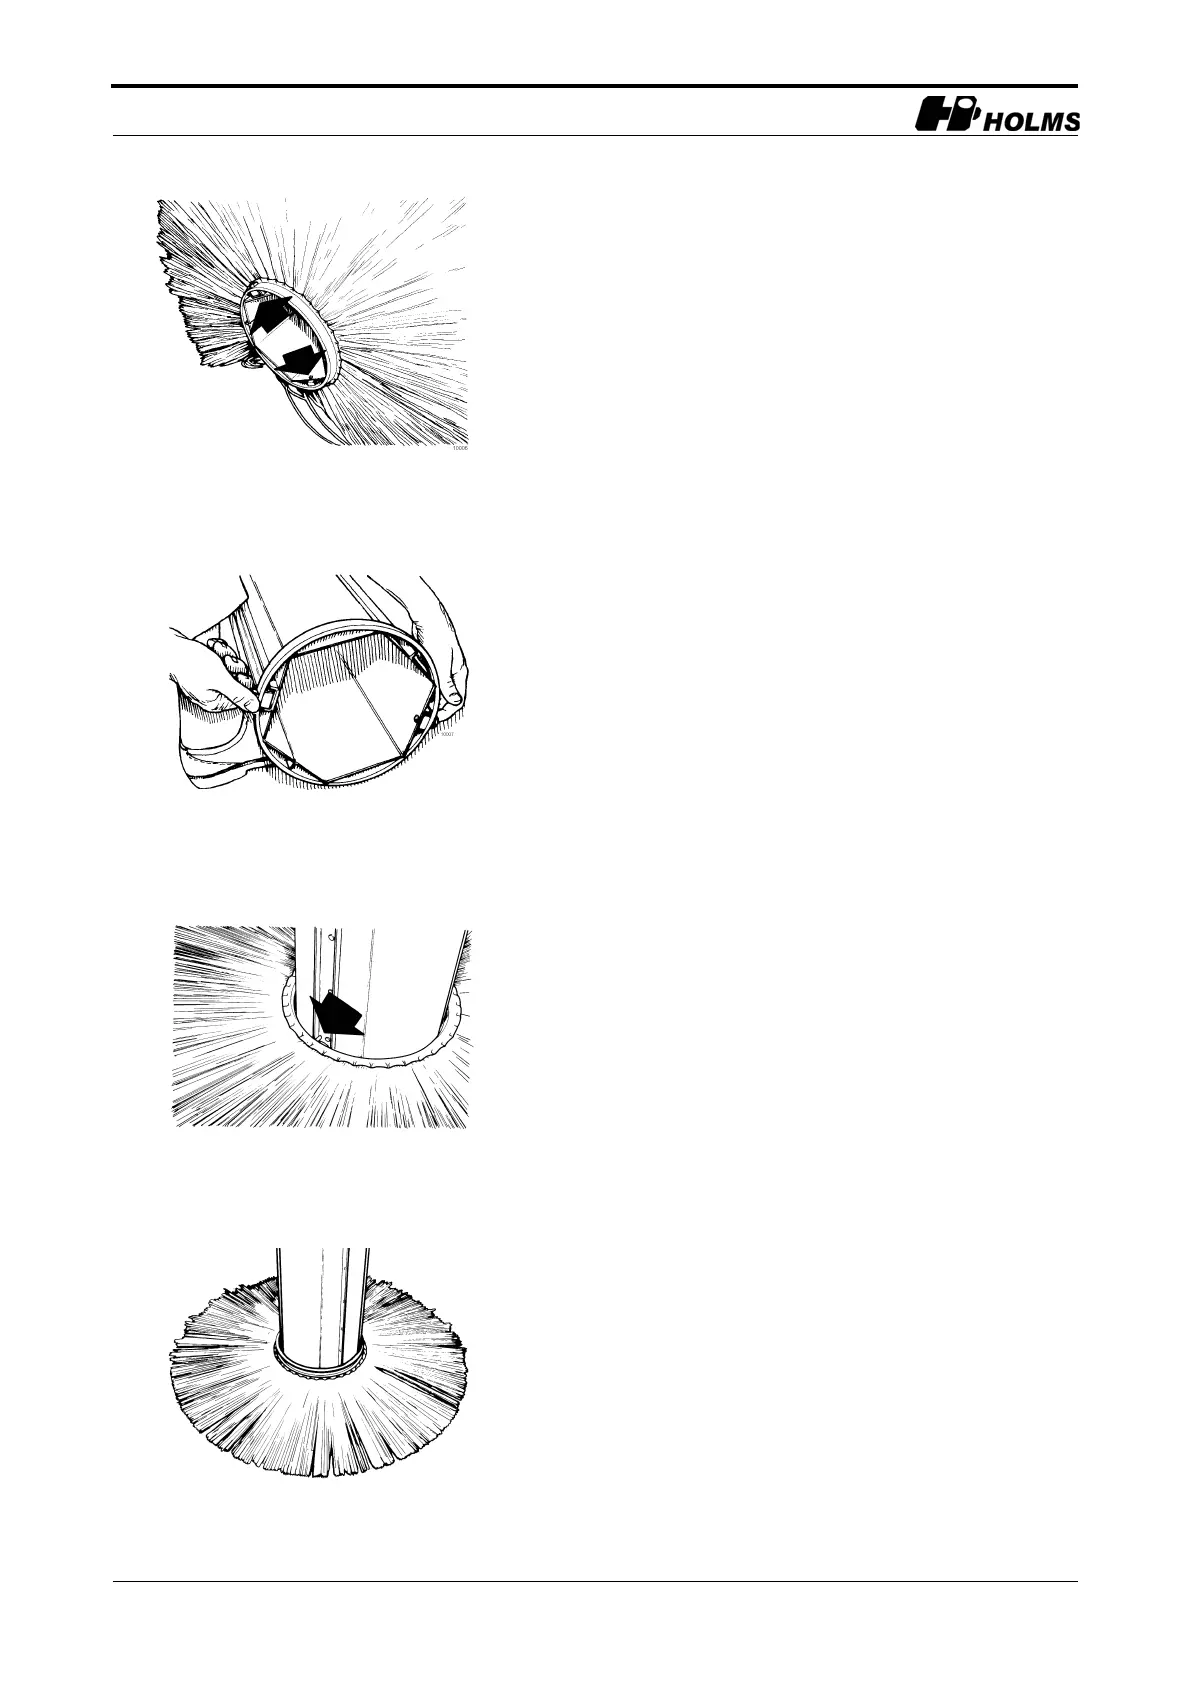
Replacement of brush
1. Undo the screws and remove the brush roller’s
clamping rings.
2. Insert a shackle into the two holes for the fixing
screws in one end of the brush core and feed a lifting
loop through the shackles.
3. Lift the brush roller up on its end using an overhead
crane or similar.
4. Lift the roller away from the floor slightly and remove
the brush and spacer rings from the brush core. Lower
the brush core.
5. Check the core for damage.
6. Attach one of the clamping rings to the brush core, see
figure 15.
7. Lift up the brush core with the clamping ring
downwards.
8. Fit a brush with the brush ring ‘pins’ in the grooves on
the brush core, (figure 16).
9. Fit a spacer ring. See figure 17.
10. Fit alternating brush rings and spacer rings. Note that
the brush rings must be facing 'in opposite directions'
so the result is as shown in figure 18.
11. To ‘cover’ the entire core, a thinner spacer ring or
double brushes without spacer rings may be required
at the end to ensure the correct length.
12. Fit the second clamping ring.
14.Clamping ring fixing screws
16.The clamping ring pin in the
groove on the brush core