Original instructions | English
10
the trigger handle about hip height.
■ Maintain your grip and balance on both feet. Position
yourself so that you will not be drawn off balance by the
kickback reaction of the cutting blade.
■ Adjust the strap hanger to a comfortable position.
■ Exercise extreme caution when using the blade with
the product. Blade thrust is the reaction that may occur
when the spinning blade contacts anything it cannot
cut. This contact may cause the blade to stop for an
instant, and suddenly “thrust” the product away from
the object that was hit. This reaction can be violent
enough to cause the operator to lose control of the
product. Blade thrust may occur without warning if
the blade snags, stalls, or binds. This is more likely to
occur in areas where it is difficult to see the material
being cut. For cutting ease and safety, approach the
weeds being cut from the right to the left. In the event an
unexpected object or woody stock is encountered, this
could minimize the blade thrust reaction.
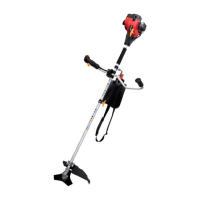
■ When replacing or installing the brushcutter blade,
make sure to make 4.5 turns after finger tight using a
combination wrench to secure the blade.
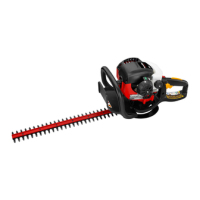
OPERATING THE HEDGE TRIMMER
■ Always hold the hedge trimmer with both hands when
operating. Use a firm grip on the handles. The unit is
used for cutting in either direction in a slow, sweeping
action from side to side.
■ The hedge trimmer should be positioned so that your
body will not come into contact with the silencer or the
power head. Stand so that you are stable and balanced
on both feet.
■ Inspect and clear the area of any hidden objects.
■ Never cut or trim anywhere you cannot clearly see the
entire length of the blades.
■ Never use the hedge trimmer near power lines, fencing,
posts, buildings, or other immovable objects.
■ Never use a blade after hitting a hard object without
first inspecting it for damage. Do not use if any damage
is detected.
OPERATING THE POLE PRUNER
■ Study the condition of the tree and branches before
starting work. If there are signs of damage, rot or decay,
do not attempt to prune yourself. Damaged or rotten
branches are highly unstable. Seek the services of a
professional tree surgeon.
■ Never stand under the branch to be pruned.
■ Pruned branches do not always fall cleanly to the
ground. They are easily caught and deflected by
other foliage. Ensure that a safety zone at least twice
the length of the branch to be cut is available and
maintained during your pruning. If this is not possible,
seek the services of a professional tree surgeon.
■ Ensure that the falling branch is not a danger to
yourself, bystanders or property, including utility cables.
■ Never operate the product with the pole at an angle of
greater than 60° from the horizontal.
■ Never operate the product with the cutting means
closer than 10 m from overhead power lines.
■ Do not force the product, let the chain do the work at
its own speed.
■ Do not try to cut the branch too close to the tree trunk.
Leave about 15 cm from the trunk to the cut.
■ Rest the saw bar on the branch to be pruned and push
the saw gently forwards so that the ribbed bumper also
contacts the branch. This will aid stability, cutting, and
provide cleaner cuts.
■ Small and thin branches that are not heavy can be cut with
one cut using the bottom of the saw bar.
■ Branches with larger diameter and are heavier may
break or split during the cut so the user must make a
first cut from under the branch using the top of the saw
bar. The first cut should be approximately one-third of
the way through the branch and then make a second
cut from above the branch using the bottom of the saw
bar to join the first cut.
■ Consider pruning large branches in manageable
sections rather than as a whole.
■ Never try to restart a previous cut with the chain and
bar in the earlier cut. Always start a new cut. This will
reduce the risk of kickback and potential injury.
CLEANING/REPLACING THE SPARK ARRESTOR
It is recommended to clean or replace the spark arrestor
every 25 hours to ensure proper performance of your
product. Spark arrestors may be in different locations
depending on the model purchased. Please contact your
nearest service dealer for the location of the spark arrestor
for your model.
CHECKING THE FUEL CAP
WARNING
A leaking fuel cap is a fire hazard and must be replaced
immediately.
The fuel cap contains a non-serviceable lter and check
valve. A clogged fuel lter causes poor engine performance.
If performance improves when the fuel cap is loosened,
then the valve may be faulty or the lter may be clogged.
Replace the fuel cap if necessary.

 Loading...
