53
Start-up
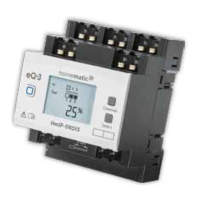
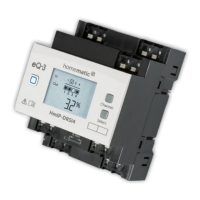
The phase conductor connection is marked with
an arrow pointing to the centre of the device, the
switched phase conductor with an arrow pointing
towards outside. To connect or loosen the
conductor, the white actuation lever at the top of
the clamp has to be pressed (see figure 5).
The network terminals may be used only for
connecting the power supply to the device or for
connecting loads to the device.
The connection
(looping through) of conductors via the network
terminals of the device to other devices is not
permitted!
• Connect external push-buttons or switches to
connecting terminal IN1 to IN3 (E) (see fig. 7):
• Replace the cover of the power distribution panel.
• Switch the fuse of the power circuit on again (see
figure 8) to activate the teach-in mode of the
device (see “5.3 Teaching-in” on page 54).
After installation and before connecting the device
to the app, basic operating functions (e.g. for test
purposes) are available directly on the device (“6
Operation” on page 56).
 Loading...