56
Operation
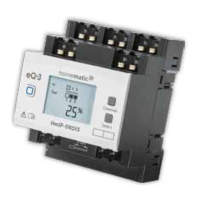
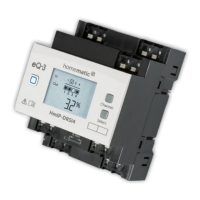
6 Operation
Via the following push-buttons, simple operating
functions are available directly on the device:
• system button (A)
• channel button (B)
• select button (C)
• external push-buttons/switches (E)
System button
By pressing the system button briefly (see figure 10), you
can activate the LCD background light.
Channel button
By pressing the channel button briefly (see figure 11) you
can select the desired channel. With each button press,
you can switch to the next channel.
The selected channel is indicated by the flashing symbol.
The current state of the selected channel (0 or 100 %) is
indicated on the display.
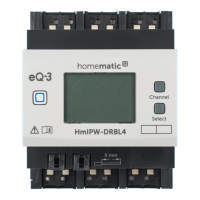
Select button
After selecting a channel via the channel button (see
‘Channel button’), you can select the status of the output
channel by briefly pressing the select button (see figure
12) (e.g. 0 or 100%). With a button press, you can switch
to the next status. For the input channels, pressing the
Select key simulates a short button press for the selected
input channel. Connected actuators can be switched.
 Loading...