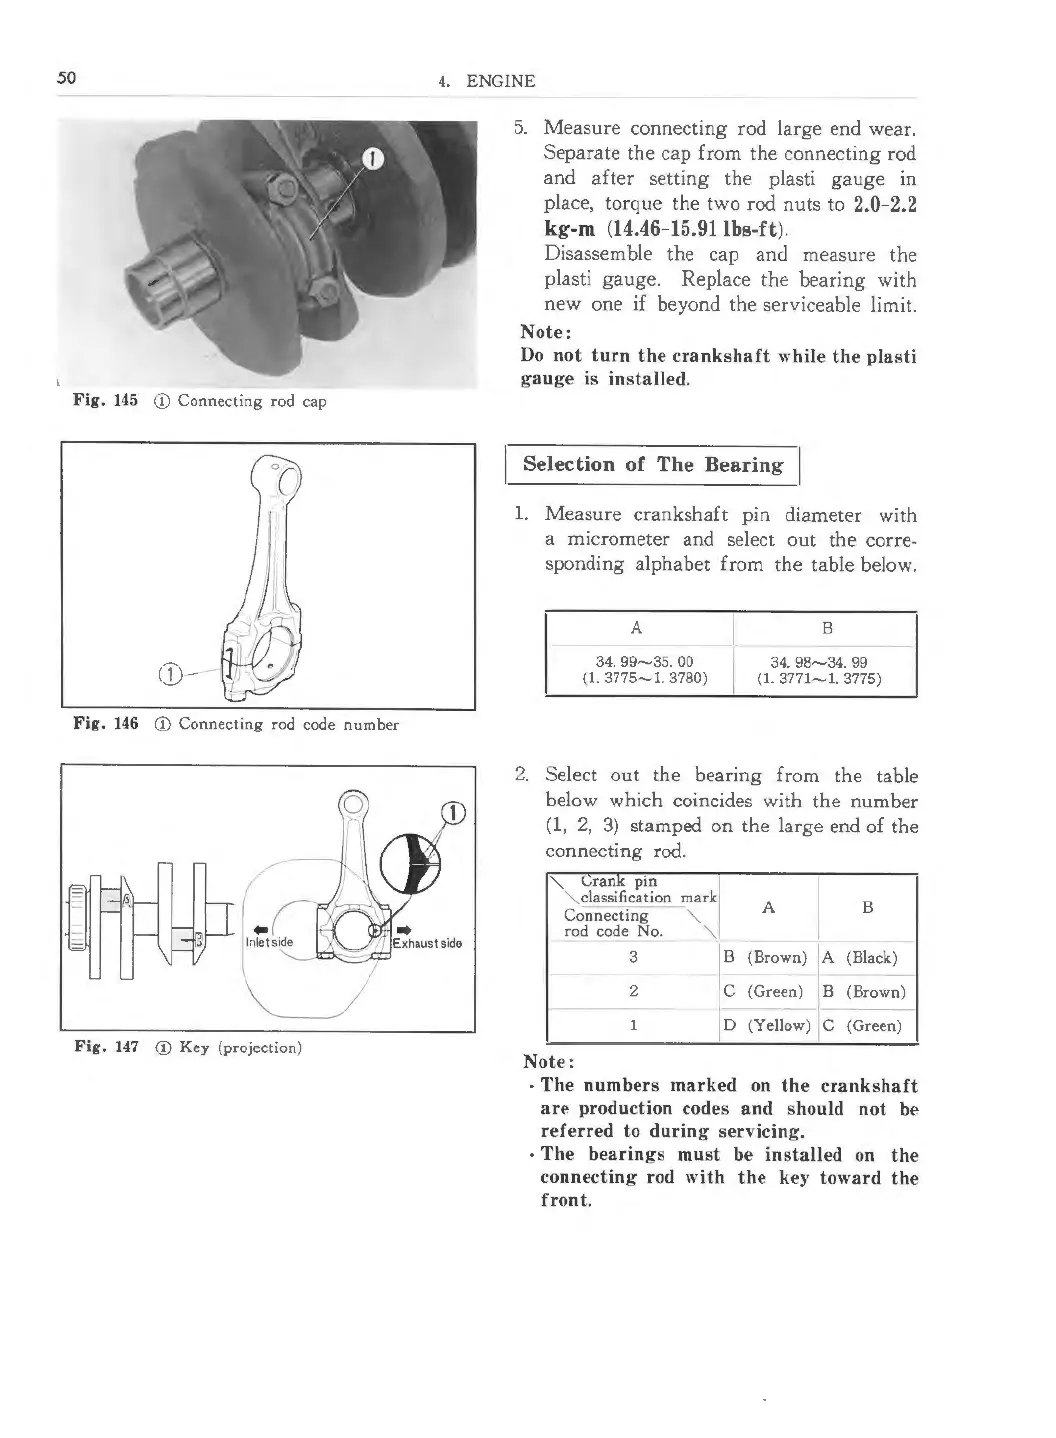
50
Fig . 145 CD Connecting rod cap
CD
Fig. 146 CD Connecting rod code number
(~
Fig . 147 CD Key (projection )
4. ENGINE
5. Measure connecting rod large end wear.
Separate the cap from the connecting rod
and after setting the plasti gauge in
place, torque the two rod nuts to
2.0-2.2
kg-m (14.46-15.91 lbs-ft).
Disassemble the cap and measure the
plasti gauge. Replace the bearing with
new one if beyond the serviceable limit.
Note:
Do not turn the crank shaft while the pla sti
gauge
is install ed.
I Selection of The Bearing I
1. Measure crankshaft pin diameter with
a micrometer and select out the corre-
sponding alphabet from the table below.
A
34.99-35.00
(1.3775-1.3780 )
B
34.98-34.99
(1.3771-1.3775 )
2. Select out the bearing from the table
below which coincides with the number
(1, 2, 3) stamped on the large end of the
connecting rod.
"-.. Crank pin
"-..classification mark
Connecting "-..
rod code No. "-..
3 IB
2 C
1 lo
Note:
A B
(Brown ) -IA (Black)
(Green ) B (Brown)
(Yellow )
le (Green )
· The number s marked on the crankshaft
are production codes and should not be
referr ed to during servicin g.
· The bearin gs must be installed on the
connecting rod with th e key toward th e
front.
 Loading...