EasyManuals Logo

Honeywell Home T6 Pro Installation Instructions

Honeywell Home T6 Pro
40 pages
To Next Page IconTo Next Page
To Previous Page IconTo Previous Page
Page #6 background imageLoading...
Page #6 background image
6
Thermostat mounting
1. Push excess wire back into the wall
opening.
2. Close the UWP door. It should remain
closed without bulging.
3. Align the UWP with the thermostat, and
push gently until the thermostat snaps in
place.
4. Turn the power on at the breaker box or
switch.
Set the time and date
Time
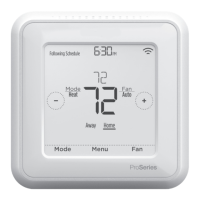
1 Press Menu on your thermostat.
2 Press or to go to TIME. Press Select.
3 Press or to choose between 12 or 24 hour.
Press Select.
4 Use or to adjust the hour. Press Select.
5 Use or to adjust the minutes. Press Select
to exit Time menu.
Date
1 If previously setting time, continue to Step
2. If at the Home screen, press Menu on your
thermostat.
2 Press or to go to DATE. Press Select.
3 Use or to adjust year. Press Select.
4 Use the or to adjust month. Press Select.
5 Use the or to adjust day. Press Select to
save and exit Date menu.

Other manuals for Honeywell Home T6 Pro

Questions and Answers:

Question and Answer IconNeed help?

Do you have a question about the Honeywell Home T6 Pro and is the answer not in the manual?

Honeywell Home T6 Pro Specifications

General IconGeneral
ModelT6 Pro
Temperature ControlPrecise Temperature Control
BacklitYes
Operating ModesHeat, Cool, Auto, Off
Fan ModesAuto, On, Circulate
Weight0.5 lbs
Temperature RangeHeat: 40°F to 90°F, Cool: 50°F to 99°F
Warranty1-Year Limited Warranty
ProgrammableYes
Power SourceBattery or Hardwired
Energy SavingYes
StagesUp to 3 Heat/2 Cool
Smart FeaturesRemote control via app, Geofencing, Alerts
Dimensions4.06 in. H x 4.06 in. W x 1.06 in. D
Change RemindersFilter
DisplayTouchscreen
ConnectivityWi-Fi

Related product manuals