EasyManuals Logo

Honeywell 4820 User Manual

Honeywell 4820
284 pages
To Next Page IconTo Next Page
To Previous Page IconTo Previous Page
Page #257 background imageLoading...
Page #257 background image
14 - 3
Assembling the Battery Charge Sleeve Kit
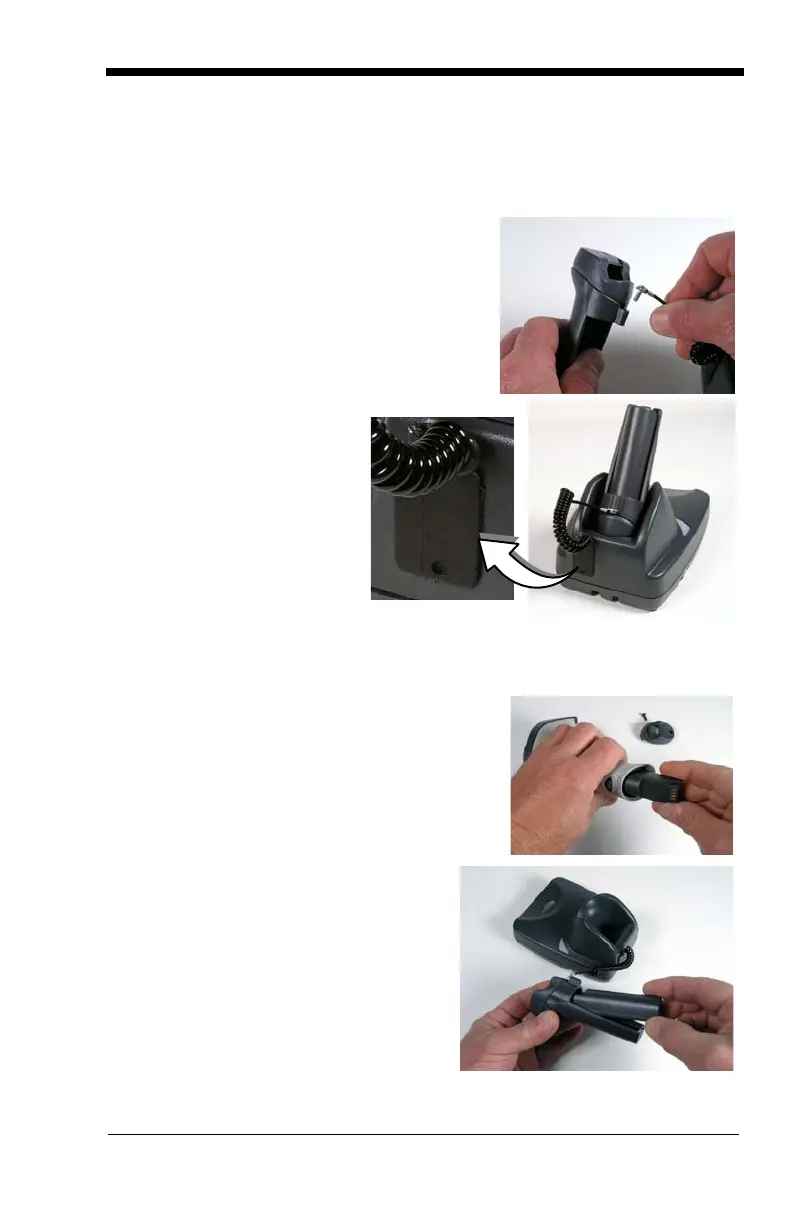
Attach Tether
1. Use the phillips screw to connect the metal
ring of the coiled tether to the battery charge
sleeve.
2. Peel the backing from the
metal plate on the coiled
tether and affix the metal
plate to the back of the
2020 base.
Note: For best adhesion, allow
a 24 hour cure time
before placing stress on
the metal plate.
Remove Battery
Remove the end cap of the image scanner (turn
the thumbwheel or use a hex wrench).
Insert Battery into Charge Sleeve
1. Place the squared-off end of the battery
into the sleeve and slide it until it stops.
The battery contacts should be show-
ing through the small rectangular open-
ing in the battery sleeve.
2. Press other end of the battery until you
feel a click.

Table of Contents

Other manuals for Honeywell 4820

Questions and Answers:

Question and Answer IconNeed help?

Do you have a question about the Honeywell 4820 and is the answer not in the manual?

Honeywell 4820 Specifications

General IconGeneral
Wavelength617 nm
Optical sensor resolution752 pixels
BluetoothYes
Standard interfacesUSB
Battery typeLithium Ion
Input voltage3.7 V
CertificationFCC Part 15, RSS-210, CE, GS, NOM-NYCE, COFETEL, C-Tick
Product colorBlack, Grey
Storage temperature (T-T)-40 - 60 °C
Operating temperature (T-T)0 - 50 °C
Operating relative humidity (H-H)0 - 95 %
Weight and Dimensions IconWeight and Dimensions
Weight255 g

Related product manuals