3
SPECIFICATIONS
• Ventilates roof area up to 450 sq. ft.
• Motor: 24 Volt
• Solar panel: 6 W
• Material: Galvanized and powder coated metal components
PARTS, TOOLS & SUPPLIES
PARTS
TOOLS REQUIRED
• Safety glasses
• Work gloves
• Extension ladder
• Permanent marker
• Utility knife
• Tape measure
• Hammer
• Screw driver
• Drill (1/2" drill bit)
• Reciprocating or jig saw
• Caulking gun
SUPPLIES REQUIRED
• Siliconeorwaterproofroongsealant
• Four (4) self tapping screws or nails
LOCATION
1. Solar fans get 100% of their operational power from the
sun, therefore the solar panel needs to be exposed to as much
sunlight as possible. South exposure is best. If a southern exposure
is not possible, look for another sunny exposure for your installation.
The solar panel can also be adjusted to capture maximum available
sunlight.
Avoid potential problems such as trees and other buildings shading
the unit during certain times of the day. Avoid installing near a wall,
chimney or any building section that is positioned higher than the
solar fan. There should be a minimum of 48" between the solar fan
and any possible obstruction.
ORIGINAL INSTALLATION
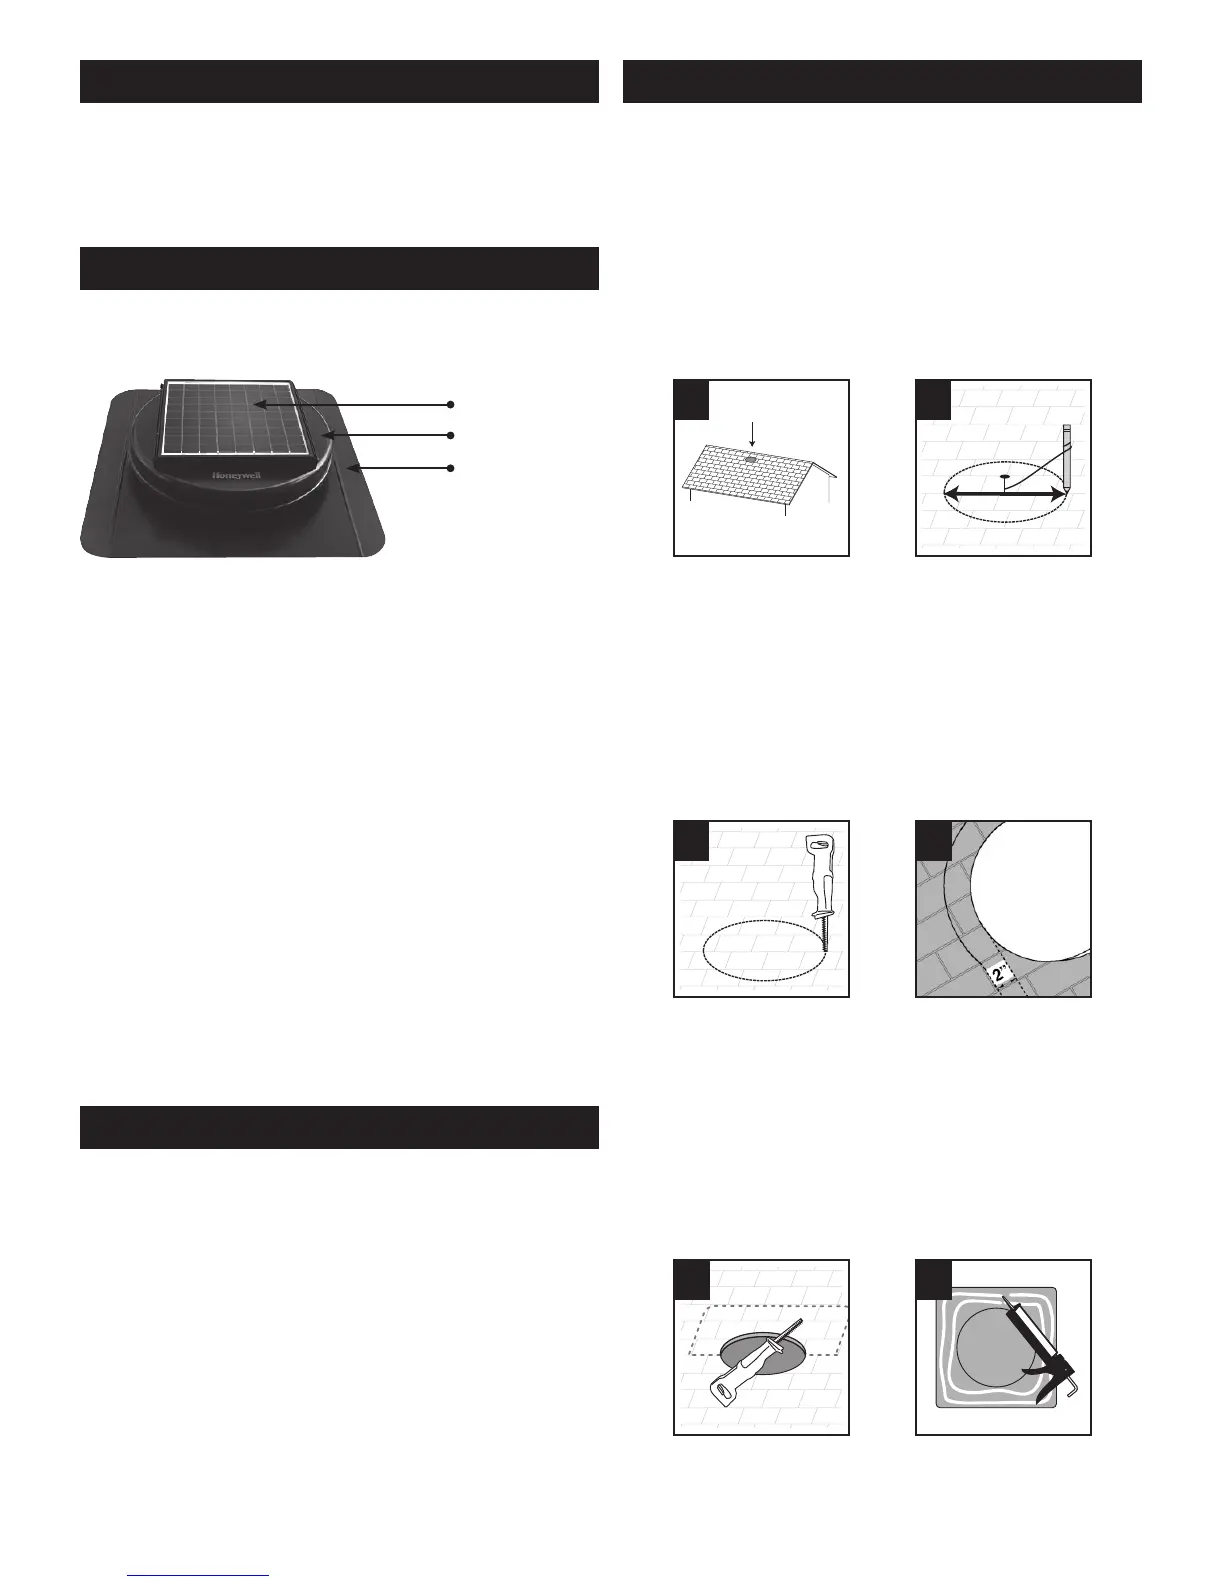
2. From inside the attic, measure down from the roof peak 24" and
mark a spot centered between two rafters. Drill a 3" screw through
this point into the plywood and roof shingle so it will be visible when
you are on the roof. If you are installing multiple fans - be sure to
separate fans by at least a distance of 10 ft.
Once on the roof, locate the screw and attach a string to it. Attach
a pen to the other end of the string and adjust the string length to
3". Mark a 6" diameter circle onto the roof shingles. IMPORTANT:
THESOLARFANMUSTBEINSTALLEDBETWEENTHEROOF
RAFTERS. DO NOT CUT THROUGH ANY ROOF RAFTERS.
1
6
"
2
3. Using a power drill equipped with a 1/2" drill bit make a pilot hole
on the circle. Then using a reciprocating saw, cut the hole. Use a
hammer to clear away any remaining pieces of wood and shingle
from the hole after cutting. NEVER CUT THROUGH ANY ROOF
RAFTERS. REMOVE ONLY ROOF SHEATHING.
4. With a utility knife, cut away the shingles an additional 2 inches
around the 6 inch hole you have cut. Remove any nails and staples
fromthisareasoashingwillbeabletoslideintopositioneasily.
3
4
5. Youwillneedtocutorremovetheroongnailslocated5"above
andtoeachsideoftheholetomakeroomfortheashingtoslide
between the felt paper and the shingles. Insert the reciprocating saw
blade sideways into one of the slits cut previously, then cut up and
around the entire area that will be covered by the footprint of the
upperhalfoftheashing.
6. Apply a continuous bead of roof sealant to the underside perimeter
of the solar fan.
5
6
Solar panel
Fan/fan housing
Flashing
 Loading...