4
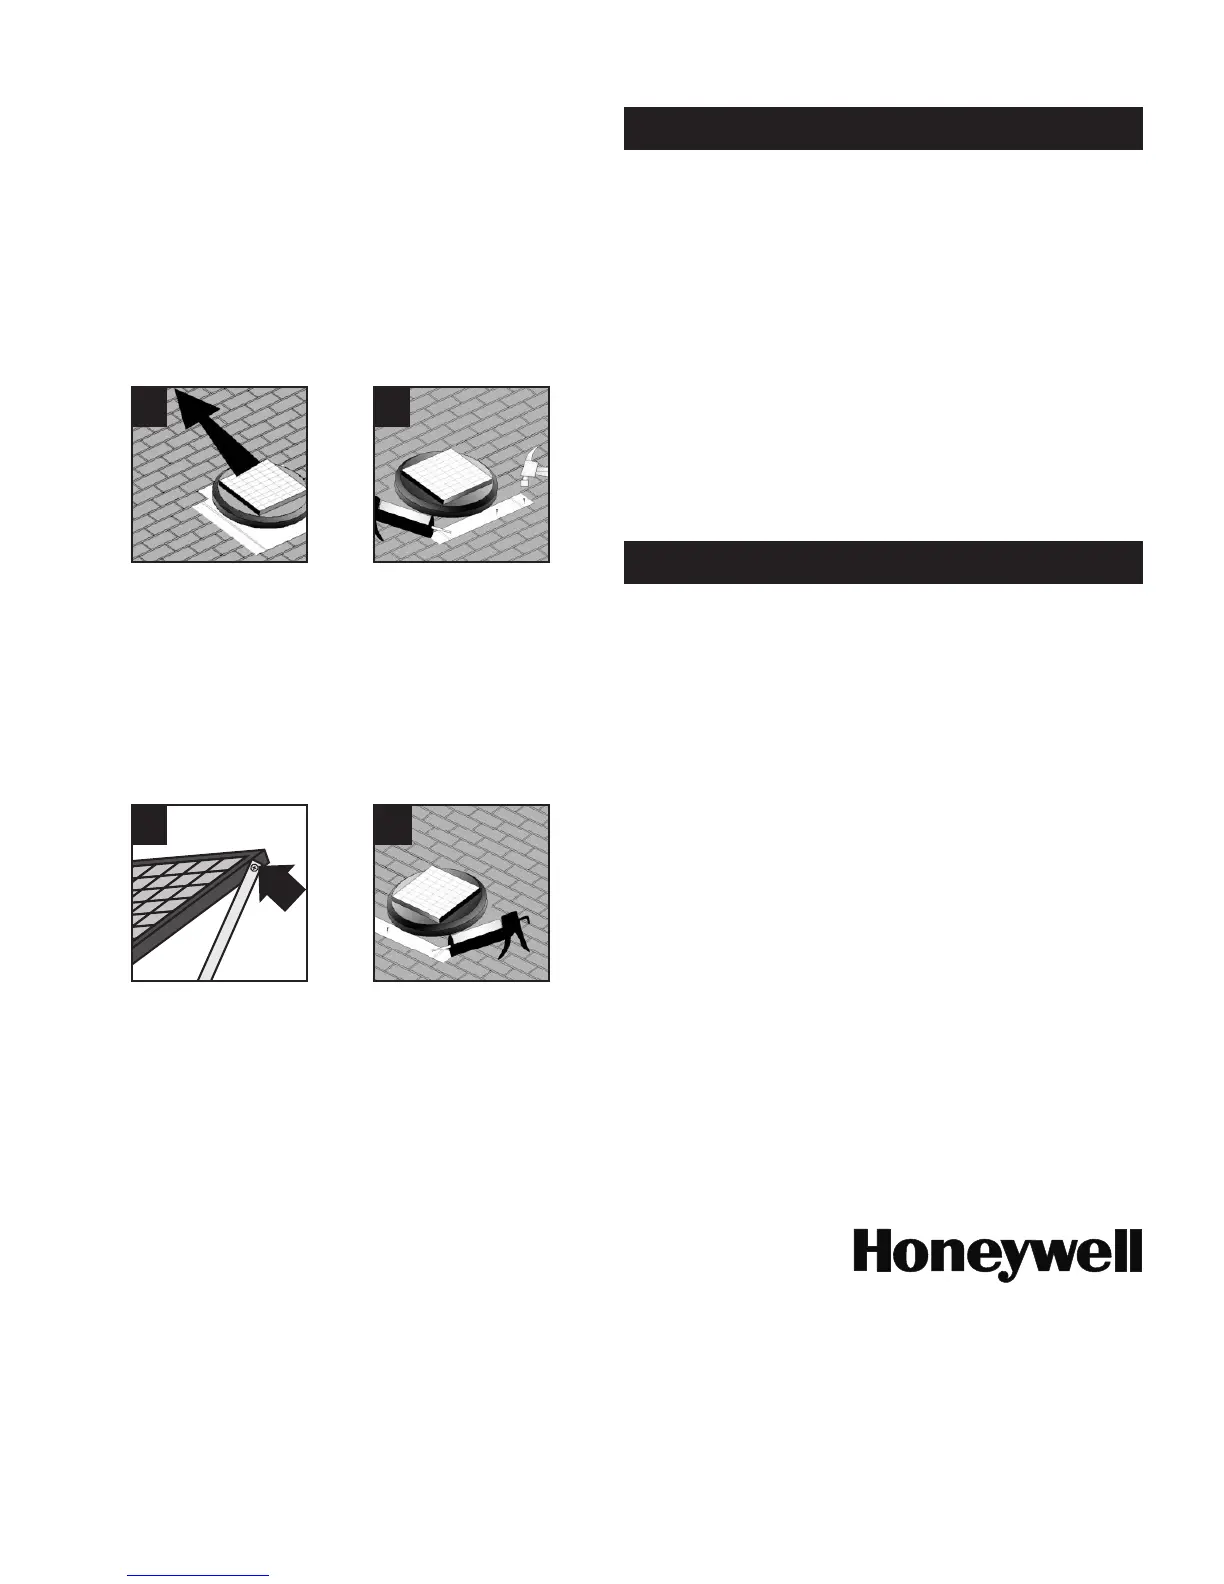
7. Turnthesolarfanrightsideupandslidetheashingmarked“UP”
throughtheslitsyoucutpreviously.Pushtheashingunderthe
shingles (but over the felt paper) until the fan is centered over the
hole. (Do not smear caulk on the exposed shingles). The lower part
oftheashingshouldsitontopoftheroofshingles.
8. Using4roongnails,securethesolarfantotheroof.Thesolarfan
shouldbesecuredacrossthebottomoftheashing.
Applywaterproofroongsealanttothenailheads.Usemore
roongnailsasneededtosecureanylooseshingles.Alwaysapply
waterproofroongsealanttothebacksideofanylooseshinglesor
nails heads that have been added.
7
8
9. Loosen the screw on the clip/screw assembly located on each side
of the solar panel bracket. Adjust the solar panel to a position that
will collect the most sunlight throughout the day. Tighten screws at
the desired position.
10.Toensurewatertightness,roongcaulkingmustbeusedtoseal
between all the edges of the base and the roof, especially bottom
and side areas of base not covered by shingles.
10
9
REPLACE AN EXISTING VENT
This solar fan is ideal for replacement of an existing static
vent provided the original attic vent has a similarly sized footprint.
This product requires a roof opening of 6" diameter.
The position of the existing vent also needs to be in a suitable
location.Conrmcorrectlocationinsection1oftheoriginal
installation instructions.
1. Beginbyremovingtheexistingatticvent.Pullbackanyshingles
surrounding the base. Save shingles for reuse. Remove any screws
ornailsthathavebeenusedtofastentheatticventtotheroong
substrate. Clean the substrate area of any old cement, caulking
or glue or other debris to ensure a tight seal for the new solar attic
fan base.
2. After removal as described above, follow the installation instructions
starting in section 6.
CLEANING
Clean the surface of the solar panel with soap and water periodically.
The Honeywell Trademark is under licence from Honeywell International Inc.
Honeywell International Inc. makes no representations or warranties with respect to this product.
Manufactured by
Quality Craft Ltd.
Laval, Quebec
Canada H7S 2G7
www.qualitycraft.com
(800) 459-4409
Made in China
 Loading...