T7350 COMMERCIAL PROGRAMMABLE THERMOSTAT
62-0195—04 4
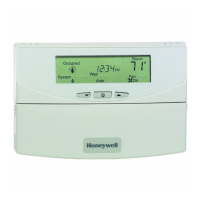
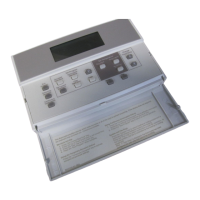
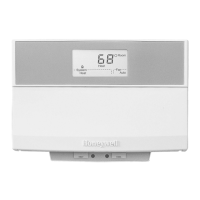
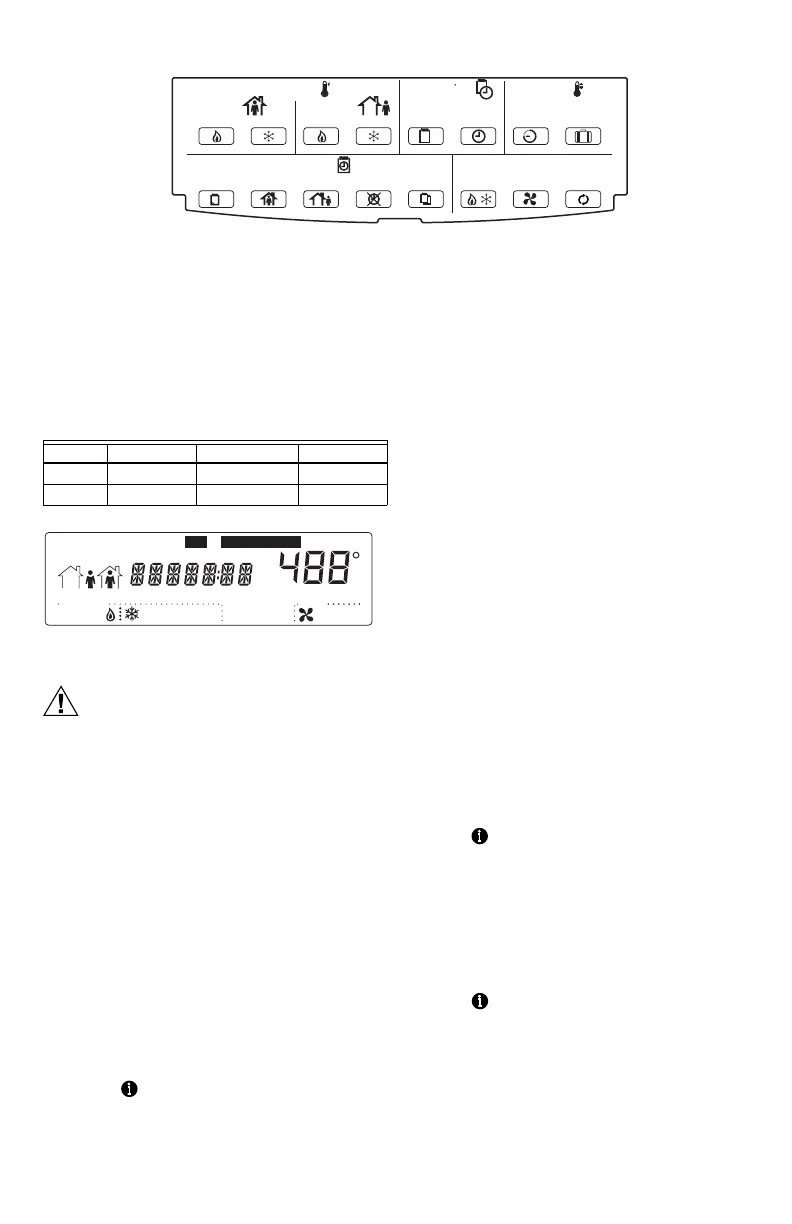
Fig. 5. Thermostat key locations.
INSTALLER SETUP
For most applications, the thermostat factory settings do
not need to be changed. Review the factory settings in
Table 2.
NOTE: When power is first applied to the thermostat, the
display will show all segments (see Fig. 6).
Table 2. Default Setpoints.
Fig. 6. LCD display of all segments.
CAUTION
Possible Equipment Damage.
Fan must be running when system is
operating.
Heat pump and electric heat systems must be
configured correctly to prevent equipment damage
caused by the system running without the fan.
Setup Using Keypad
The installer uses the Installer Setup to customize the
thermostat to specific systems. For basic setup functions,
the thermostat can be configured using the keypad.
NOTE: The T7350 has serial communications to
facilitate use of an installer configuration tool.
More advanced features are available using this
tool. (Refer to form 63-2605 for details.)
A combination of key presses are required to use the
Installer Setup feature:
1. To enter the Installer Setup, press and hold both the
Run Schedule and the Copy keys until DEG F (or
DEG C) displays.
2. To advance to the next Installer Setup number,
press .
NOTE: Pressing Run/Copy again while in this
mode displays the T7350 firmware version
number.
3. To return to a Setup item, cycle through the options.
4. To change a setting, use the up S or down T key.
5. To exit the Installer Setup, press Run Schedule.
6. Display prompts SAV CFG (save configuration).
a. If you want to save the new configuration, use
the up S or down T key to change NO to YES
before pressing Run Schedule.
b. If you want the configuration to remain as it was
before starting this change, ensure the
display indicates SAV CFG NO and press Run
Schedule.
NOTE: Installer Setup is automatically exited after five
minutes with no key pressed. Upon this auto-
matic exit, all changes are lost.
Configuration
Limited configuration can be done with the keypad using
the Configuration ID. In order to determine the proper
codes to use for the Configuration Variables (CnfgID).
NOTE: Spreadsheets of the CnfgID values are available
online at http://customer.honeywell.com
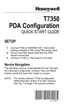
The PDA T7350 Configuration Tool or the PC Tool
LonSpec can also be used as follows:
1. Open the PDA Config Tool Application.
2. Select the desired configuration.
3. On the summary screen, tap CnfgID.
4. The PDA determines the proper CnfgID.
5. Make note of the values.
6. Press both Copy and Run Schedule.
7. Tap until C1 appears on the right end of the dis-
play.
NOTE: While stepping toward C1, check other
items to ensure they are set properly. See
Setup Using Keypad section.
8. To adjust each variable to match PDA indication:
a. Hold down the up S or down T key to adjust
the value quickly.
b. Tap the up S or down T key for fine control.
9. Tap to switch to another variable.
10. Return to step 8 and repeat the process until all
configuration values are set properly.
11. To exit the Installer Setup, press Run Schedule.
System Fan
Run
Schedule
CopyNot OccupiedOccupiedDay
Clear
Start Time
Day Time
Temperature
Temporary
Occupied
Override
HEAT HEATCOOL COOL
HEAT COOL
ON AUTO
Schedule
Set Day/Time
Occupied
Not Occupied
Tempora ry
Not Occupied
M19610
Control Occupied Not Occupied Standby
Heating 70°F (21°C) 55°F (13°C) 67°F (19°C)
Cooling 75°F (24°C) 85°F (29°C) 78°F (26°C)
Temporary Standby
StartTime
M19611
Not Occupied12
System
EmHeat Off CoolAuto
MonTueWedThuFri
AM
PM
SatSunHol
Dehumid OnAuto
MinsDays
Room
Fan
%
Set ScheduleSet

 Loading...