Check
Source Output
Po
wer
1.
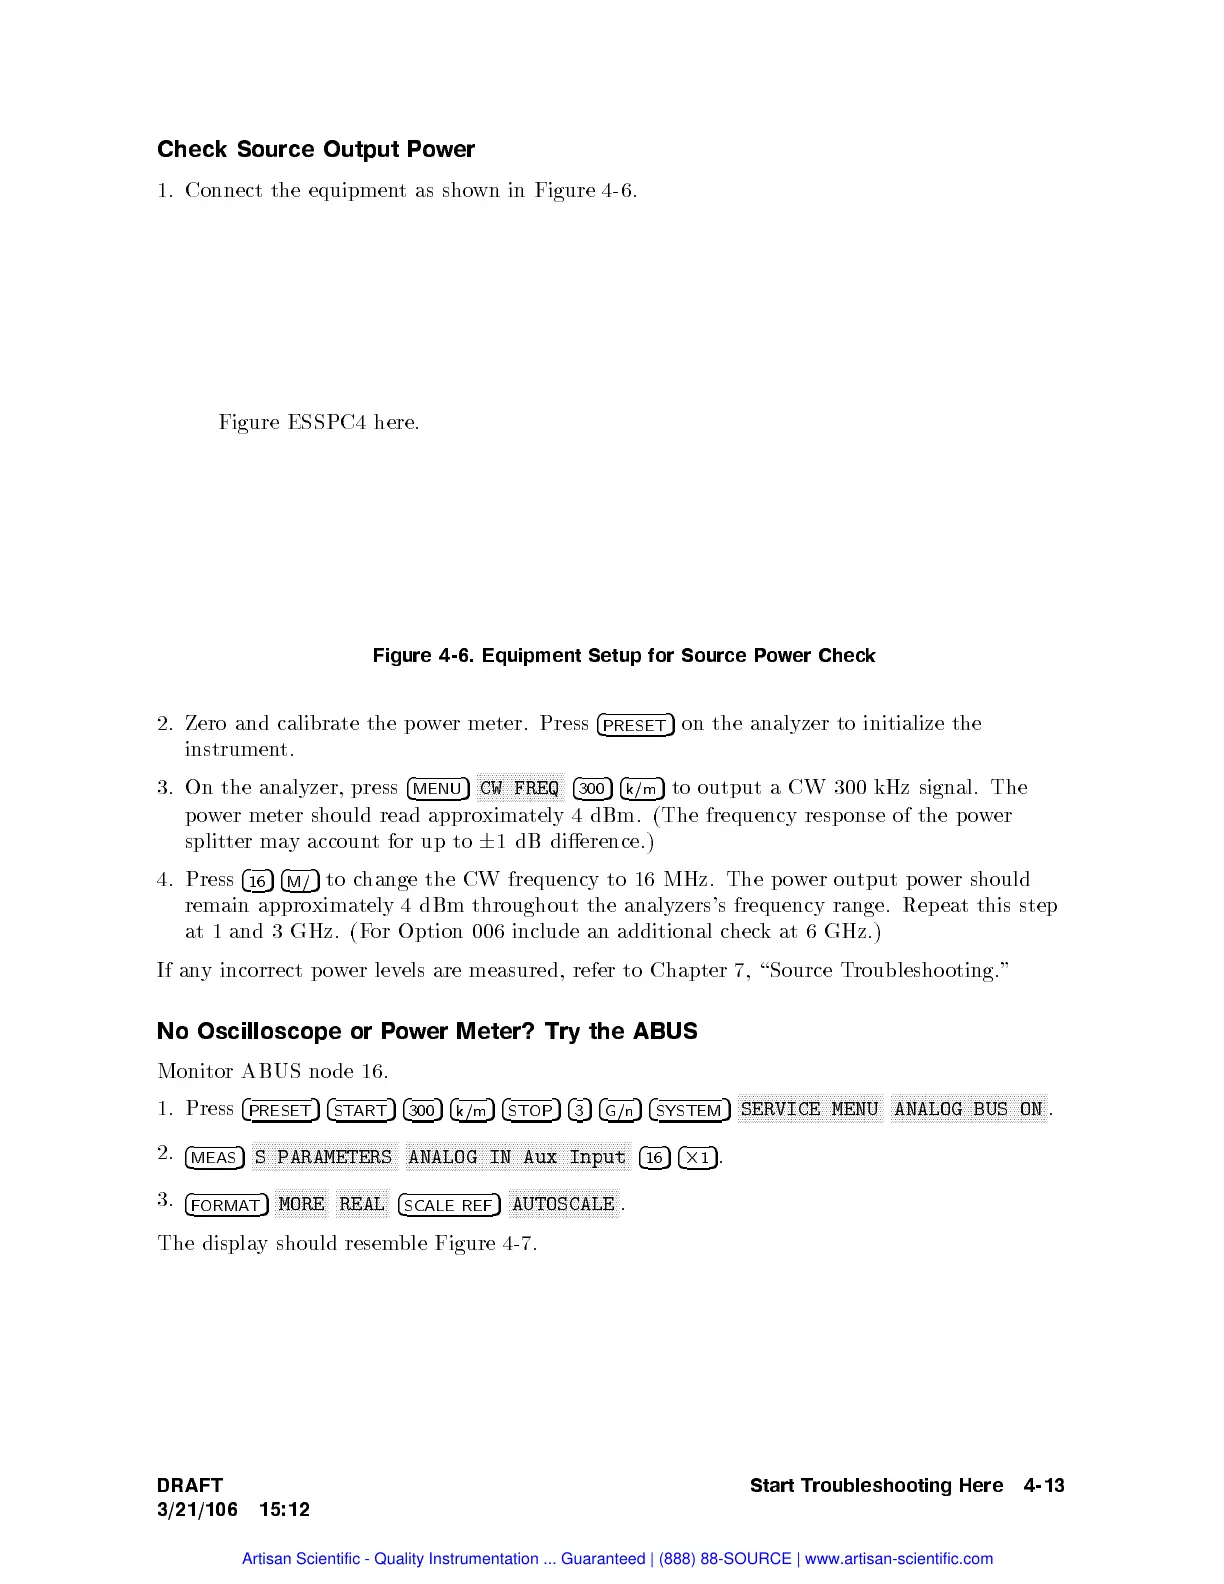
Connect
the
equipmen
t
as
sho
wn
in Figure
4-6.
Figure ESSPC4
here.
Figure
4-6.
Equipment
Setup
for
Source
Po
wer
Check
2.
Zero
and
calibrate
the
p
o
w
er
meter.
Press
4
PRESET
5
on
the
analyzer
to
initialize
the
instrumen
t.
3.
On
the
analyzer, press
4
MENU
5
N
N
N
N
N
N
N
N
N
N
N
N
N
N
N
NN
N
N
N
N
N
N
CW
FREQ
4
300
5
4
k/m
5
to
output
aCW
300
kHz
signal.
The
p
ow
er
meter
should
read
appro
ximately
4
dBm.
(The
frequency
resp
onse
of
the
p
o
w
er
splitter
ma
y
accoun
t
for
up
to
6
1
dB
dierence.)
4.
Press
4
16
5
4
M/
5
to
c
hange
the
CW
frequency
to
16
MHz.
The
p
o
w
er
output p
ow
er
should
remain
appro
ximately
4
dBm
throughout
the
analyzers's
frequency
range.
Rep
eat
this
step
at
1
and 3
GHz. (F
or Option
006 include
an
additional
c
hec
k
at
6
GHz.)
If
an
y incorrect
po
wer
lev
els
are
measured,
refer
to
Chapter
7,
\Source
T
roublesho
oting."
No
Oscilloscope
or
P
o
w
er
Meter?
Try
the ABUS
Monitor
ABUS
no
de
16.
1. Press
4
PRESET
54
START
54
300
54
k/m
54
STOP
54
3
54
G/n
54
SYSTEM
5
NNNNNNNNNNNNNNNNNNNNN
NNNNNNNNNNNNNNNNN
SERVICE MENU
NNNNNNNNNNNNNNNNNNNNN
NNNNNNNNNNNNNNNNNNNN
ANALOG BUS ON
.
2.
4
MEAS
5
NNNNNNN
NNNNNNNNNNNNNNNNNNNNNNNNN
NNNNNN
S PARAMETERS
NNNNNNN
NNNNNNNNNNNNNNNNNNNNNNNNN
NNNNNNNNNNNNNNNNNNNNNNNNN
NN
ANALOG IN Aux Input
4
16
54
2
1
5
.
3.
4
FORMAT
5
N
NNNNNNNNNNNNN
MORE
N
NNNNNNNNNNNNN
REAL
4
SCALE REF
5
N
NNNNNNNNNNNNNNNNNNNNNNNNN
NNN
AUTOSCALE
.
The displa
y should resem
ble Figure
4-7.
DRAFT
3/21/106 15:12
Start Troubleshooting Here 4-13
Artisan Scientific - Quality Instrumentation ... Guaranteed | (888) 88-SOURCE | www.artisan-scientific.com
 Loading...


