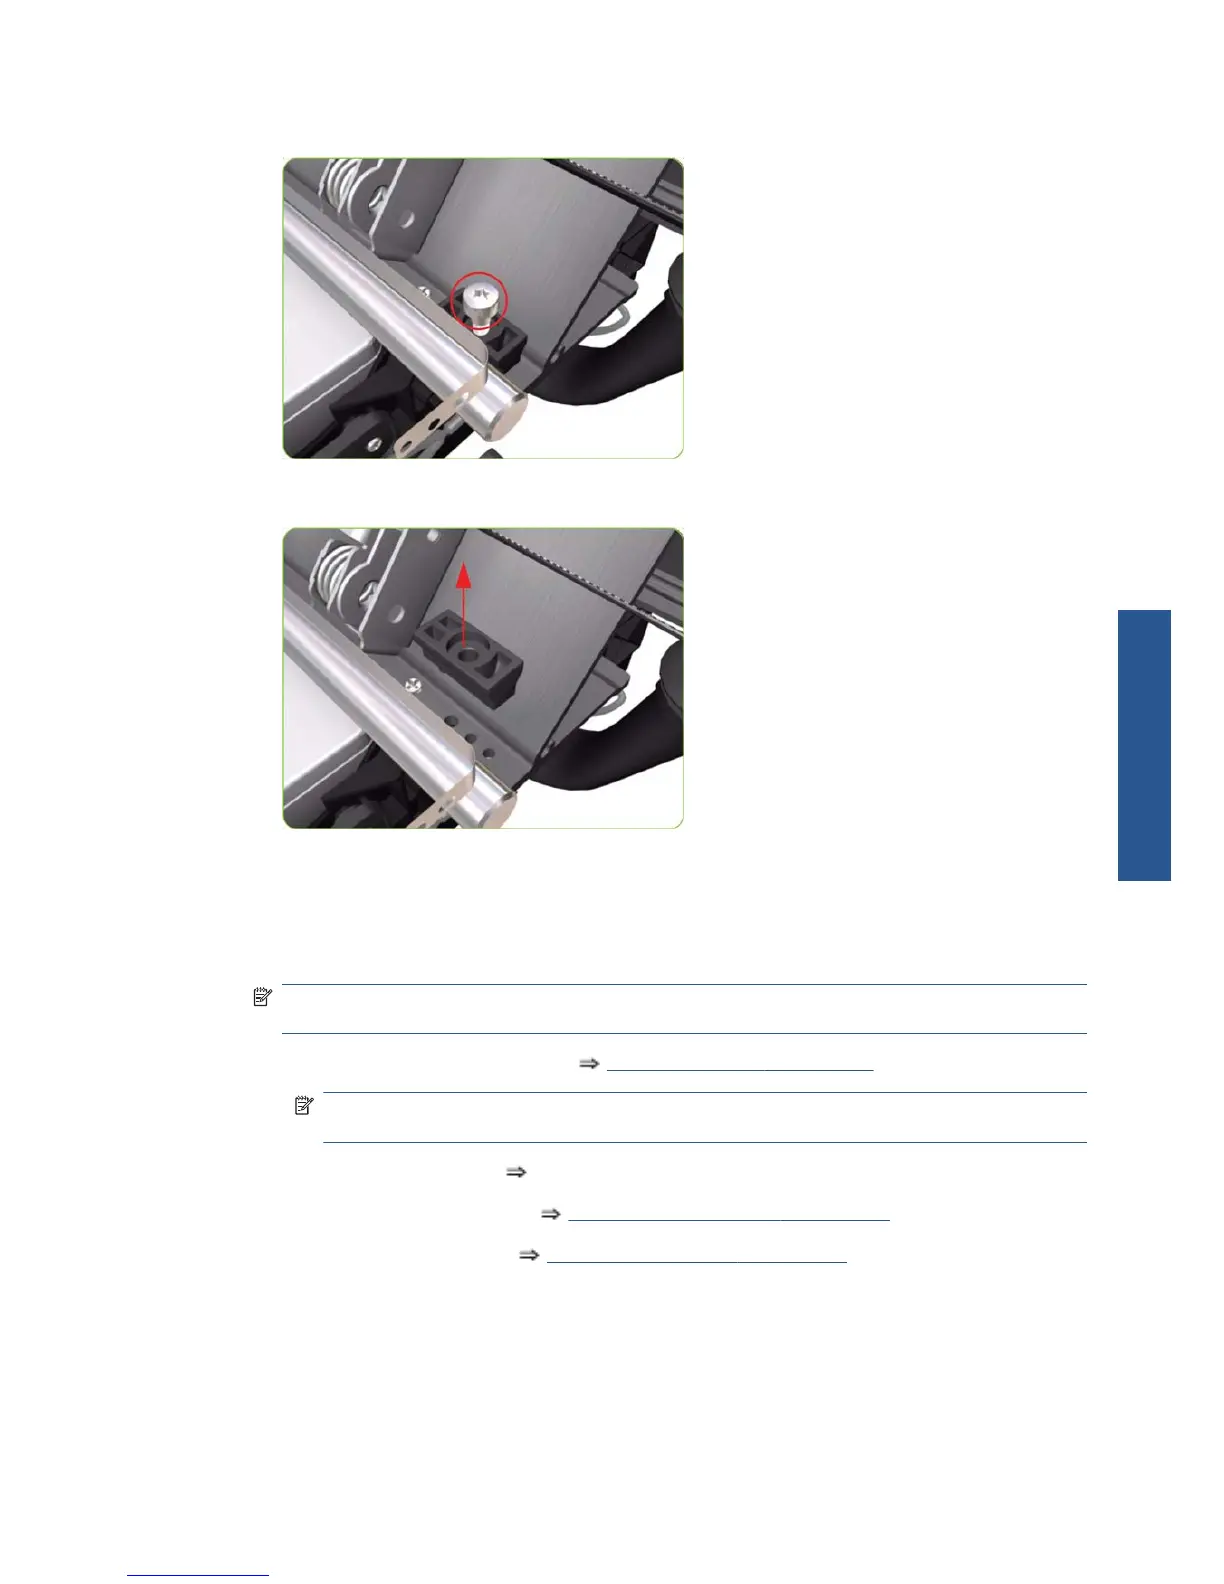
22. Remove the Carriage Stopper Screw (T-20) from the Chassis.
23. Remove the Carriage Stopper from the printer.
24. Slide the Carriage Assembly (including the belt) to the right and out of the printer.
25. If the Carriage Assembly is to be replaced, make sure that you remove the Belt, the Carriage PCA,
ESP, Encoder and Line Sensors and the Cutter Assembly (in order to install them on the new
Carriage Assembly).
NOTE: After installing the NEW Carriage Assembly, make sure you perform the following
Service Utility:
●
Reset life counter Carriage ME
Reset Life Counters on page 108.
NOTE: After installing the new Carriage Assembly, make sure you perform the following
Service Calibrations:
●
Scan-Axis Calibration
????.
●
Drop Detector Calibration
Drop Detector calibration on page 129.
●
Line Sensor Calibration
Line Sensor calibration on page 131.
ENWW
Disassembly order
307
Removal and
installation
 Loading...
