EasyManuals Logo

HP Elite Dragonfly Max User Manual

HP Elite Dragonfly Max
84 pages
To Next Page IconTo Next Page
To Previous Page IconTo Previous Page
Page #41 background imageLoading...
Page #41 background image
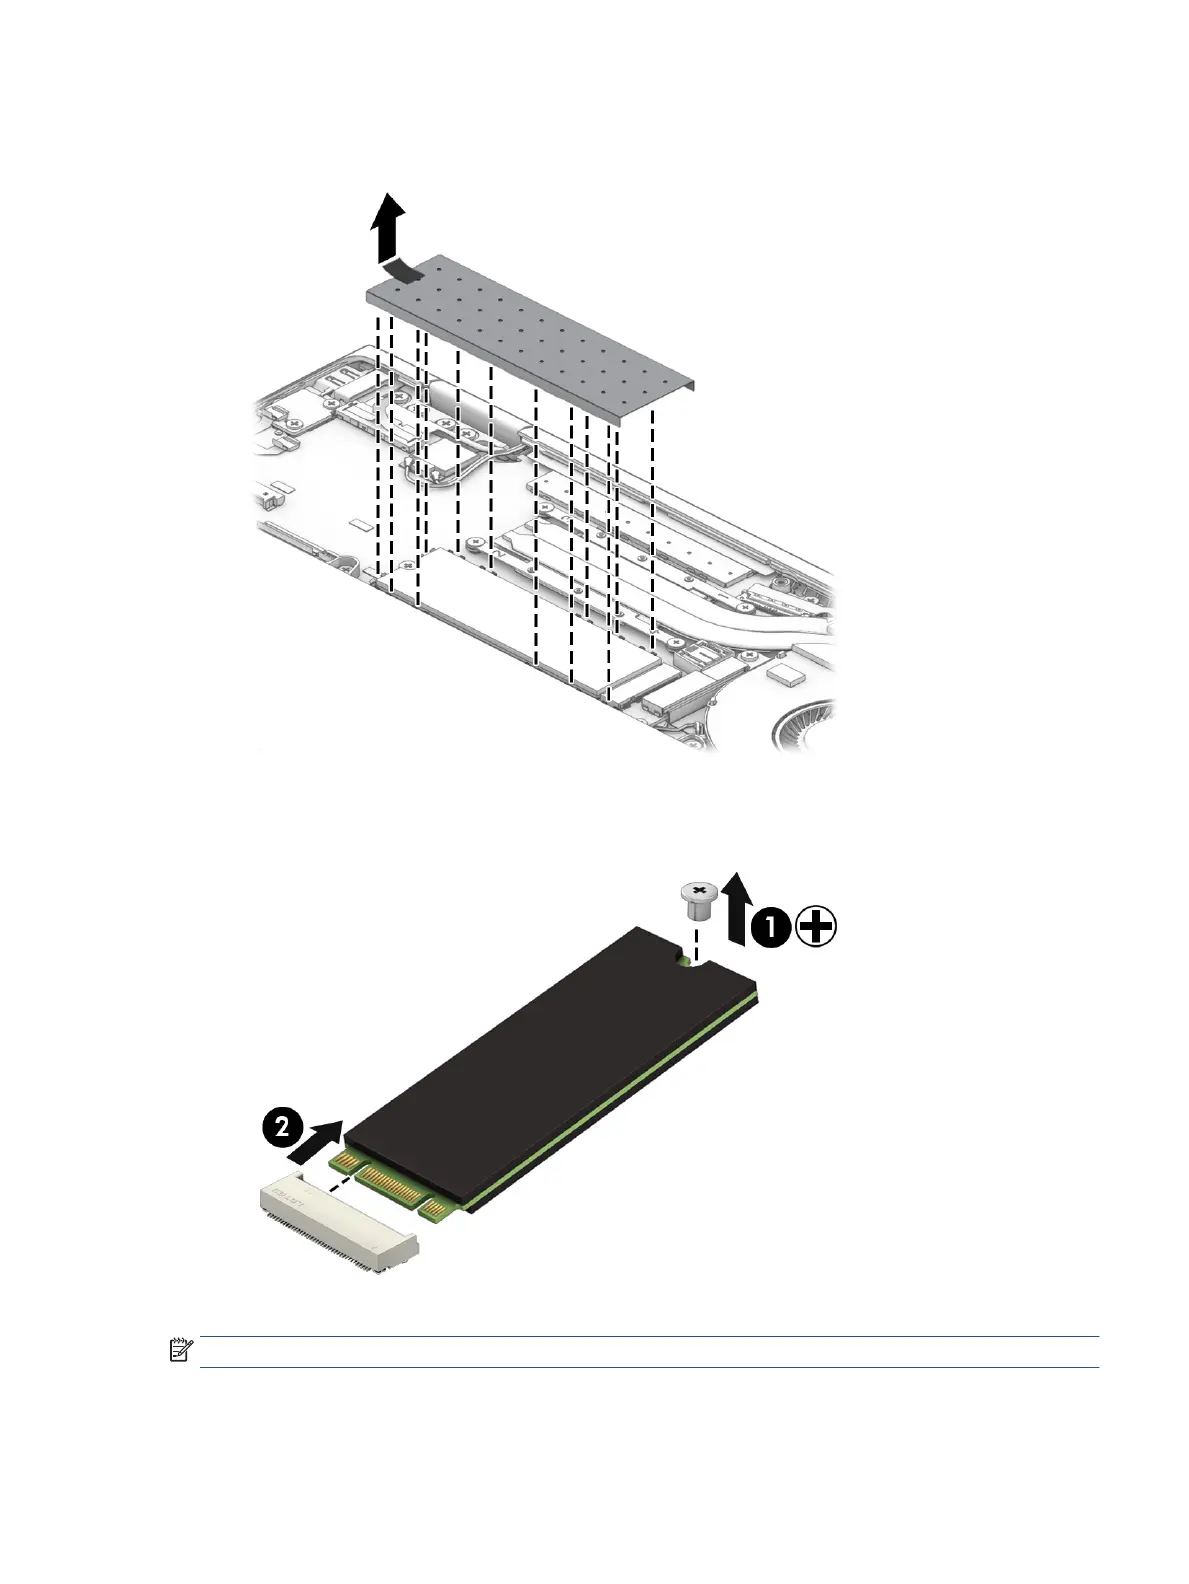
1. Use the tab to lift the metal cover from the solid-state drive.
2. Remove the Phillips M2.0 × 2.5 screw (1) that secures the drive to the computer.
3. Pull the drive away from the socket to remove it (2).
To install the solid-state drive, reverse the removal procedures.
NOTE: Solid-state drives are designed with a notch to prevent incorrect insertion.
When replacing the cover over the solid-state drive, position the cover over the drive (1), and the insert the
edges of the cover into the clips (2) that secure it to the system board.
Component replacement procedures 33

Table of Contents

Questions and Answers:

Question and Answer IconNeed help?

Do you have a question about the HP Elite Dragonfly Max and is the answer not in the manual?

HP Elite Dragonfly Max Specifications

General IconGeneral
StorageUp to 2 TB PCIe NVMe SSD
GraphicsIntel Iris Xe Graphics
ProcessorIntel Core i5-1135G7 or i7-1185G7
Display1920 x 1080
RAMUp to 32GB LPDDR4x
Operating SystemWindows 10 Pro
WeightStarting at 2.49 lb (1.13 kg)
Battery4-cell, 56 Wh Li-ion polymer
CameraIR camera
AudioBang & Olufsen
Dimensions1.61 cm
Ports1 x HDMI 2.0, 1 x headphone/mic combo
WirelessIntel Wi-Fi 6 AX201 (2x2) and Bluetooth 5 combo
SecurityHP Sure Sense, HP Sure Click, HP Sure Start

Related product manuals