Do you have a question about the HP StorageWorks EVA8000 and is the answer not in the manual?
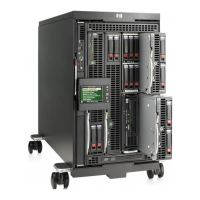
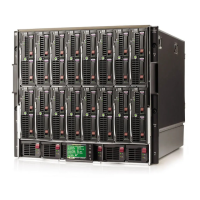
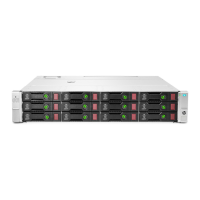
This document outlines the disassembly instructions for HP Storage Enclosures, specifically the EVA8000, EVA8100, EVA4000, EVA6000, EVA4100, and EVA6100 models, identified by part numbers 70-41138-01, 70-41138-11, 70-41138-02, and 70-41138-12. The primary function of these devices is to provide robust storage solutions, serving as a critical component in data management infrastructure. These enclosures are designed to house various components necessary for data storage and processing, ensuring reliable operation within a server environment. The instructions are tailored for end-of-life recyclers and treatment facilities, focusing on the selective removal of specific components and materials in accordance with the EU directive 2002/96/EC on Waste Electrical and Electronic Equipment (WEEE).
The disassembly process emphasizes the removal of items requiring selective treatment, which include printed circuit boards (PCBs) or printed circuit assemblies (PCAs) with a surface area greater than 10 sq cm. For Model #1, there are 18 such PCBs/PCAs, while Model #2 contains 16. Batteries of all types, including standard alkaline, lithium coin, or button-style batteries, also require selective treatment. Model #1 includes 12 batteries, and Model #2 has 6. The document explicitly states that mercury-containing components, such as those found in lamps, display backlights, scanner lamps, switches, or batteries, are not present in these models, with a quantity of 0. Similarly, liquid crystal displays (LCDs) with a surface greater than 100 sq cm, including those with background illumination from gas discharge lamps, are not found in these enclosures, also with a quantity of 0. Cathode ray tubes (CRTs) are likewise absent, with a quantity of 0. Capacitors or condensers containing PCB/PCT are not present, showing a quantity of 0. However, electrolytic capacitors or condensers measuring greater than 2.5 cm in diameter or height are present, though specific quantities are not provided in the initial table for Model #1 and Model #2. External electrical cables and cords, gas discharge lamps, plastics containing brominated flame retardants, components and parts containing toner and ink (including liquids, semi-liquids, and toner), and components and waste containing asbestos are all listed with a quantity of 0, indicating their absence or non-relevance for selective treatment in these devices. Components, parts, and materials containing refractory ceramic fibers or radioactive substances are also not present, each listed with a quantity of 0.
For maintenance and disassembly, specific tools are required. A Philips screwdriver is necessary, with a size of 2 indicated. A pry tool is also essential for various removal steps. The document suggests that additional tools might be needed, but these are not specified. The disassembly process begins with a series of basic steps designed to systematically remove components and materials requiring selective treatment. While the detailed steps are not fully enumerated in the provided text, the document includes graphical illustrations to guide the process, particularly for complex procedures.
The visual aids start with a "Controller front view," highlighting the battery assemblies on the left side. An arrow points to the battery latch, indicating how to initiate the removal of the batteries. The instruction "Remove Battery(s)" is provided, suggesting that this is one of the initial steps in the disassembly process. A crucial note is included, stating that "Printed Circuit Boards no longer require selective treatment. Can be disposed with the remainder of the assembly." This update simplifies the recycling process by reclassifying PCBs, allowing them to be handled with the general assembly rather than requiring separate selective treatment.
Further illustrations guide the user through the removal of other key components. A "Controller rear view" shows the power supply assemblies on the right. A purple power supply latch is indicated by an arrow, with the instruction "Remove Power Supplies." This step is vital for isolating the power components. A "Controller top view" illustrates the cover latch in a disengaged position, ready for removal. The instructions detail how to "Remove cover by lifting edge of cover slightly and pull away from mating cover section prior to lifting off of enclosure," ensuring proper access to the internal components.
Once the cover is removed, the internal layout becomes accessible. An image shows the interior, with an arrow pointing to "Capacitor (10 places)." The instruction "Remove using pry tool" is given, indicating that these capacitors are to be carefully extracted. Another image focuses on a different section of the internal components, again pointing to "Capacitor (6 places)" with the same instruction to "Remove using pry tool."
The disassembly of the power supply unit is also detailed. An image shows the power supply unit partially disassembled, with the instruction "Power Supply disassembly – remove 6 case screws and lift top cover." Inside the power supply, an arrow points to "Capacitor (2 places)," which are also to be "Remove using pry tool." This highlights the presence of multiple capacitors across different sub-assemblies that require specific removal.
Finally, the battery disassembly process is further elaborated with an image showing a battery assembly. The instructions state, "Battery disassembly – insert small flat blade screwdriver to remove catches (3 places), and lift top cover." This step provides access to the individual batteries. An arrow then points to "Battery (6 places)," with the instruction to "Lift assembly from case and remove from PCB using pry tool." This comprehensive guidance ensures that all relevant components, especially those requiring selective treatment, are identified and removed correctly, facilitating responsible end-of-life management of the HP Storage Enclosures. The emphasis on clear visual and textual instructions makes this document an invaluable resource for recycling and treatment facilities.
| Form Factor | Rack-mountable |
|---|---|
| Maximum Raw Capacity | 240 TB |
| Maximum Number of Drives | 240 |
| Connectivity | Fibre Channel |
| Model | EVA8000 |
| Drive Types Supported | Fibre Channel |
| Supported Devices Qty | 8 |
| RAID Levels Supported | RAID 0, RAID 1, RAID 5 |
| Host Connectivity | Fibre Channel |
| Host Bus Interface | Fibre Channel |
| Power Supply | Dual redundant power supplies |
| Cooling | Redundant |
| Cache Memory (Installed) | 8 GB |