Upgrading and Replacing PC Hardware
Installing a Drive in the Lower Expansion Bay
WARNING For your safety, disconnect the power cord and all external cables.
1 Switch off the PC, disconnect the power cord and remove the PC’s side panel and air flow guide (refer
to
“Removing and Replacing the Side Panel & Air Flow Guide” on page 12).
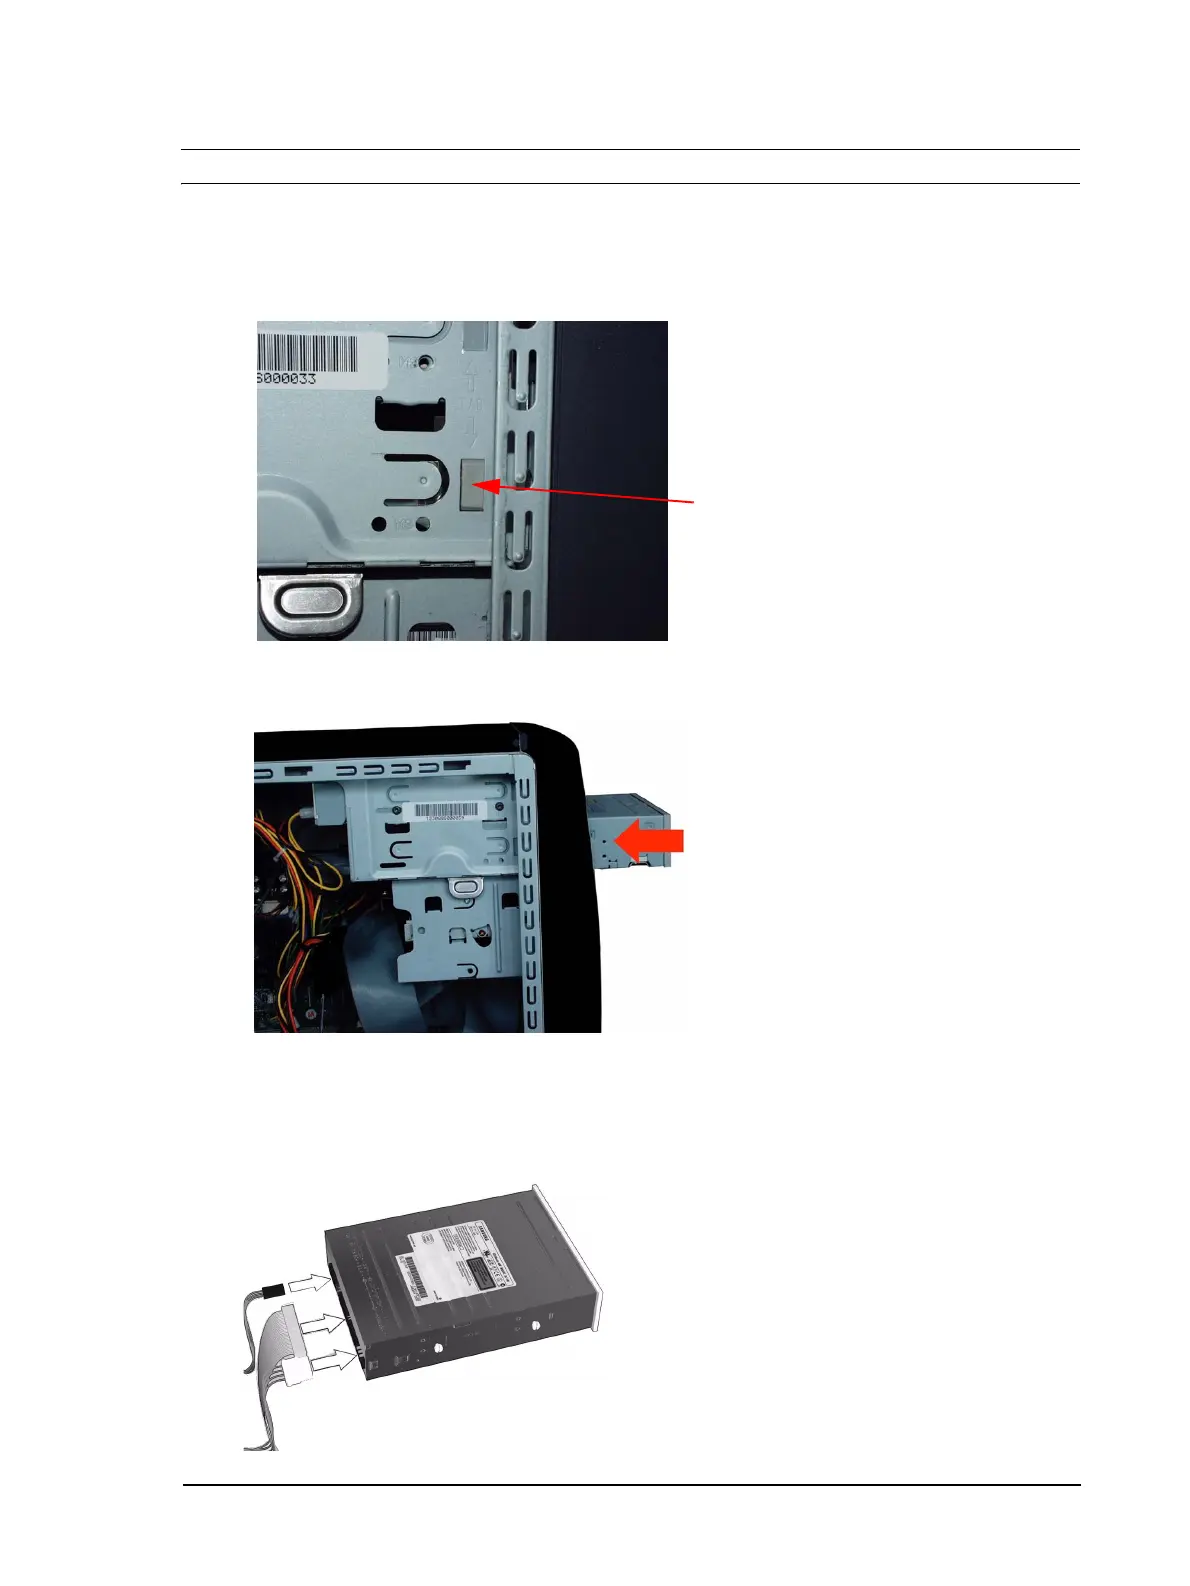
2 Remove the plastic masking plate from the front panel by prising the retaining tab open with a
screwdriver.
masking plate
retaining tab
3 Check that the jumpers on the rear of the new drive are set to CS (cable select) mode.
4 Slide the drive in from the front of the PC, aligning it with the drive in place in the shelf above.
5 Tighten the two screws that fasten the drive to the bay.
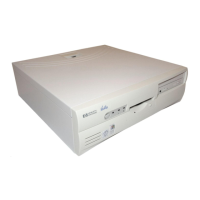
6 Connect the data and power cables, and for a DVD or CD-ROM drive, the audio cable.
• If this is the second device installed in the expansion bays, fit the data connector marked SLAVE.
• If this is the only device, fit the end CD connector marked MASTER.
24