HT7051 - HT7051N
EN - 18
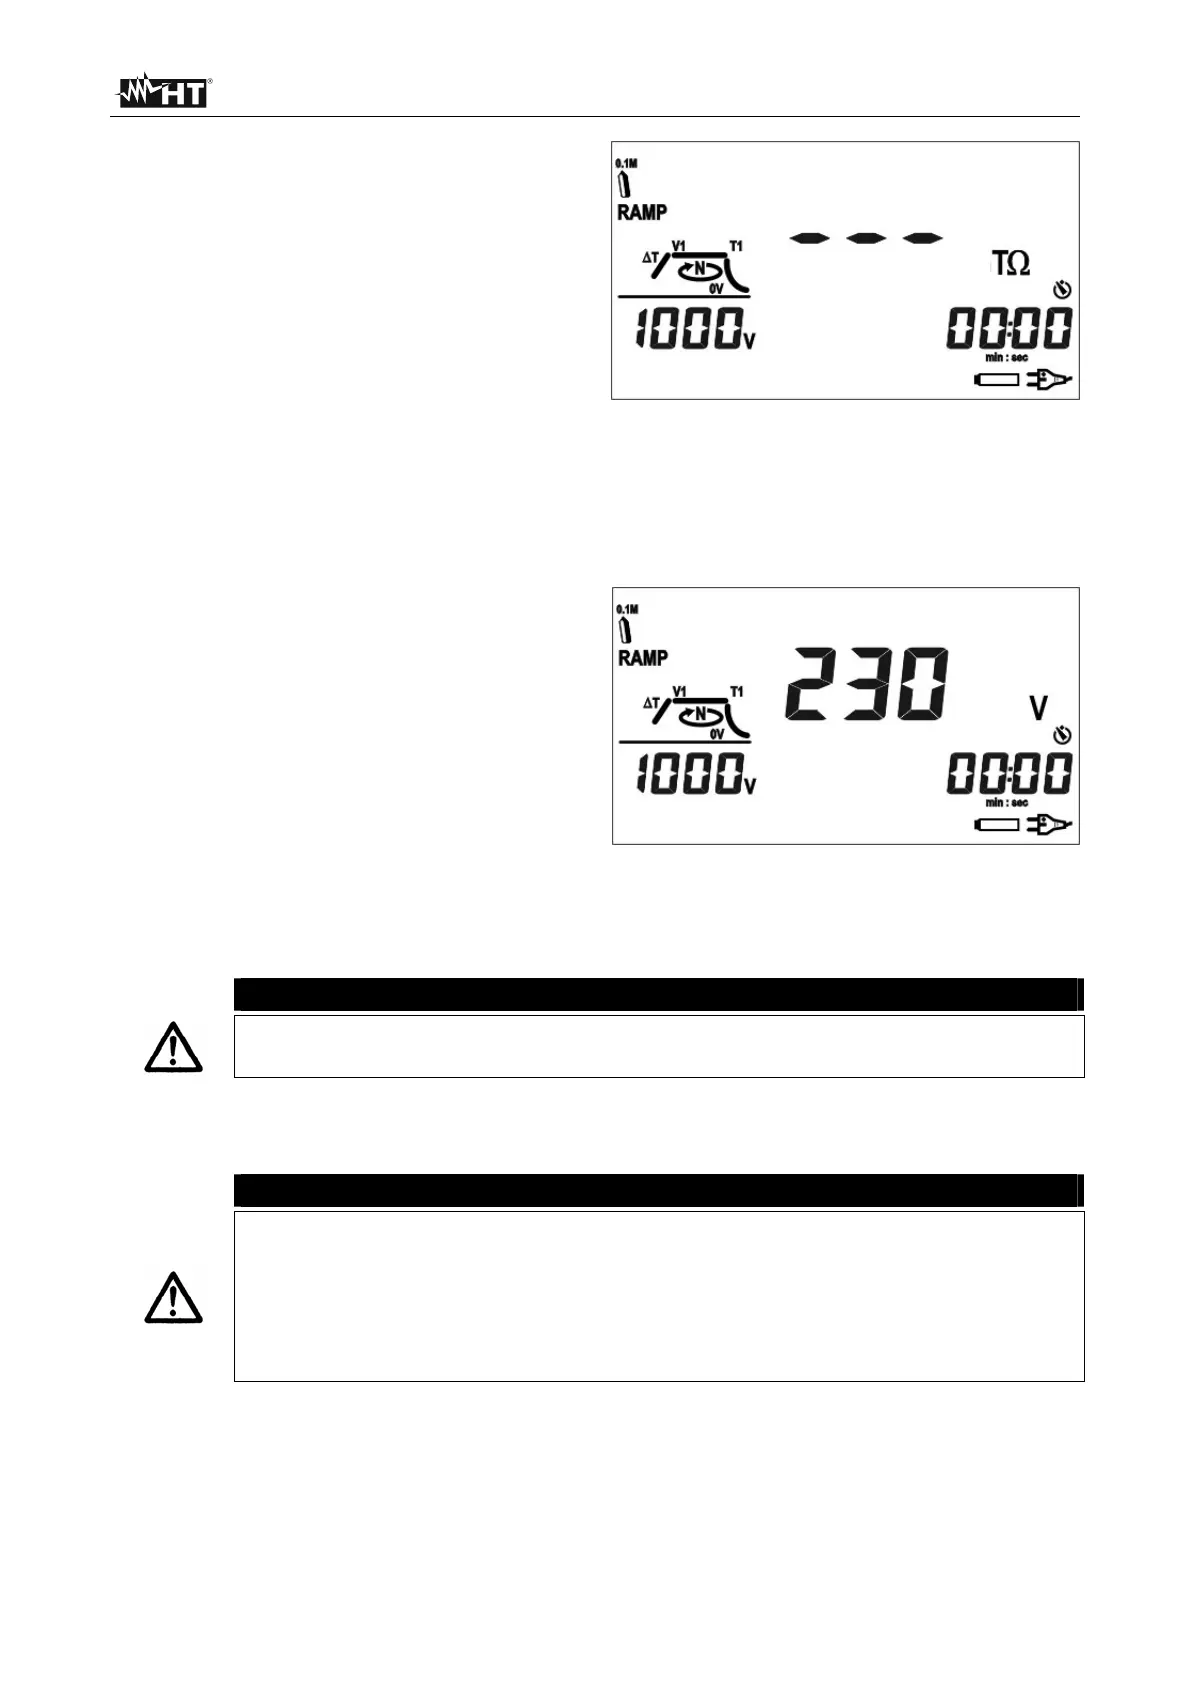
3. The display shows a screen similar to
that reported here to the side, which
contains:
The RAMP type selected
The bar graph set to zero
The indication "--- T"
The set test voltage
The value of the test time
The plug symbol (if the instrument is
supplied from the mains)
The battery symbol steadily
illuminated or flashing (if batteries
are flat or are being recharged)
The timer symbol if the duration of
the test has been preset.
4. By pressing the arrow keys, the
instrument shows a screen similar to
that reported here to the side, which
contains the value of the input voltage.
5. Insert the measuring leads into the relevant input leads of the instrument -Rx, +Rx
and GUARD, if necessary (see § 4.5 and Fig. 6)
CAUTION
Make sure that there is no voltage at the ends of the measuring points before
connecting them to the measuring leads.
6. Connect the alligator clips to the part of the system to be tested.
7. Press the START/STOP key to perform measurement.
CAUTION
The display shows the message "Measuring..." which indicates that the
instrument is performing the measurement. During this whole phase:
Do not disconnect the measuring leads of the instrument from the
conductor being tested; the conductor could remain live at a dangerous
voltage because of possible stray capacitances in the circuit tested
Never insert the power cord into the Europlug socket