JUPITER
IT - 26
1. Set the limit value of contact voltage (see § 4.2.10)
2. Select position RCD
3. Press key MODE/MXMNPK and select one of the following options:
Mode AUTO RCD T Measurement of the RCD’s tripping time in automatic
sequence with test currents In, 5xIn, ½In and polarity 0° and 180°. See Table 1
in § 7.1 to identify possible combinations
Mode RCD T ½In Measurement of manual tripping time with test current ½In
and polarity 0° and 180°. See Table 1 in § 7.1 to identify possible combinations
Mode RCD T In Measurement of manual tripping time with test current In and
polarity 0° and 180°
Mode RCD T 5xIn Measurement of manual tripping time with test current 5xIn
and polarity 0° and 180. See Table 1 in § 7.1 to identify possible combinations
Mode RCD Measurement of tripping current with increasing “ramp” method
and polarity 0° and 180° (only AC and A RCDs with 30mA).
4. Press key RCDIN/ to set the rated tripping time of the RCD among the options:
30mA, 100mA, 300mA. See table in § to identify possible combinations
5. Press and hold (>2s) key RCDIN/ to set the type of RCD among the options:
(type AC) and (type A). See table in § to identify possible combinations
6. In case the cable with Shuko plug is used, insert the red conductor into input terminal
V L and the green conductor into input terminal COM/E/N and connect the
instrument to the system to be tested (see Fig. 29). The presence of phase-to-earth
voltage is shown in the bargraph
7. In case measuring leads are used, insert the red conductor into input terminal V L
and the black conductor into input terminal COM/E/N and connect the instrument to the
system to be tested (see Fig. 30 or Fig. 31). The presence of phase-to-earth voltage is
shown in the bargraph
8. Press key GO/HOLD to activate the test with polarity 0°. Press again GO/HOLD key
with symbol flashes on the display to activate polarity 180°. The screens shown in
Fig. 19, Fig. 20 and Fig. 21 may appear on the display for a few seconds to signal
anomalous conditions in which the instrument does not carry out the test.
9. In case no anomalous conditions are present, the instrument carries out the test and
symbol flashes on the display. During and at the end of the test, the following
screens appear on the display:
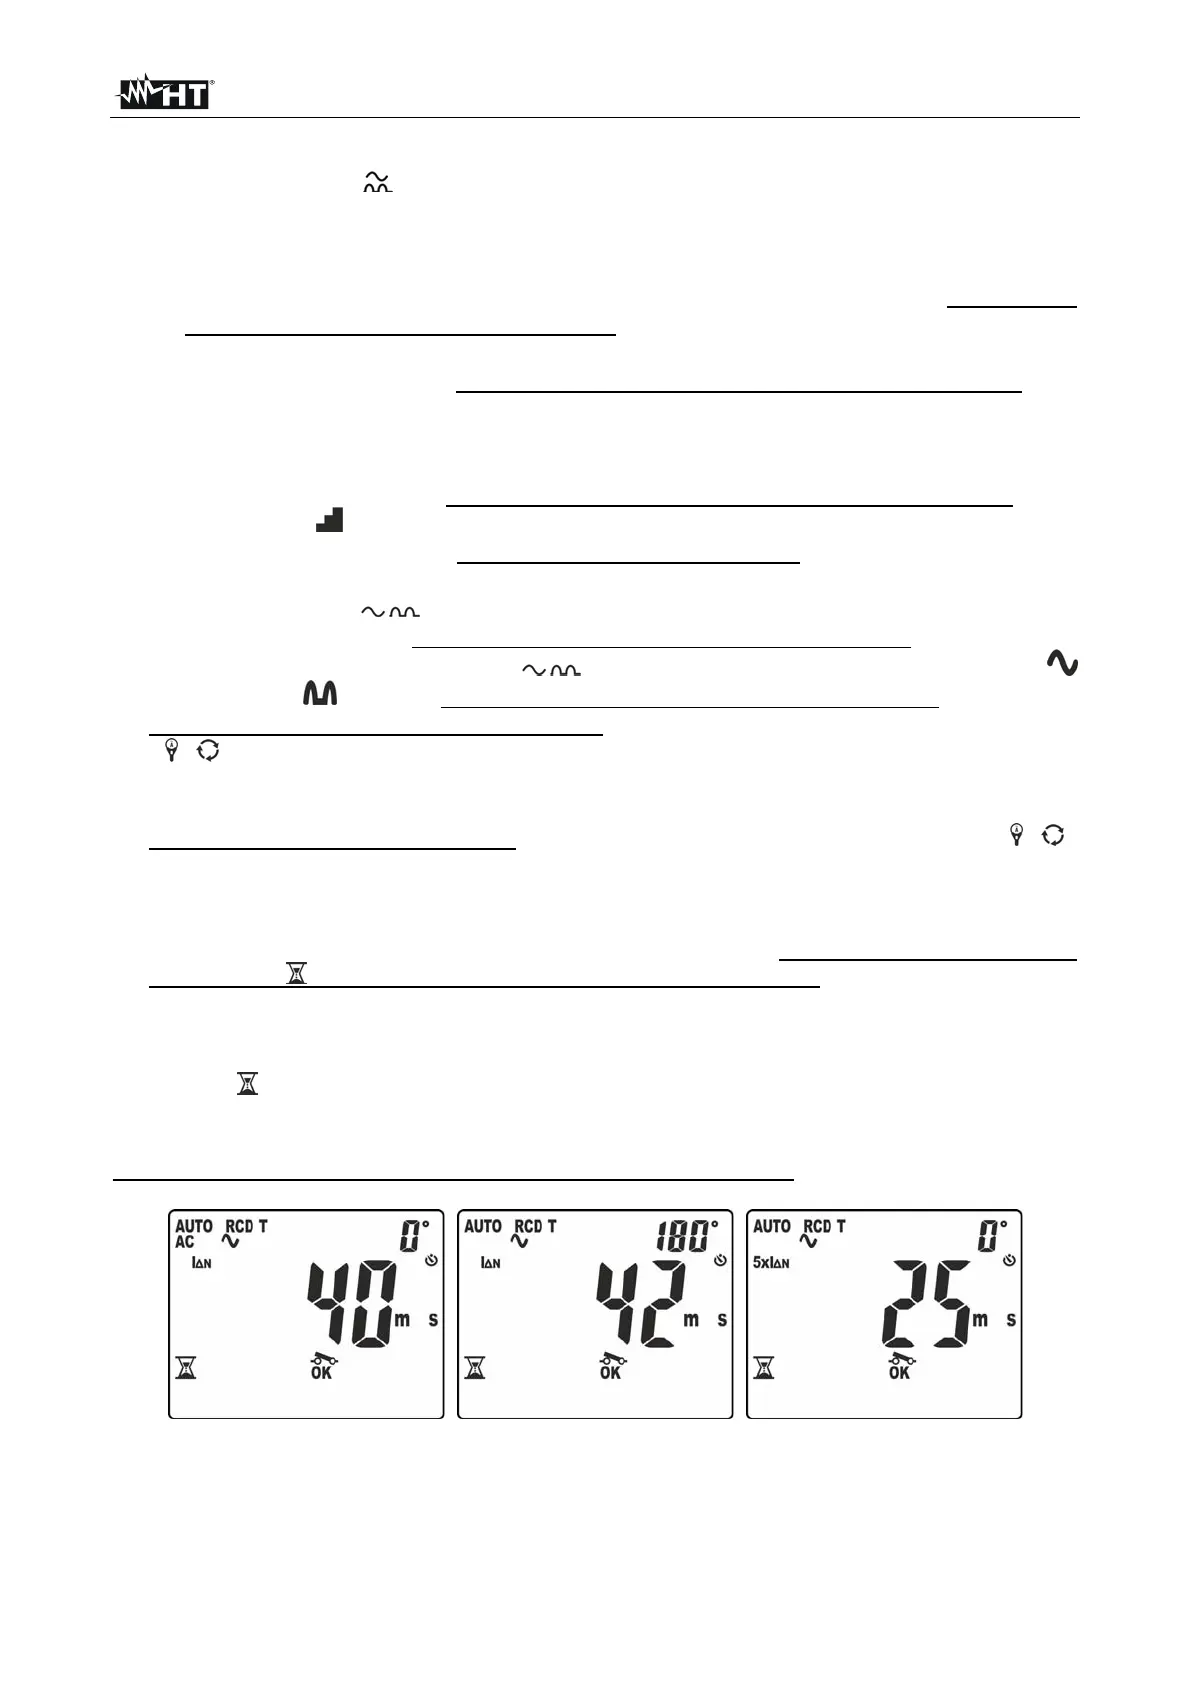
Tripping time in automatic mode (AUTO) (6 tests in a sequence)
Fig. 32: Tripping time in AUTO mode
– Screen 1