JUPITER
IT - 27
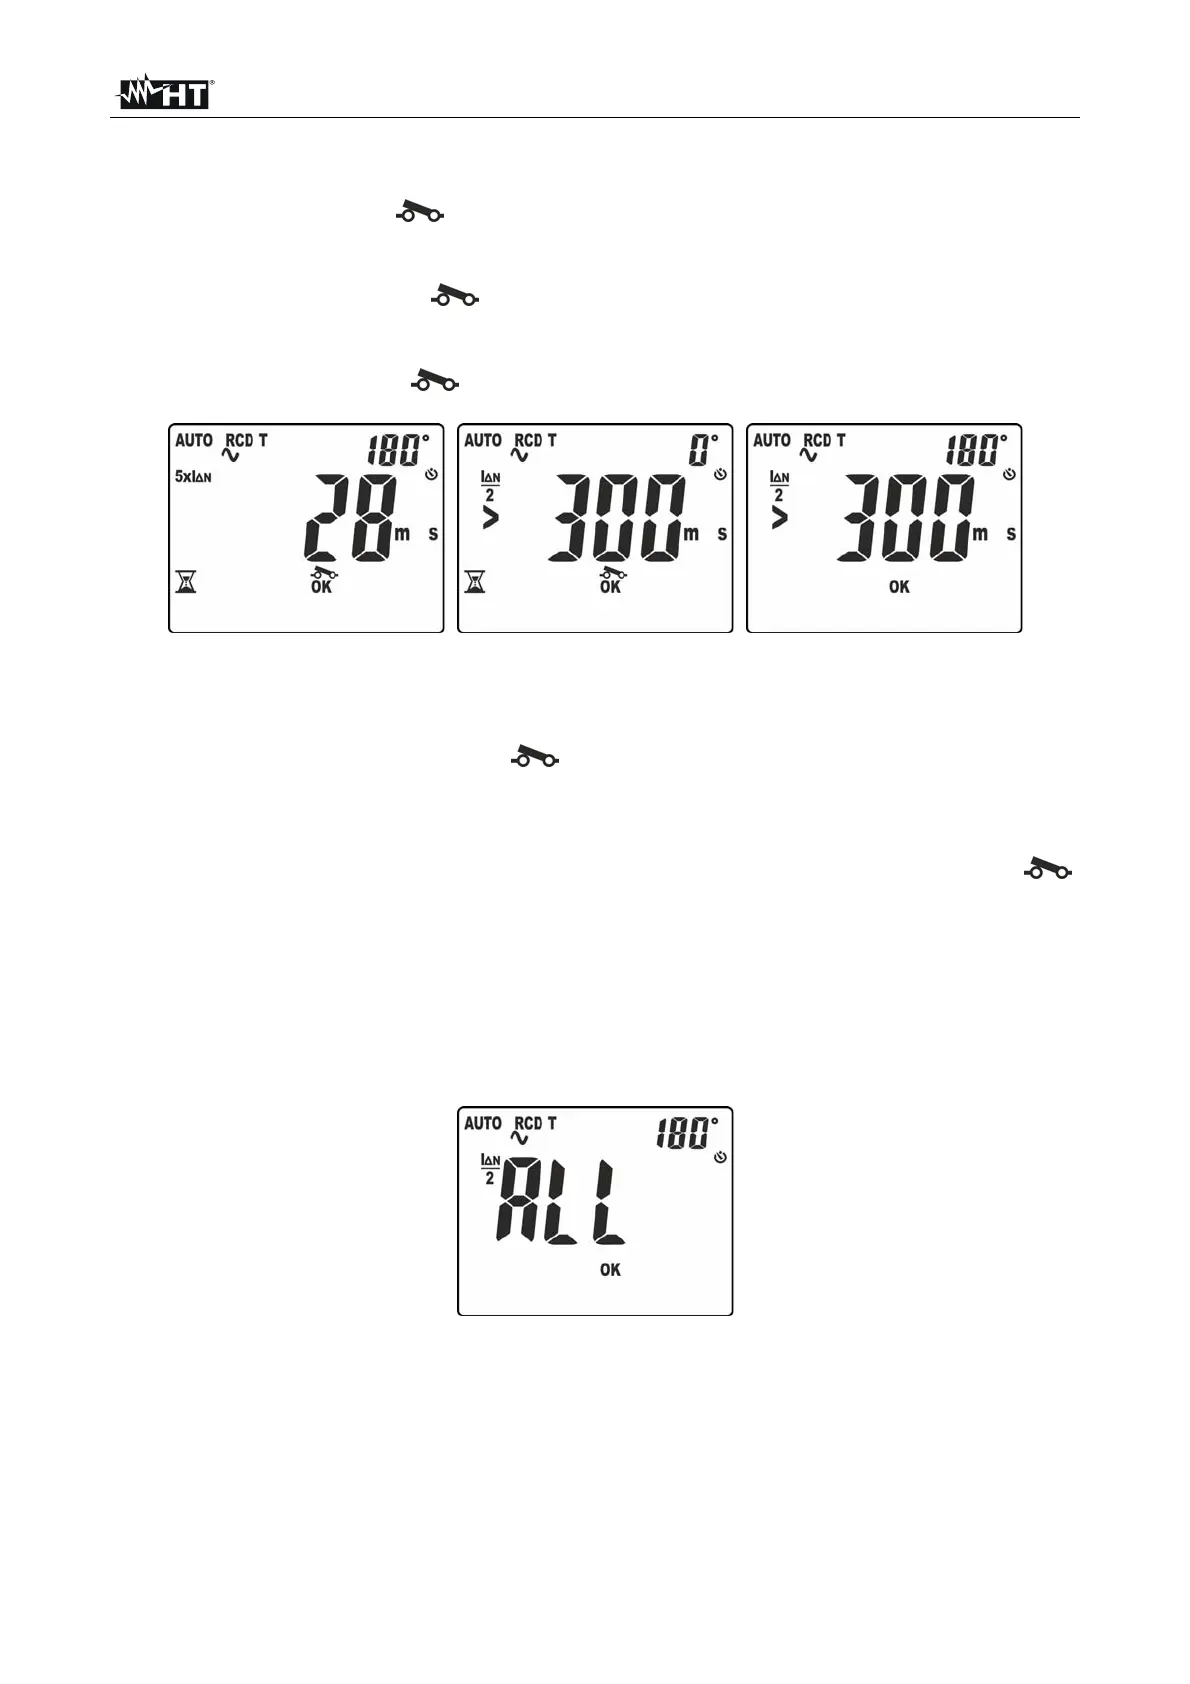
10. The first test carried out is the one with test current In and polarity 0°. The result of
partial measurement is shown on the display with indication “OK” or “NOT OK” (see Fig.
32 – left side). Symbol “ ” flashing indicates that the RCD must be reset.
11. The second test carried out is the one with test current In and polarity 180°. The result
of partial measurement is shown on the display with indication “OK” or “NOT OK” (see
Fig. 32 – middle). Symbol “ ” flashing indicates that the RCD must be reset.
12. The third test carried out is the one with test current 5xIn and polarity 0°. The result of
partial measurement is shown on the display with indication “OK” or “NOT OK” (see Fig.
32 – right side). Symbol “ ” flashing indicates that the RCD must be reset.
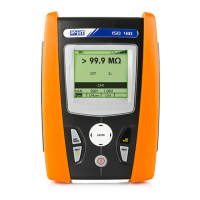
Fig. 33: Tripping time in AUTO mode – Screen 2
13. The fourth test carried out is the one with test current 5xIn and polarity 180°. The
result of partial measurement is shown on the display with indication “OK” or “NOT OK”
(see Fig. 33 – right side). Symbol “ ” flashing indicates that the RCD must be reset.
14. The fifth test carried out is the one with test current ½In and polarity 0°. The result of
partial measurement is shown on the display with indication “OK” or “NOT OK” (see Fig.
33 – middle). Message “>300ms” indicates that the full scale of the instrument has been
reached, to indicate that the RCD correctly did not trip in this situation. Symbol “ ”
flashing indicates that the RCD must be reset.
15. The sixth and last test carried out is the one with test current ½In and polarity 180°.
The result of partial measurement is shown on the display (see Fig. 33 – right side).
Message
“>300ms” indicates that the full scale of the instrument has been reached, to
indicate that the RCD correctly did not trip in this situation. Indication
“OK” or “NOT OK”
indicates in this case also the final result of the test
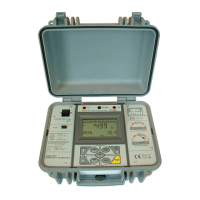
16. The “ALL OK” indication shows the final correct outcome of test
Fig. 34: Outcome final test screen